[ITP: Fabrication] Flashlight

Inspiration

This week’s assignment was to create a flashlight. A flashlight was defined as an object that (a) creates light and (b) is portable. Here’s a list of things that first came to mind when thinking about things that light up:

  • bioluminescent algae

  • lightning bugs

  • lite-brite

  • lightning

  • moon/cloud lamps

  • the stars (and glow-in-the-dark)

  • fire

  • angler fish

I really wanted to think outside of the box and get as far away from the traditional flashlight as possible. I have this memory of being with my family watching lightning bugs fly around in my childhood backyard. Natural objects (such as flowers) have always inspired my work and I’m intrigued by the contrast of the natural world and man-made things.

Drawings

My first thought was lightning bugs in a jar as a flashlight. I obviously couldn’t collect live bugs or algae to create my flashlight so I had to come up with a substitute. String lights could serve as my lightning bugs but putting lights in a jar seemed too easy. I really love looking at flowers and wanted to make something beautiful to potentially decorate my new NYC bedroom so I liked the imagery of lightning bugs landing on a flower bush.

Concept sketches

Materials

Pot, artificial flowers, glue sticks, scissors, floral foam, glue gun, string lights all collected from Michaels

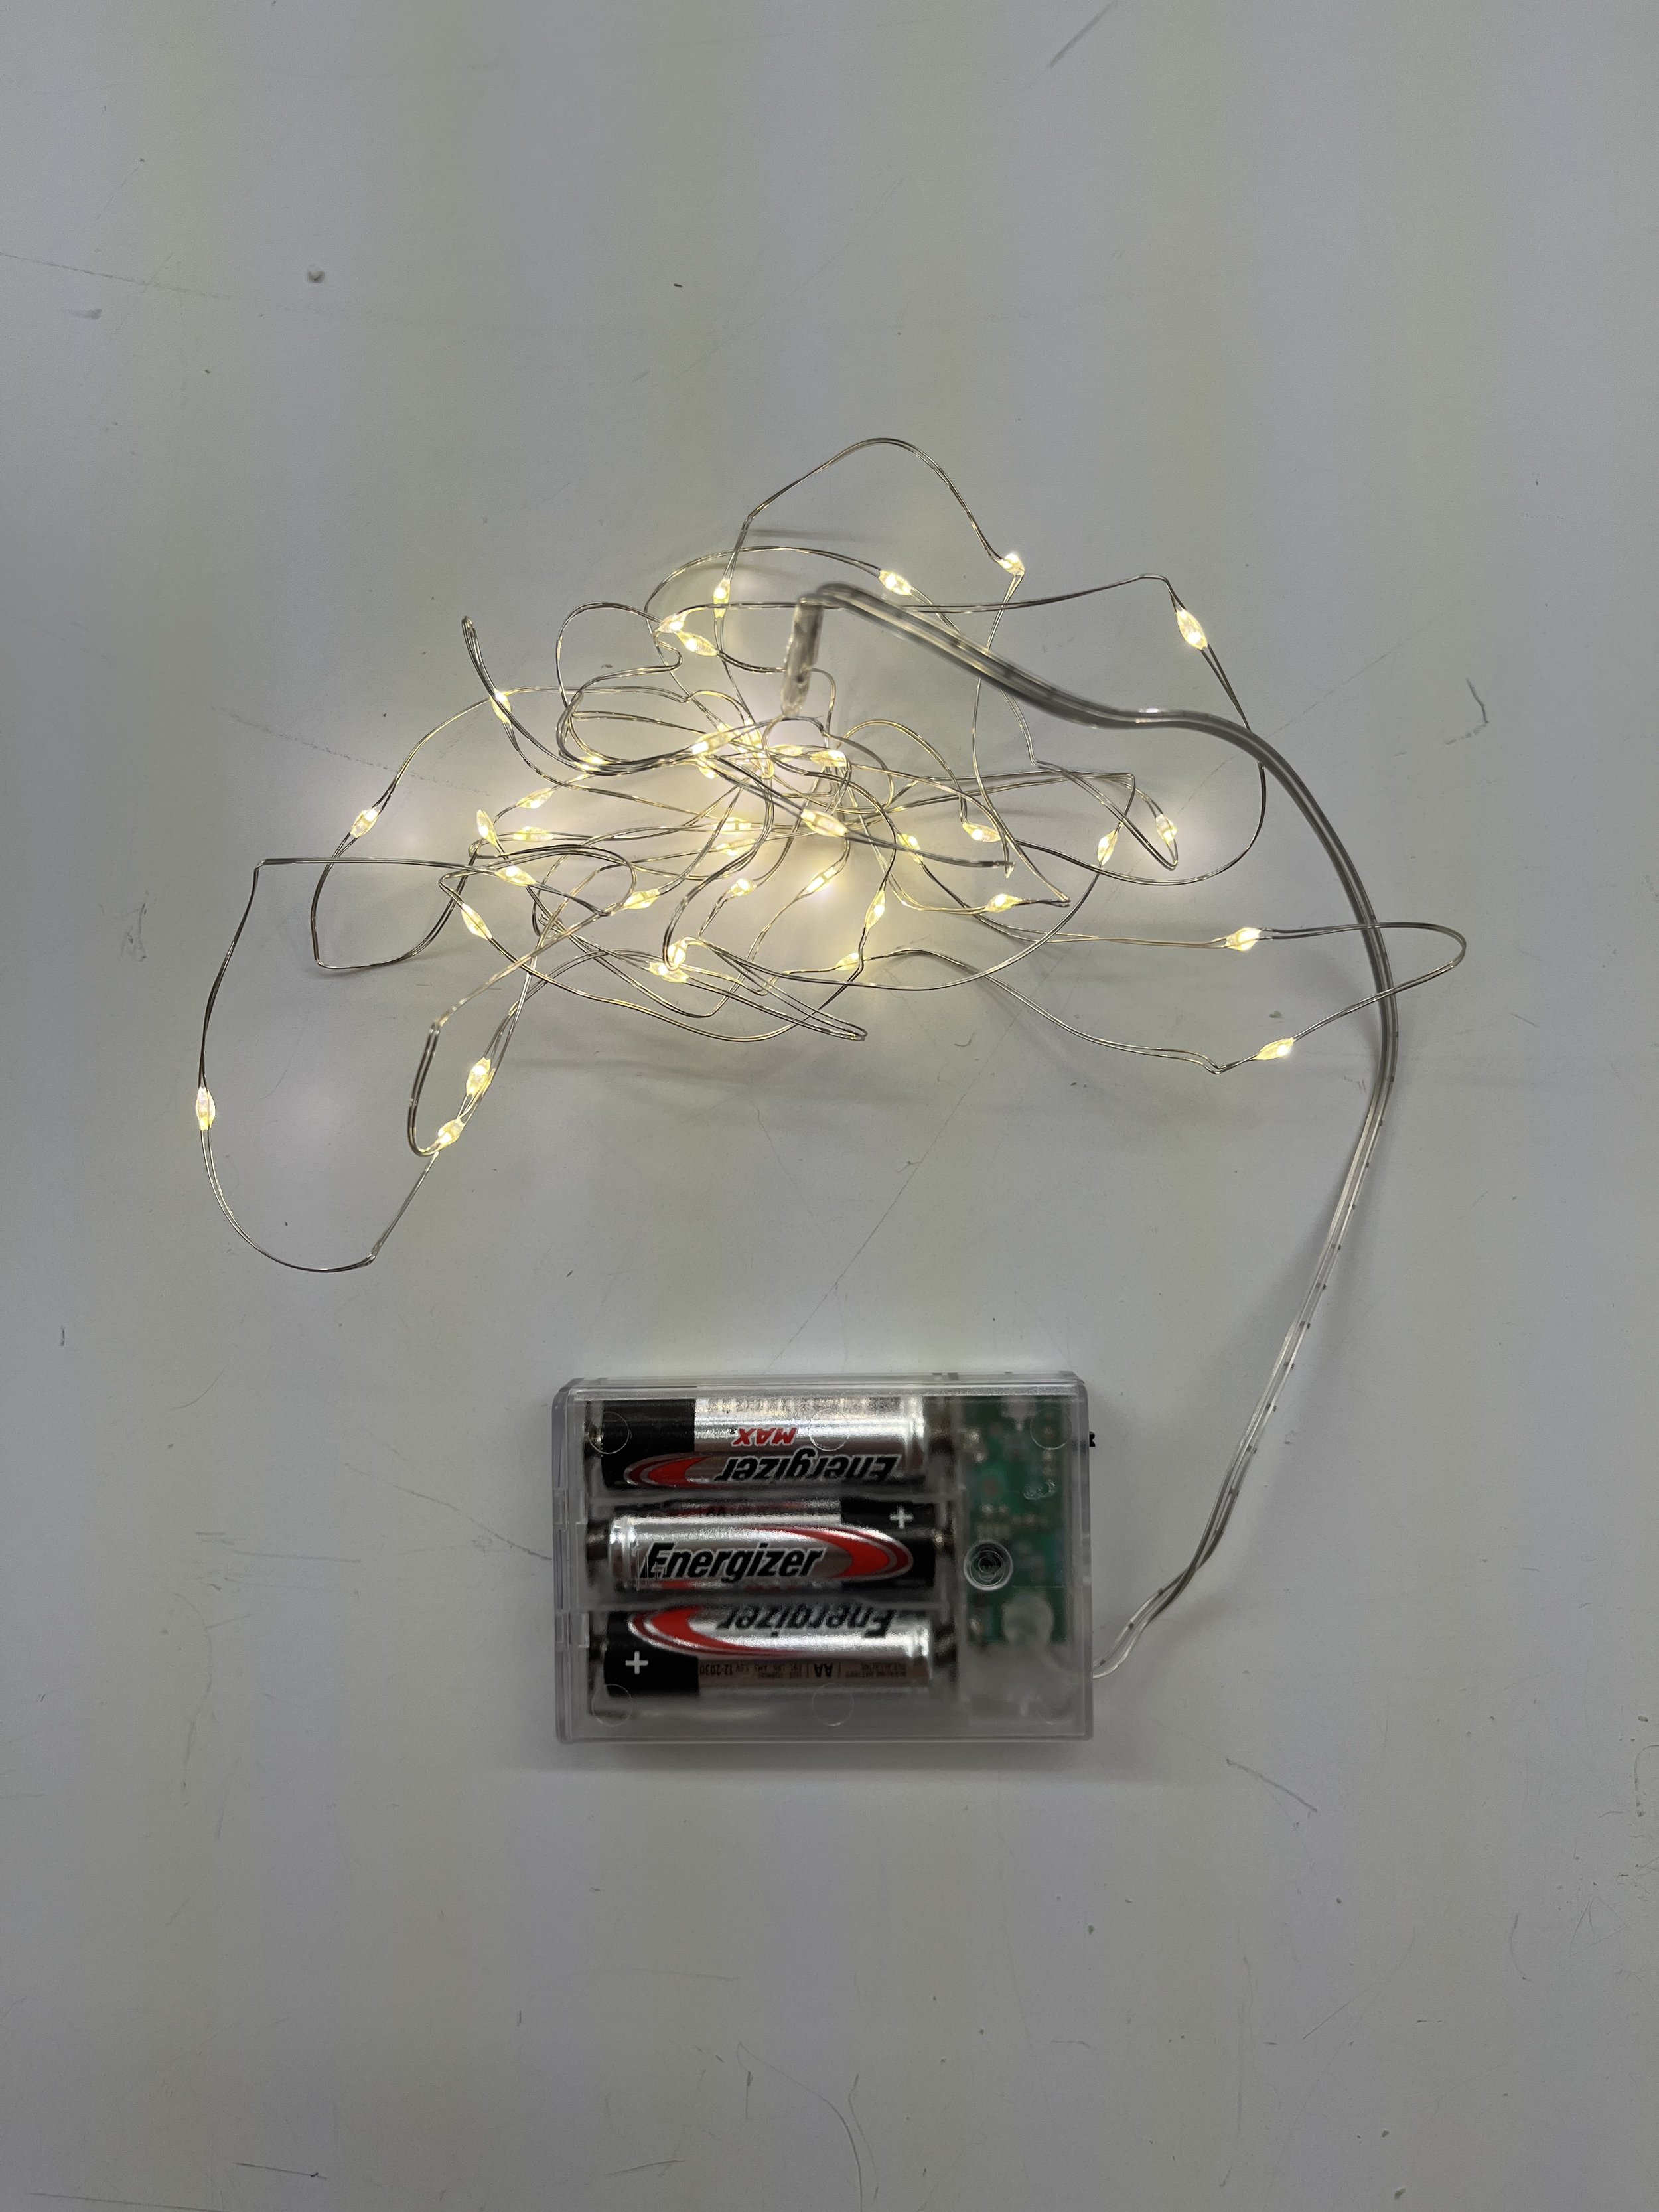
“Lightning bug” - battery powered string of lights

Tools

There weren’t too many tools needed for this build. I used a hot glue gun to keep the string lights in place. Originally I used scissors to trim down my flower stems. They didn’t quite get through the wire in the plastic stems but the wire cutters worked much better.

Process

My flashlight wasn’t a terribly complicated build. I first started with trimming down the flower stems. I have no experience arranging flowers, but I tried my best to get them into a pretty arrangement by poking them through the floral foam. A bit more stem trimming.

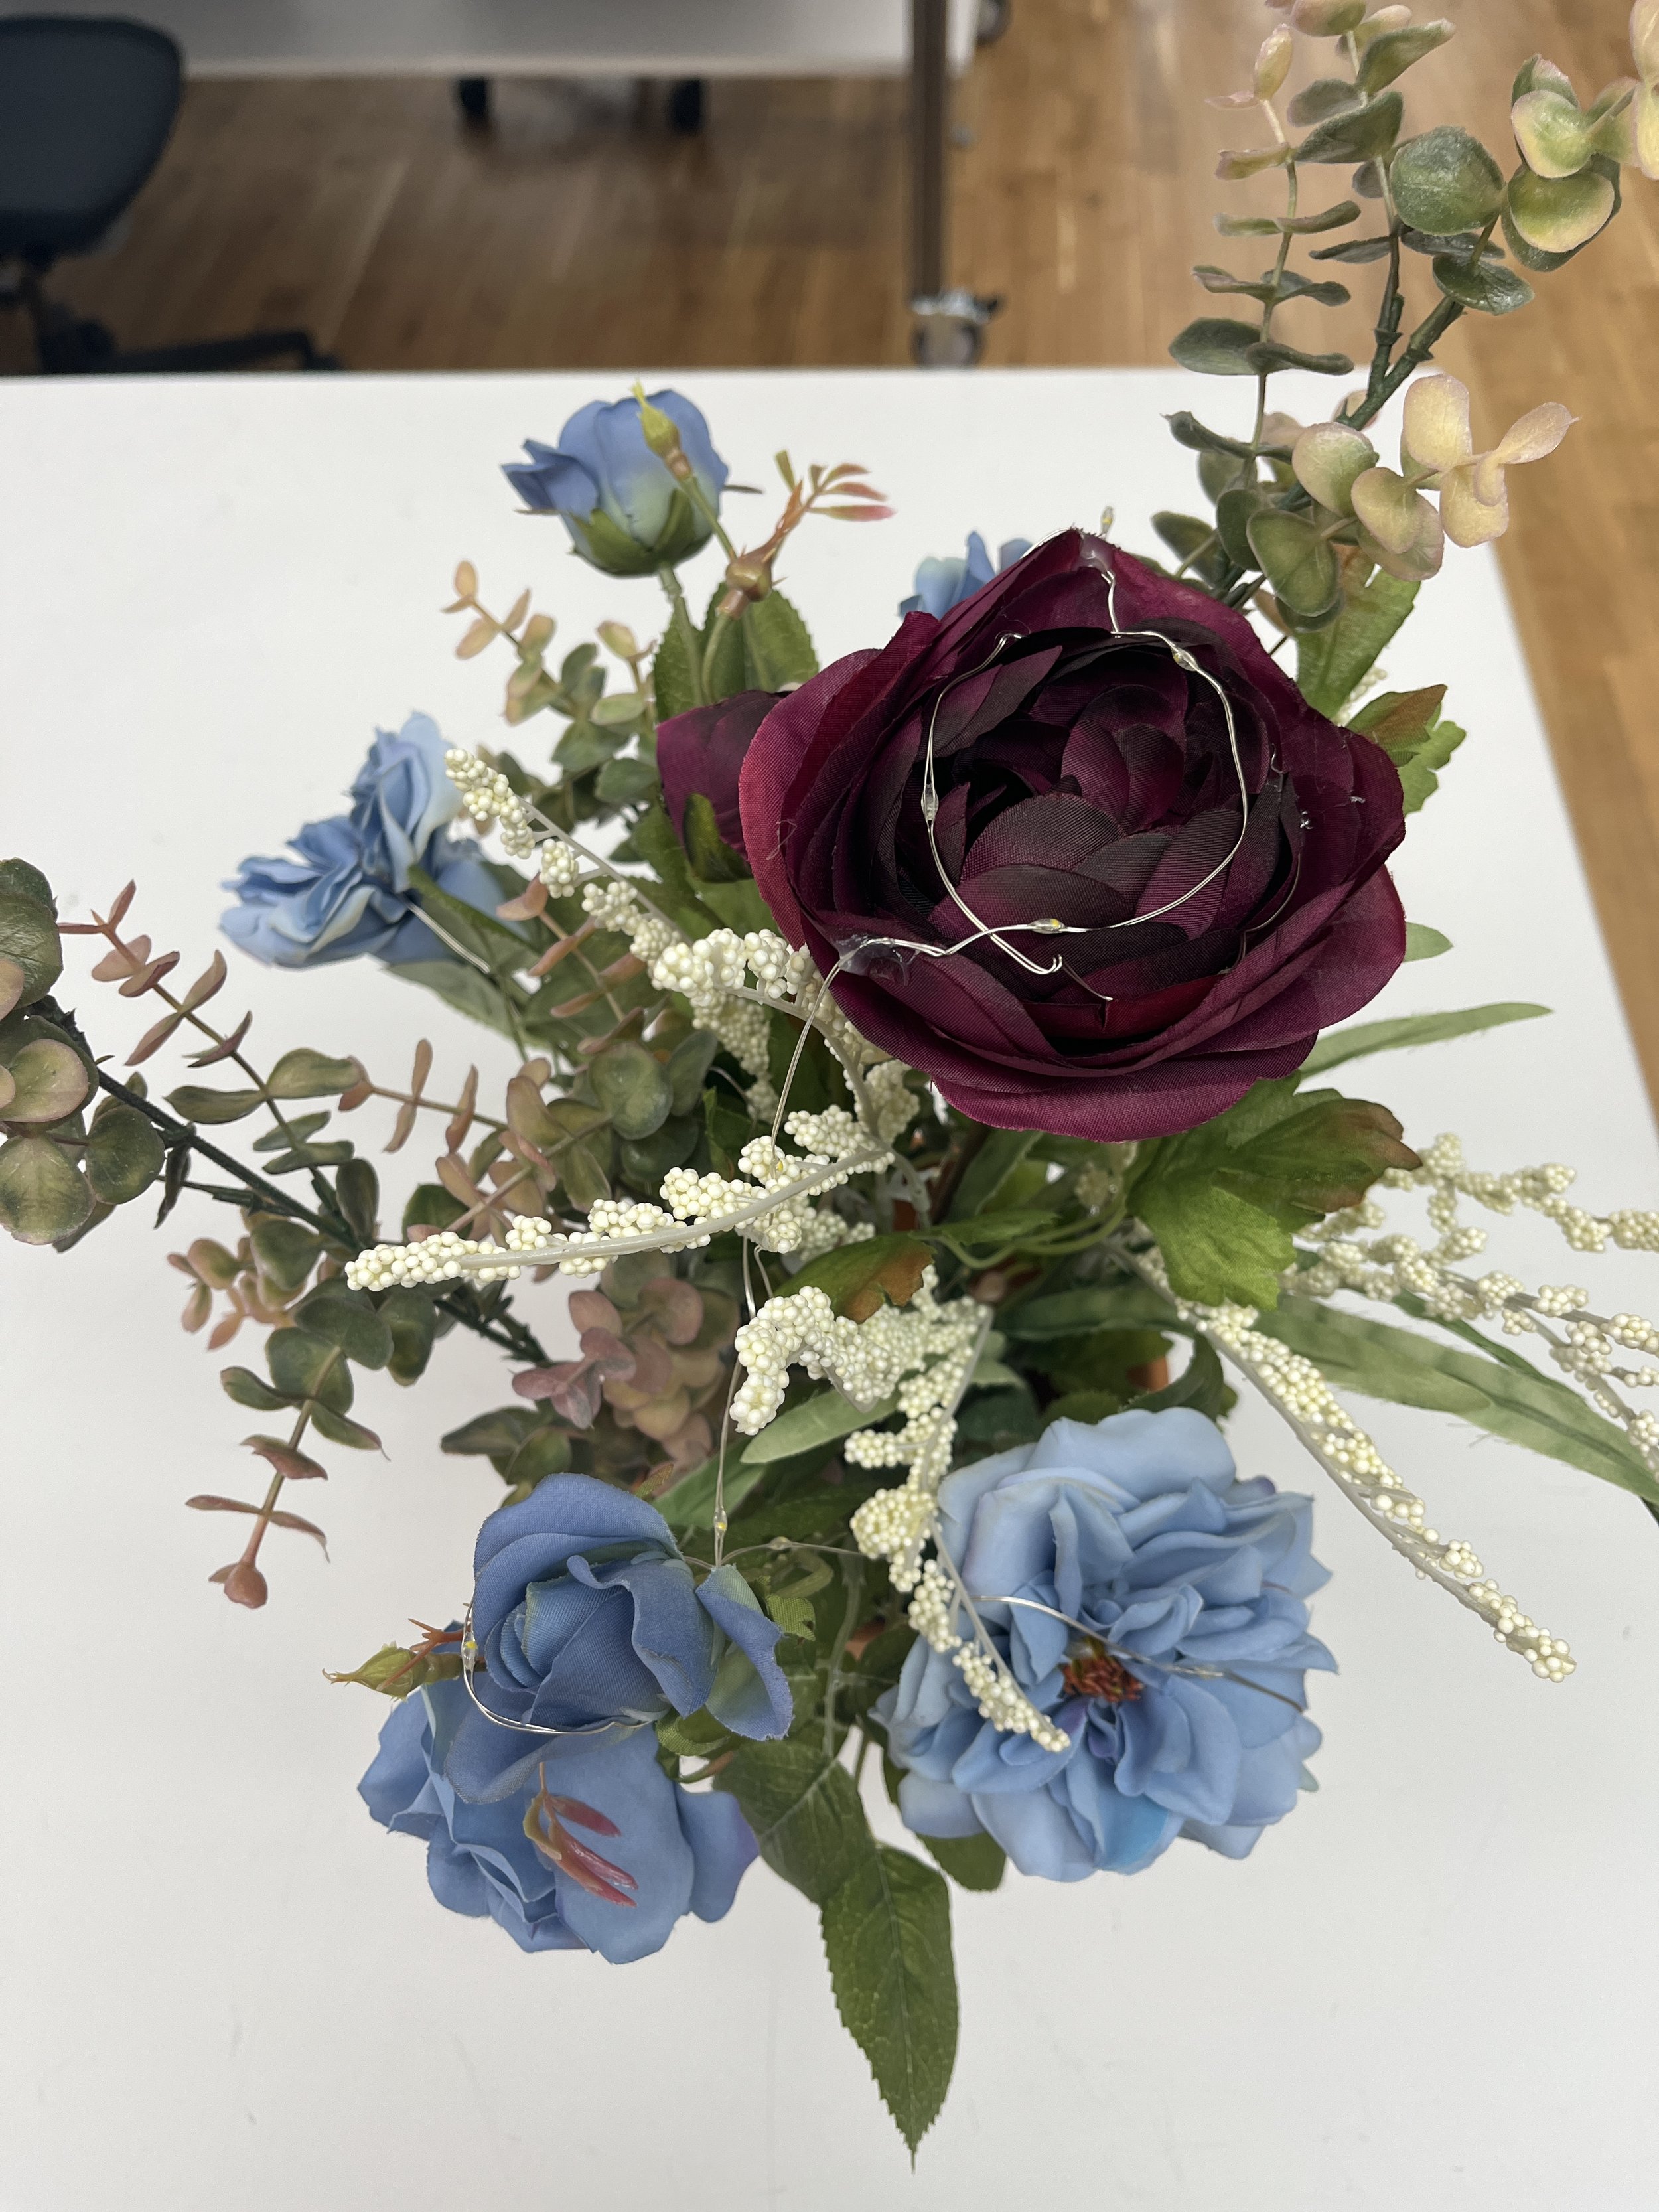
Next I installed my “lightning bugs”. I hid the battery pack in the flower pot and weaved the string of lights through the flowers. The string was wire itself, so I could bend it into place and glue down the lights where I wanted them. Lastly, I tried sprucing up my bouquet a bit more by bending the flowers and leaves into place.

Final Product

Conclusion

I do kind of feel like buying a string of lights for this assignment might be a bit of a cop out (especially with my electrical background) but I did not see the point of re-inventing the wheel to make my “lightning bugs”. I feel like this is a kind of fun, cheesy, whimsical, (un)natural solution to a flashlight. I would like to get some pictures of my flashlight illuminated in the dark at some point as well.

In the future, I could see myself expanding on this project. I could switch out the string of lights for and Arduino and some addressable LEDs. It could be fun to make my flash light interactive. Like, maybe the “lightning bugs” “fly” around or pulse. Or maybe they get scared and “hide” when someone gets too close. Maybe there’s a sound associated with them?

Makin Art: Kinetic Column

This article was featured on SparkFun’s site.

Summary

For my creative technology class final project, I wanted to build an idea I had living in my brain since the beginning of the pandemic. My background in electrical engineering and art has helped me venture into the field of kinetic sculpture and in this article I will describe how I designed and built the Kinetic Column.

Kinetic Column is my modern take on an iconic, historical relic. It's completely built out of neon acrylic sheets. The transparency and bright colors contrast the white stone columns we traditionally know. The top platform is meant to resemble the turning pedestals you would see in home shopping TV shows. An amphora vase cut and etched on iridescent acrylic serves as the topper.

Background

I’ve always been inspired by the intersection of art and engineering. I’ve had a couple of opportunities to help local artists bring movement to their sculptures. This kind of work in kinetics really sparked my interest and I created my first piece, Nature Mobile, last year. I used that project as an experiment with using the laser cutter and, what is now probably one of my most favorite mediums, neon acrylic.

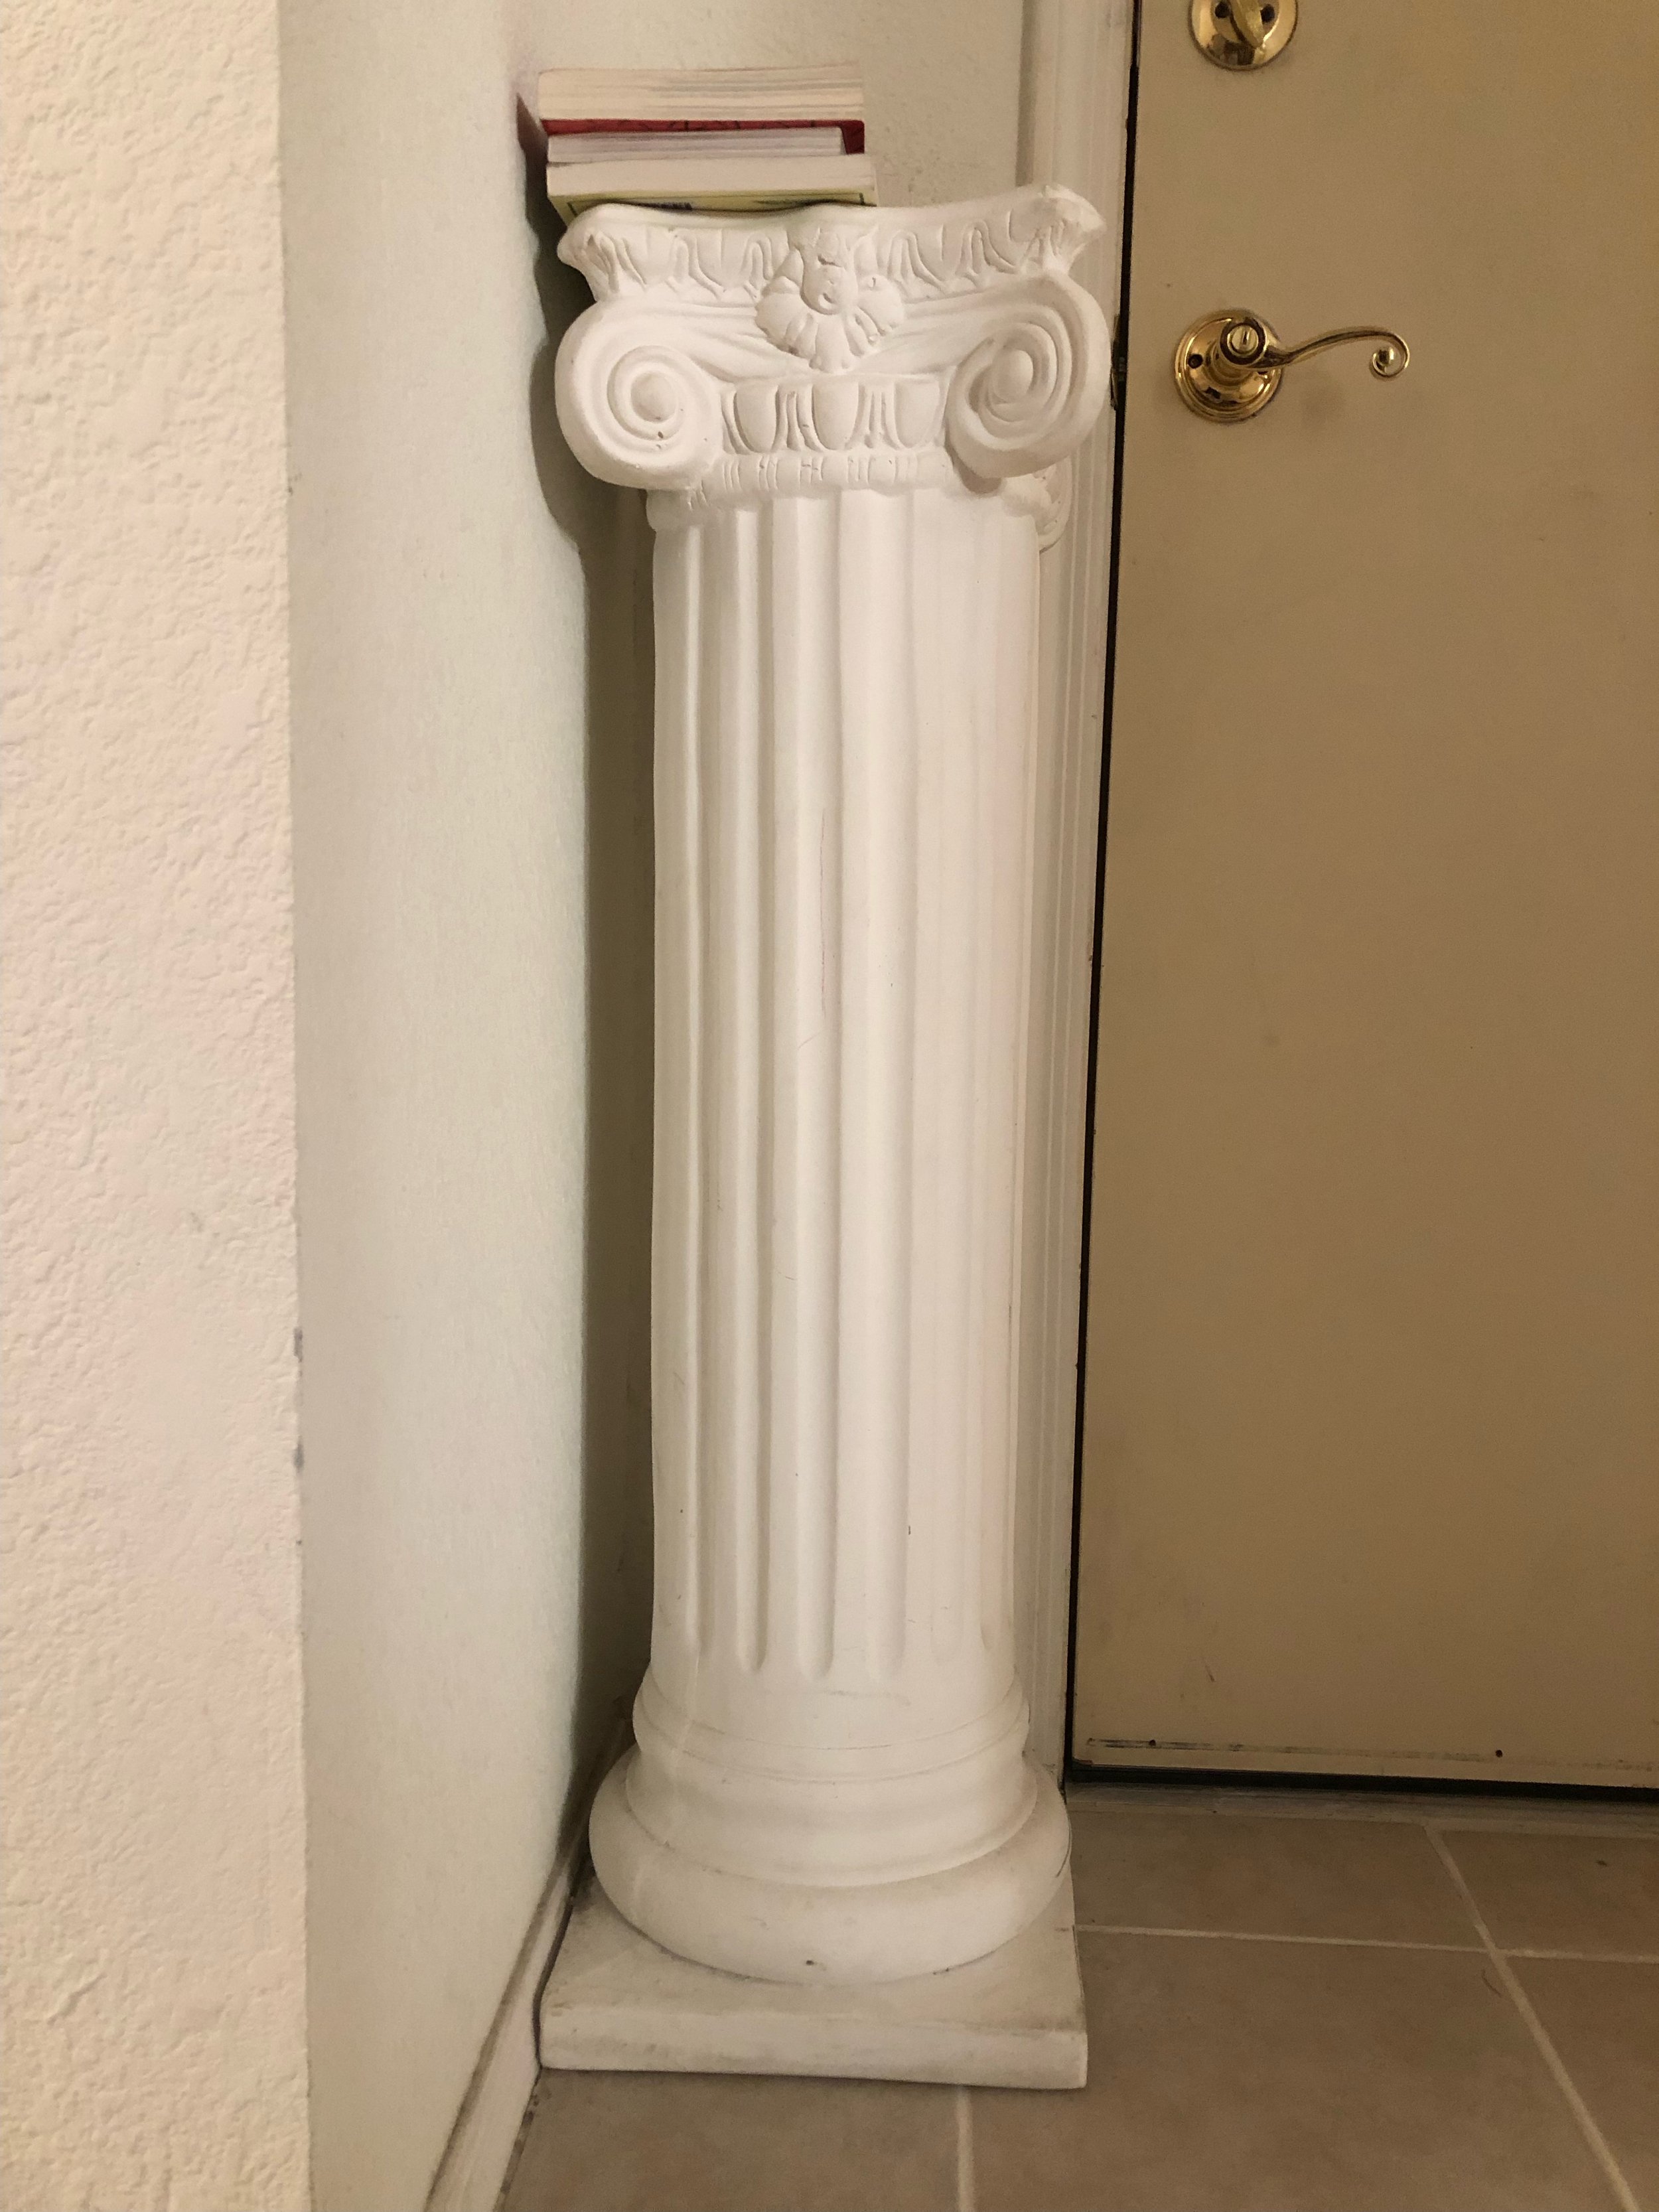
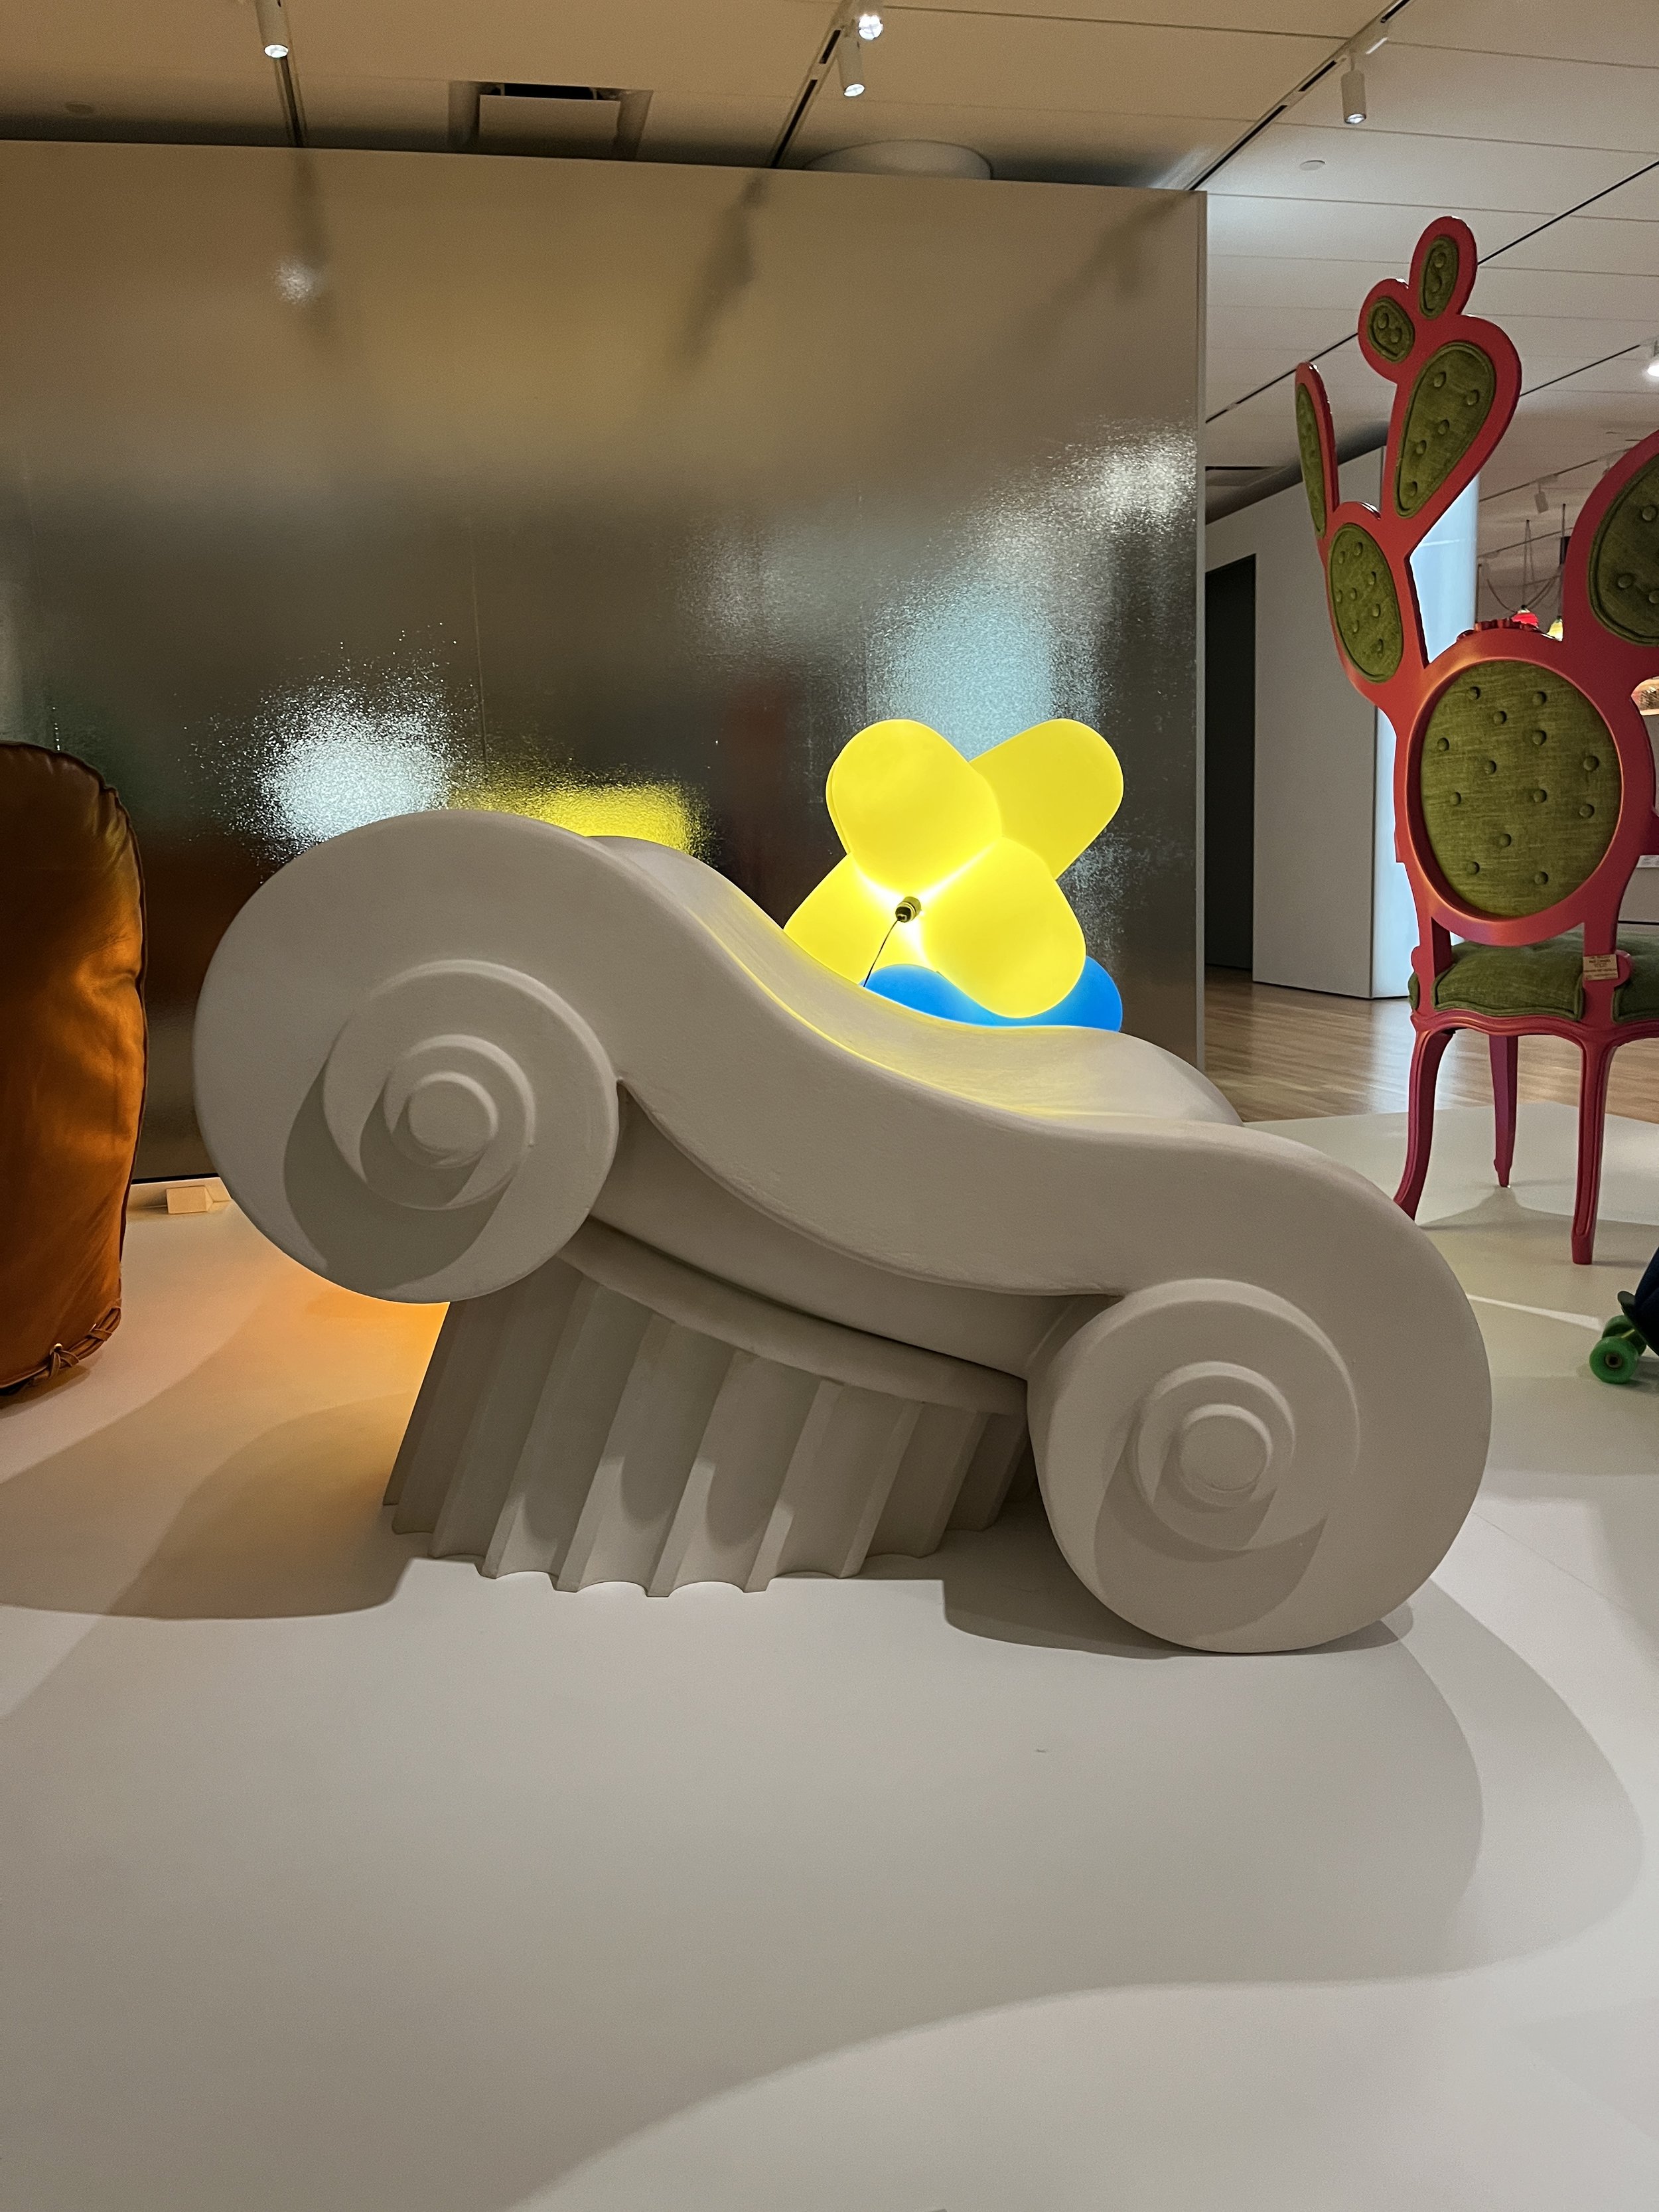
Column pedestal from childhood home

My original idea for this piece was a bit more complicated than what I ended up with (or so I thought). Originally, I wanted to contrast the classical with the modern, plaster with plastic, neutral with color. I was inspired by this weird column pedestal that’s lived in my parent’s home for as long as I can remember and never served any purpose.

At first, I wanted to cut a similar plaster pedestal in parts and replace the middle section with an acrylic mosaic cube. That cube would rotate around its center and embedded LEDs would essentially turn the middle section into a colorful disco ball. Again, an ulterior motive of creating this art piece was to learn some new skills, like laser etching, 3D printing, workshop skills, etc. The sketchbook excerpts below show the evolution of my idea. Some changes were based on feasibility, cost of material, and construction know-how. I finally landed on a rectangular pedestal design of all neon acrylic and a turning top-plate.

Ideation

Historical Context

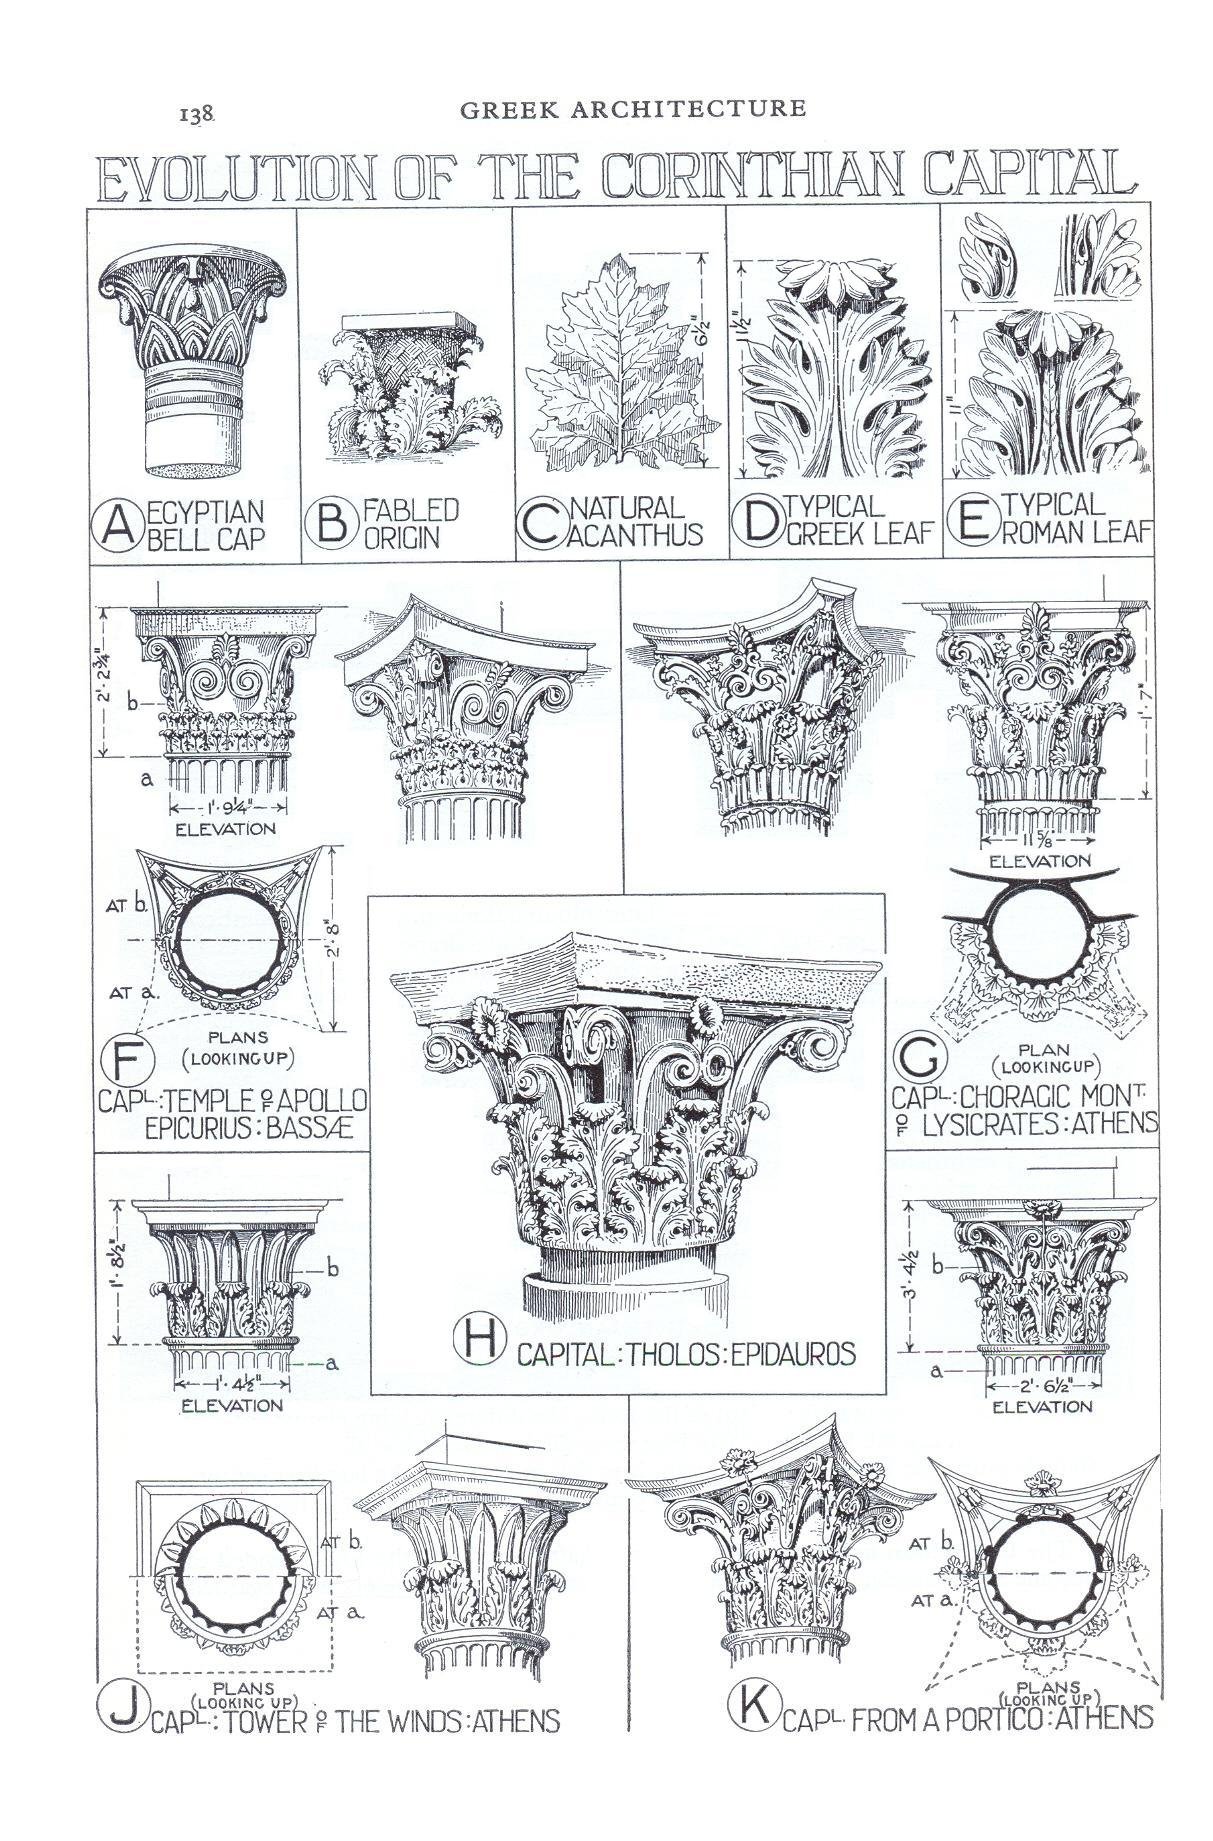
Architectural columns date way back to 2600 BC ancient Egypt. This structural element has had practical uses in architecture styles all over the world. Egyptian columns were carved to reflect the organic form of bundled reeds. Greek and Roman cultures most famously made use of columns in their structures. The Parthenon is an example of ancient Greek columns that are still standing today. Columns historically marked places of authority or importance.

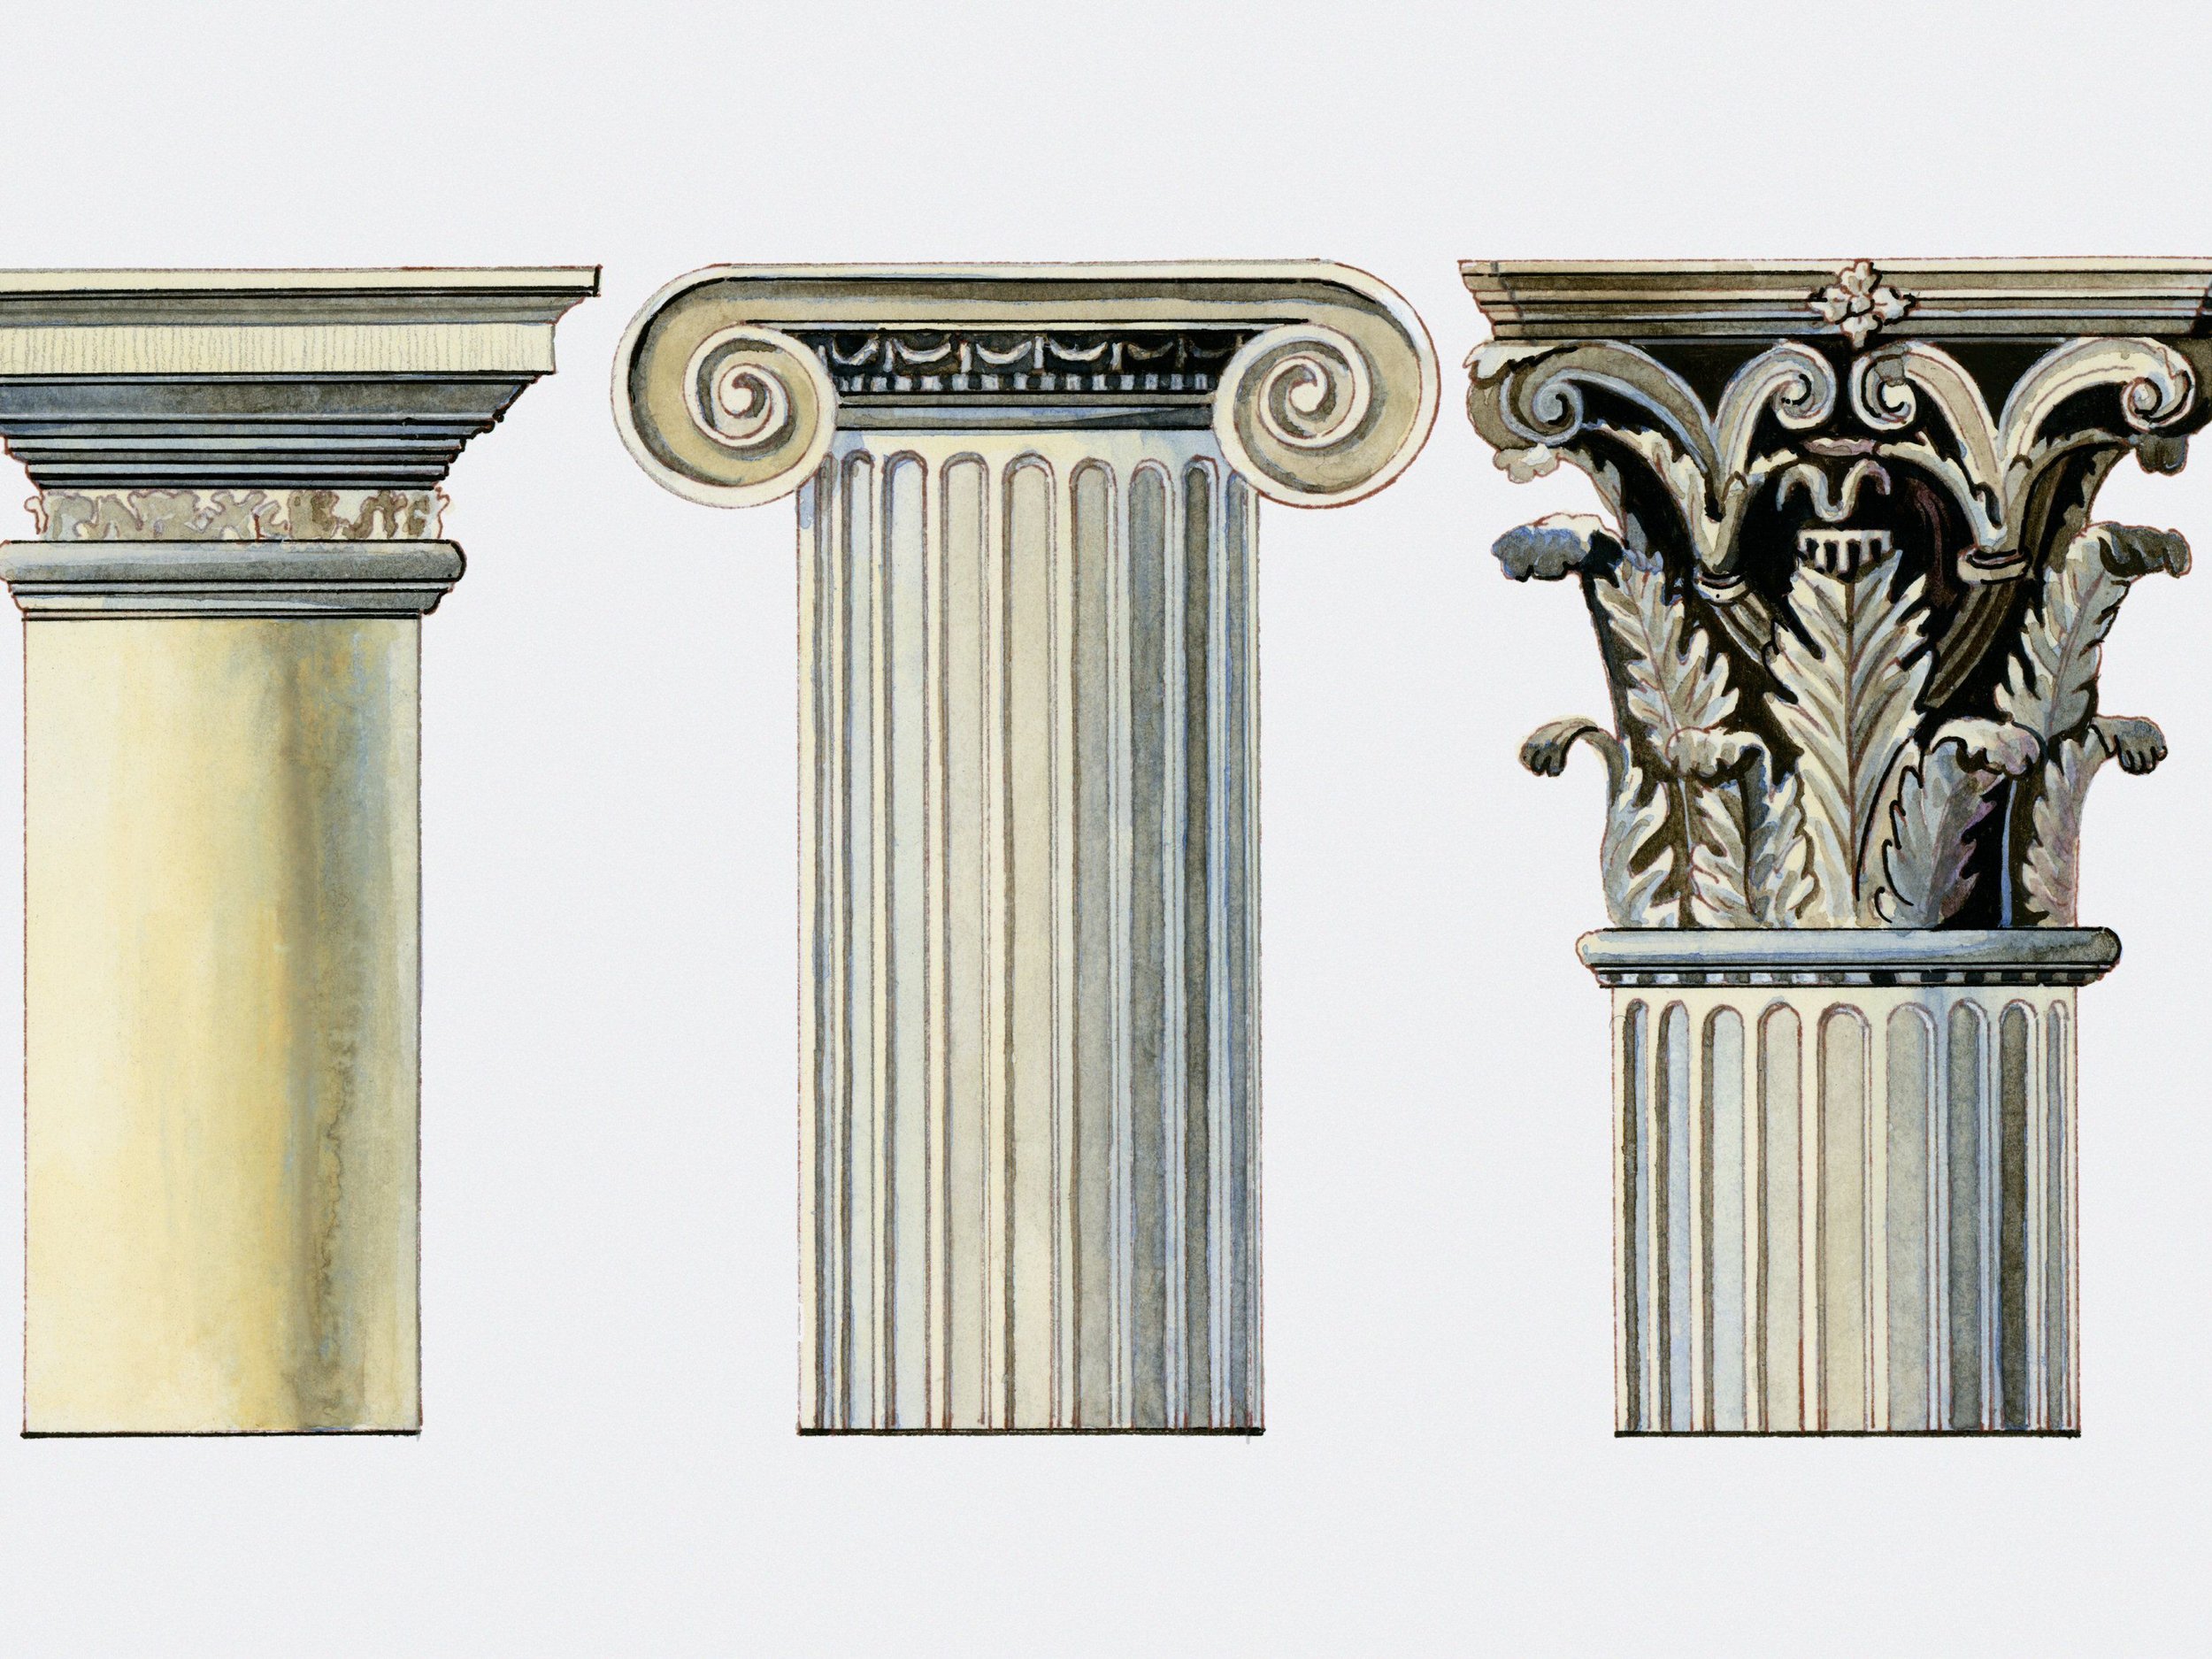
Generally columns are made of stone, however older iterations could feature a tree trunk as support. They have a standard anatomy of a base, shaft, capital, and sometimes fluting. The design of a column’s capital defined the different orders of classical architecture. The Doric order is the oldest and simplest and is customarily a plain column that’s wider at the bottom than the top. Next is the Ionic order which is characterized by its volutes or scrolls. The most intricate order is Corinthian which is identifiable by the acanthus leaves growing around the votive basket and is considered the feminine order.

Materials

I wanted to build this column out of neon acrylic because of its special luminescent properties. This material lights up all on its own, especially at its edges. When natural light passes through a piece of colored acrylic, the shadows it casts takes on the color of the plastic and makes for a really interesting effect. I bought all my acrylic sheets, including the clear rod for wires and the iridescent sheet, online from Delvie’s plastics. To save some time at the laser cutter, I’d recommended getting what you can cut to size from your supplier.

These are the materials needed for sculpture construction:

  • Weld-on 3 or 4 with needle point applicator bottle

  • Respirator

  • Gloves

  • Sand paper

  • Tape

  • Isopropyl alcohol

  • Microfiber cloths

  • Clamps of various sizes

  • 1-2-3 blocks for squaring off corners

  • Heat gun

  • 7-inch lazy susan

These are the materials needed for the electrical system:

Build Process

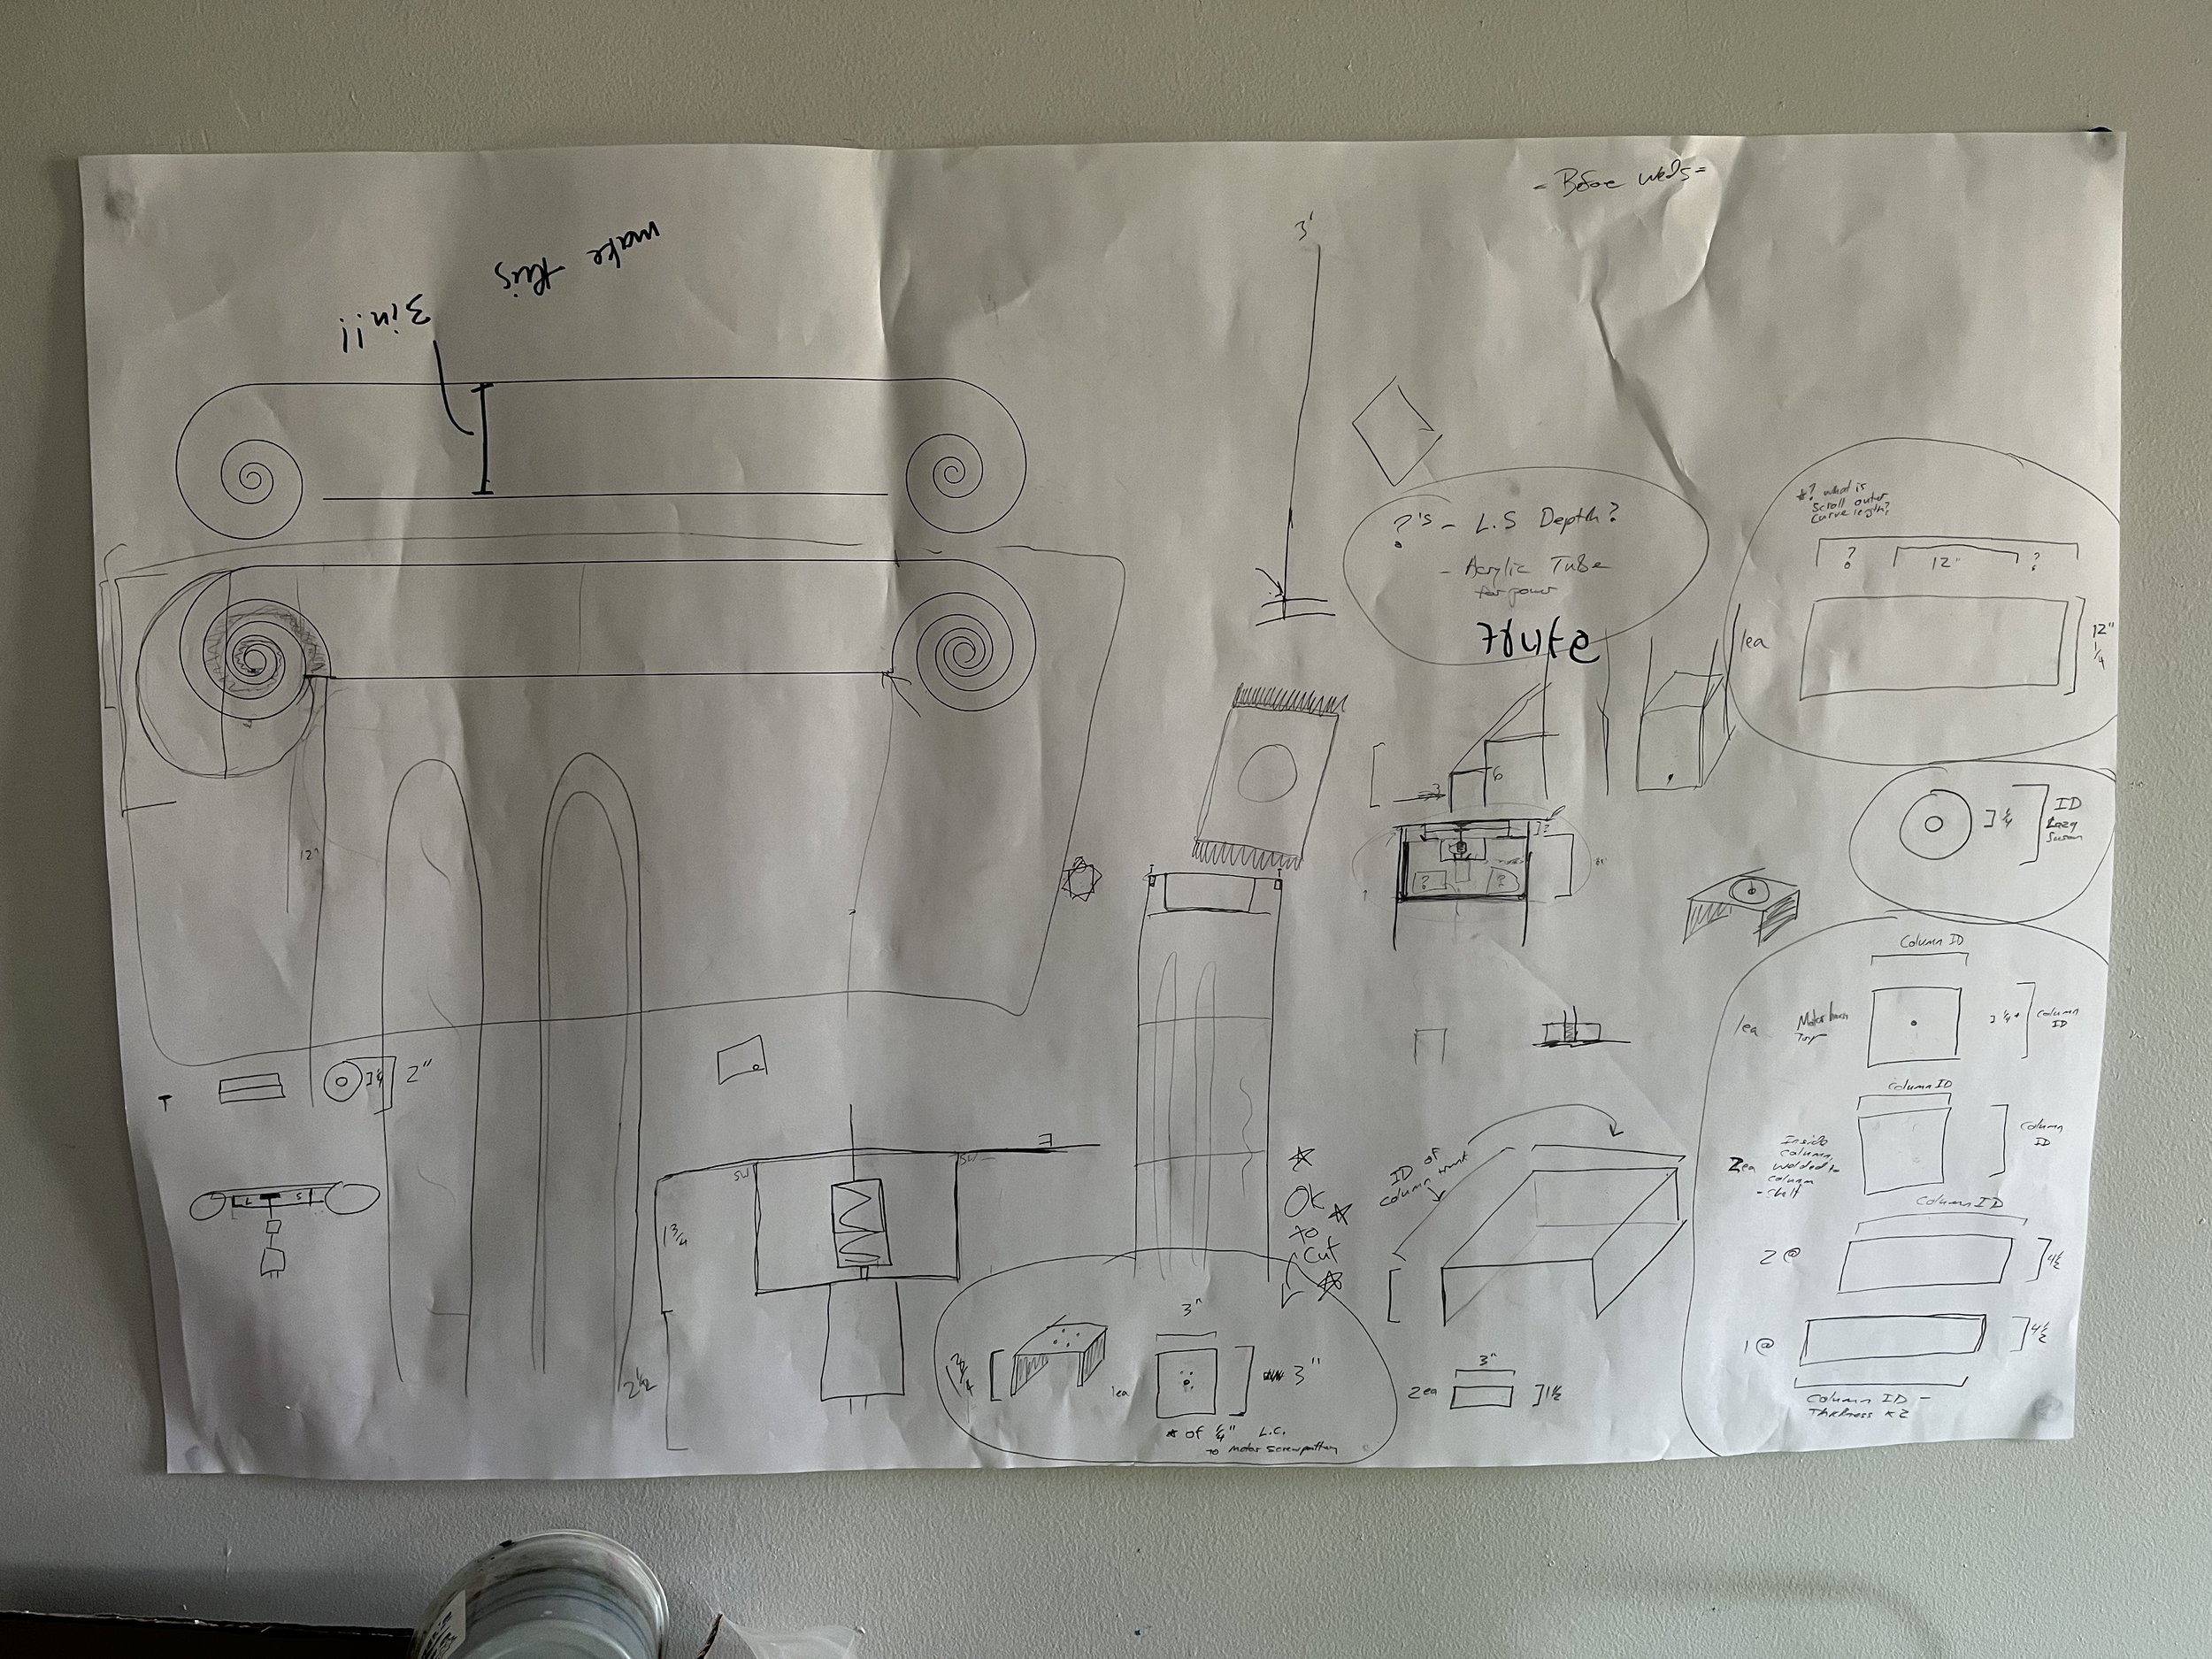
Since this is a laser cutter heavy project before I could get to building I had to get my laser cuts drawn up in Adobe Illustrator. Even though most of the column parts are just rectangles, I really had a hard time visualizing how all the pieces fit together in 3D, hence all the scribbled calculations and drawings done old-school by pen on paper. In hindsight, I should have drawn up a model on the computer right at the beginning, but I don’t really know how to do that. I basically lived by the “measure 10 times, cut once” philosophy to make sure my laser cuts came out right. Some of my favorite laser cut files are pictured below but all my files live on this github repo.

Dimensioning

Laser cutter file

Laser cutter file

Because I had no scale rendering of what my column would look like put together, I made a scale model prototype. This was constructed out of scrap cardboard and wood. It was at this point I realized that the proportion of the size of the top platform to the bottom “foot” was way off so I decided to double up on the “feet”.

Turning mechanism prototype

Scale prototype

With acrylic in hand, I was eager to build. But first, the cut pieces needed to be prepared by finishing the edges with some sandpaper and cleaning with isopropyl and a microfiber cloth. Pro-tip: wear gloves when handling unwrapped acrylic to avoid too many neon fingerprints.

After all the acrylic was cut and prepped, it was time to get started with assembly. This was pretty much a four-hand job, so my friend and mentor Trey Duvall helped me with the construction. The order of assembly is depicted in the images below. Essentially we first welded on the ornamental pieces that go on the outside, the scroll swirls and blue flutes. Then built the trunk of the column including the interior supports and the tube. And then the two box feet were constructed as well as the scrolls welded onto the top plate. 1-2-3 blocks, clamps, and what we called “human clamps” (hands) were really instrumental in making the joints. This material is especially luminescent at the edges, it is important that the acrylic comes together at a nice seam. Also, due to the see-through properties of this type of acrylic, to-scale paper templates also came in handy to position or mark acrylic.

To join two pieces of acrylic together, the main method is using Weld-on which is a solvent that literally fuses together the plastic at a joint. It can be a pretty finicky material, especially if you’re working with stuff that is clear. Air bubbles and even wiped up drips are guaranteed to show up on your acrylic surface so it’s really important to practice your hand with the applicator bottle.

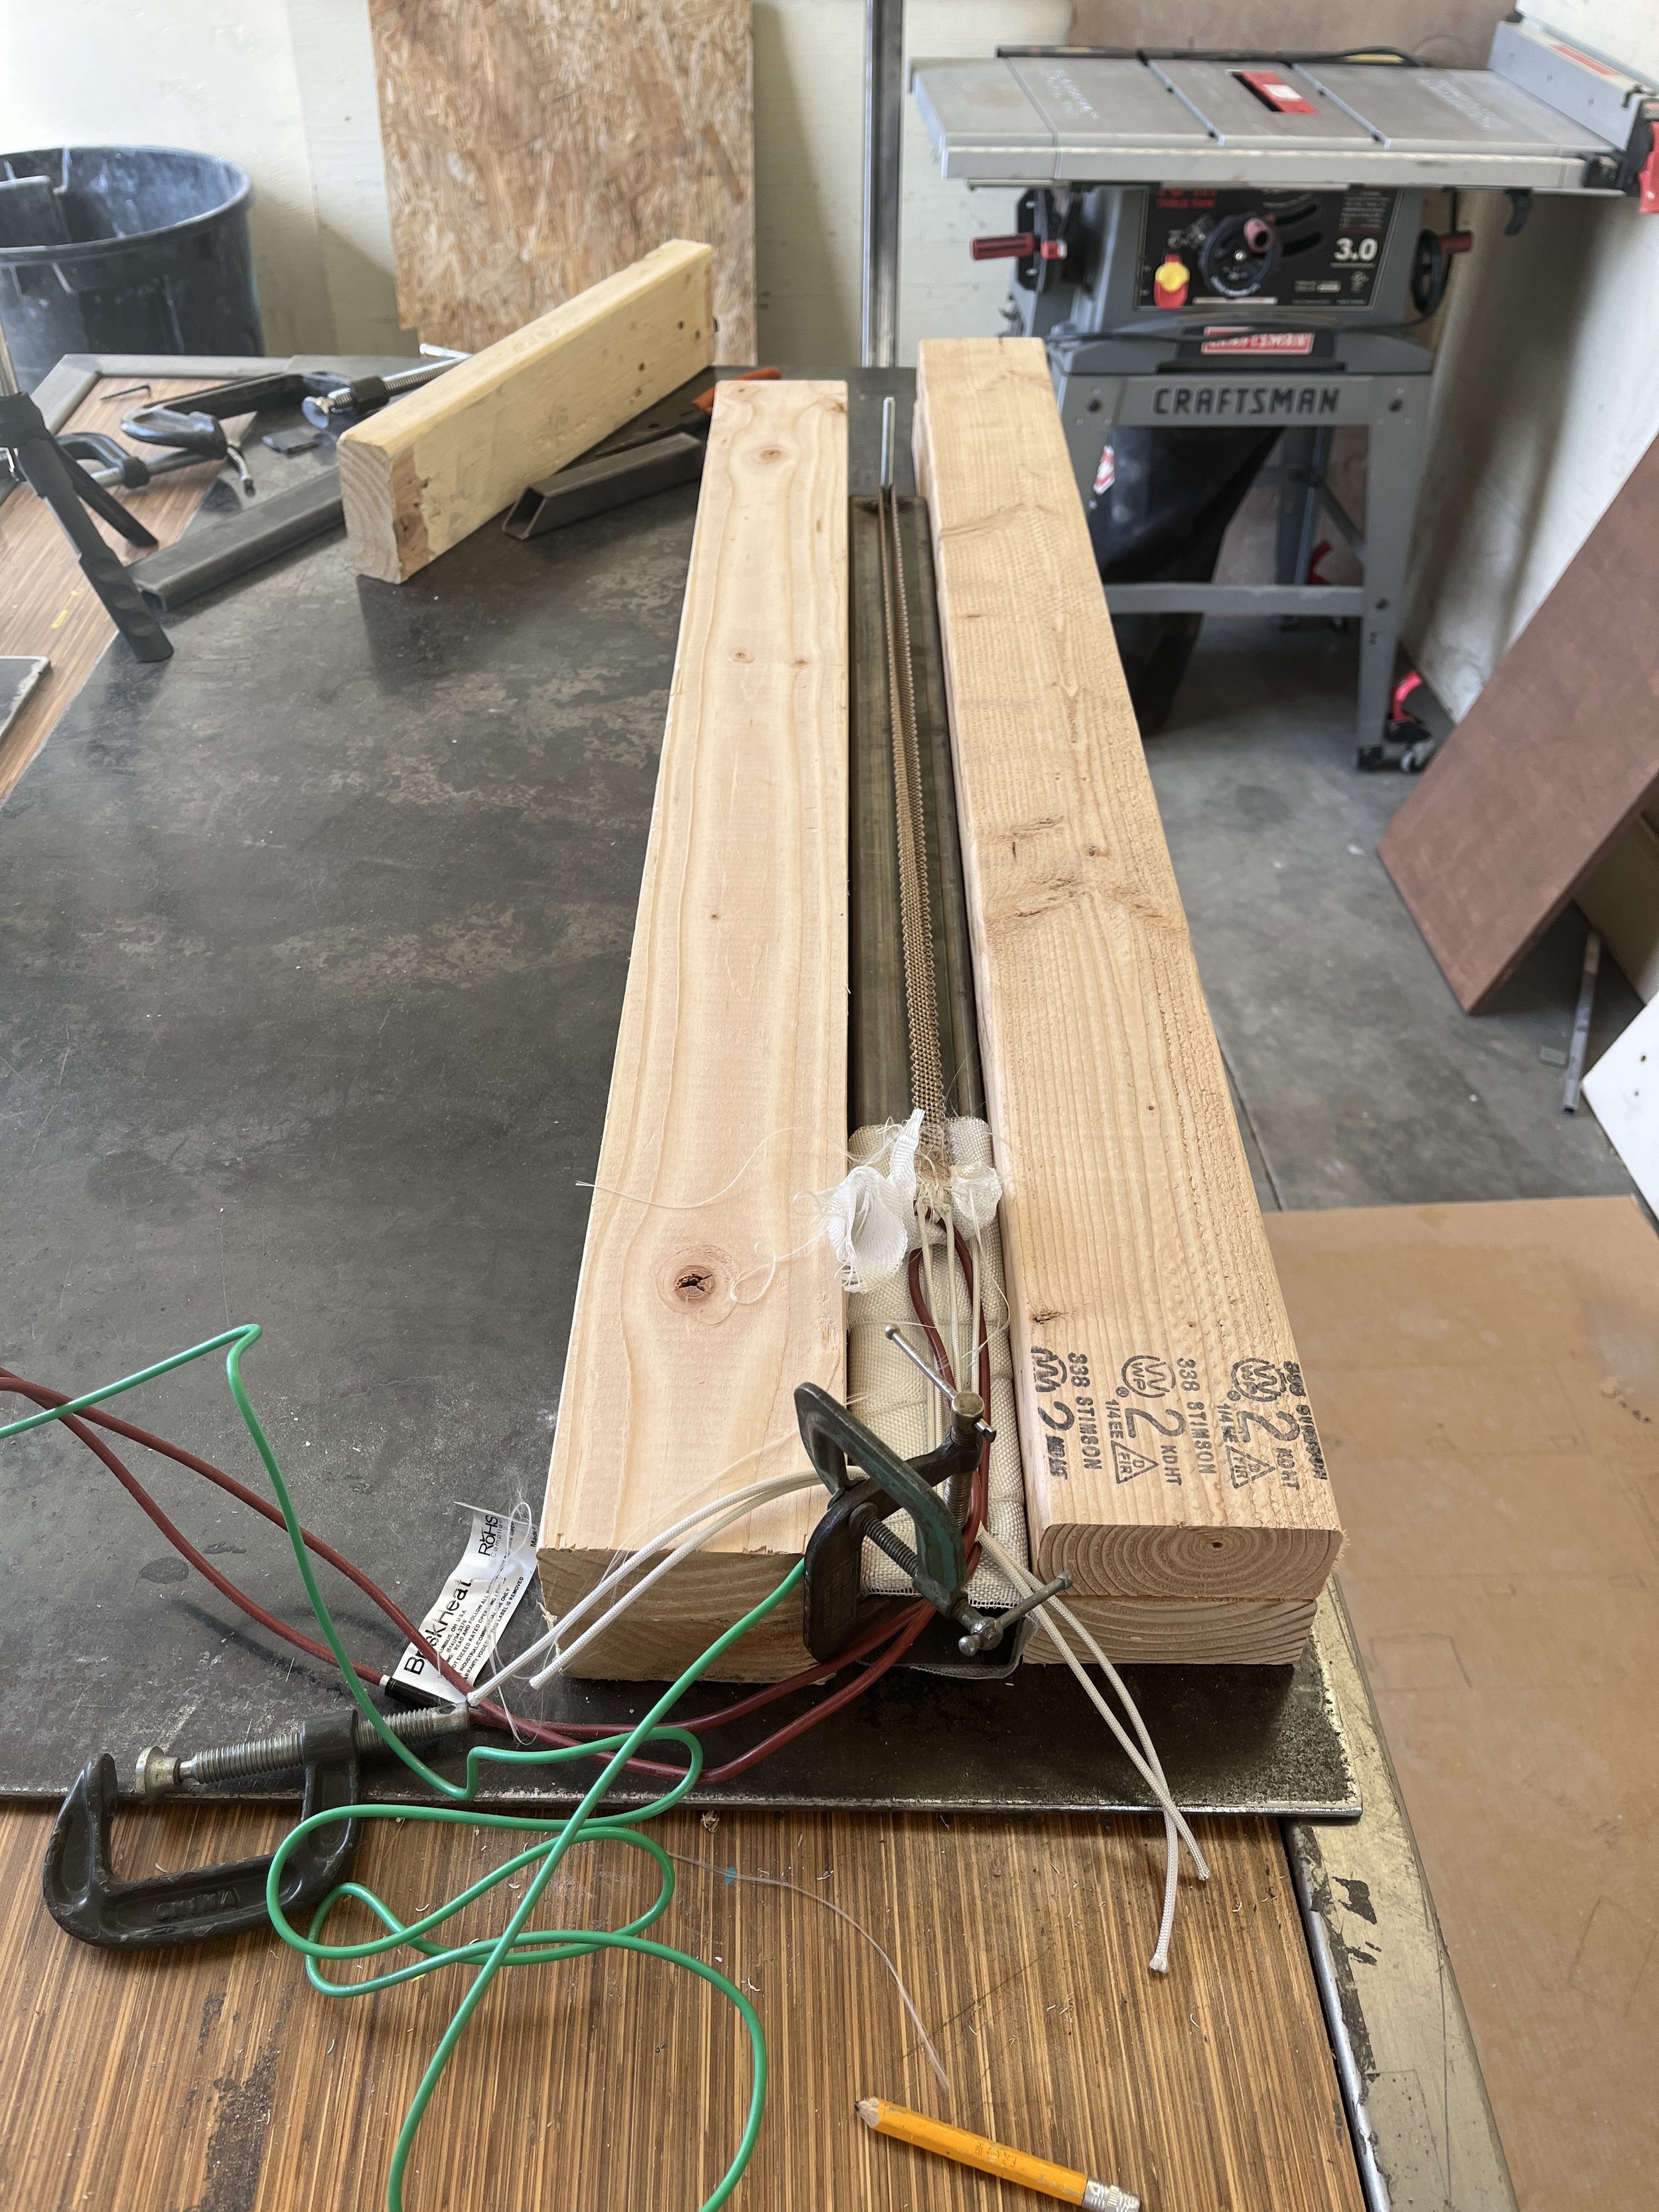
After all the 90° edges were welded together I had to tackle bending the acrylic top plate. The industrial standard for bending acrylic is using a professional line bender so we tried setting up a strip heater as pictured below. Other than the setup being pretty sketchy, the strip heater did not get hot enough to bend the acrylic quick enough, so we changed plans.

Acrylic line bender

Using a hot air gun and a counter weight really made the bending process really quick and clean. This is a very involved process that definitely requires at least four hands, so Trey helped me with this as well.

Complete motor housing stack-up with bent top-plate

Throughout this build, I kept on asking myself what this pedestal would display, if anything at all. I was definitely inspired by ancient greek relics and I eventually decided a classical vase would be the perfect topper and give me a chance to try out some etching.

Greek vase reference

Vase illustrator drawing

I learned so much about using the Epilog Engraver at the SparkFun office in drawing and creating this vase. For etching the Epilog engraver looks for a black fill with no line in your Illustrator file. I used my iPad and apple pencil to draw the vase scenes. I made the mistake of drawing the prototype etches using Illustrator’s Paintbrush Tool. That tool creates lines with anchor points, a given stroke, and thickness. To draw a custom engraving pattern I found the Blob Brush Tool worked for me which essentially creates vector shapes with both a stroke and fill.

Use the blob brush tool!

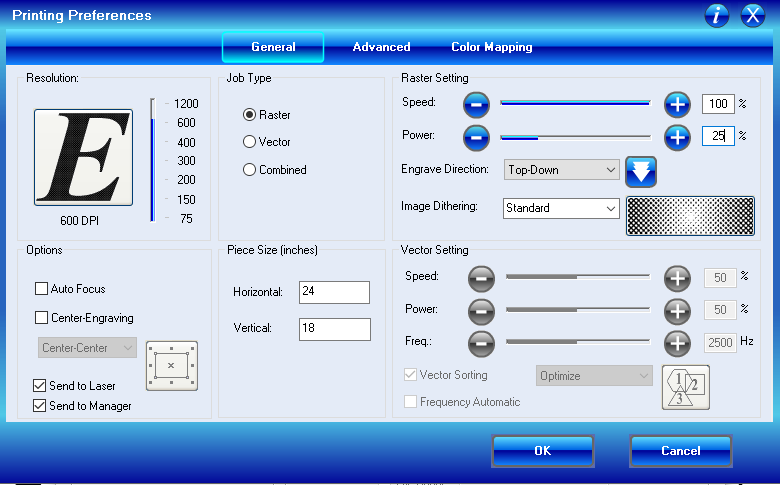
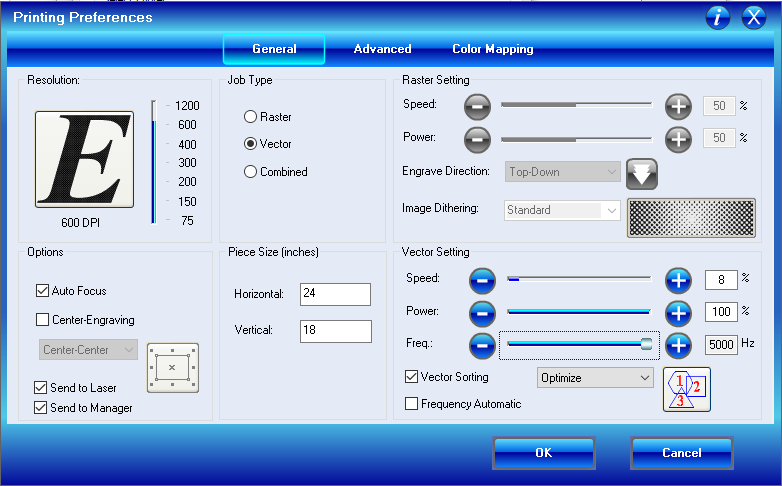
Etching laser printer settings

To create a cut, the Illustrator file you’re printing from needs a black line, no fill, and 0.001 stroke. I tried out different vector settings as well. The defaults outlined in the Epilog handbook usually require the cut to be done twice to get all the way through the thickness of the acrylic. This sometimes leads to non-perpendicular and wavy cuts. By slowing down the cutting speed, one cut can make it through the acrylic but the dimensions are less exact because the laser takes out a wider path out of the acrylic.

Cutting laser printer settings

Kinetic Column vase

The last part of the build process was putting all the pieces together and installing the circuitry. I was pretty confident in my electrical system design because I had used similar systems on projects in the past. Below is my circuit diagram and physical circuitry. Most of the connections are soldered and shrink-tubed and the boards glued into place. The code used to turn the motor can be found on my github repo and the parts list is linked in the “Materials” section.

Electrical schematic

Installed electronics

The last game we like to play in the integration phase is “where’s the squeak coming from?” Once the whole column was assembled and turning, there was a horrendous squeaking sound, acrylic scratching on acrylic. I determined it was coming from the acrylic rod scratching on a hole. Though it’s still not perfect, a little bit of filing and WD-40 helped bring down some of the noise. Easy, peasy, kinetic column!

Evaluation

Since the Kinetic Column is primarily an art piece and doesn’t serve any tangible purpose or function per se, I found it kind of challenging to evaluate this project. I tried to create a virtual critique by sending out a Google Form questionnaire to some of my friends and colleagues.

Here are the questions I asked and some of the best responses:

  • What is your name?

  • What's your professional background?

  • What's your relationship with art?

  • Name at least 3 things you first notice about the Kinetic Column

    • “Colorful, geometric and reflective”

    • “The way the light reflects off of the vase, the intricate designs in the vase, how the top part of the column is spinning”

  • Name at least 3 things the Kinetic Column makes you think of

    • “Roman architecture, vapor wave and the 1980’s”

    • “This art piece makes me think of my history lessons in high school, where we learned about the different column types in Greek antiquity. It also makes think about my head spinning, if it could, 360 degrees around my neck. But mostly it makes me think about catching the light from all sides, which no photographer ever achieved.”

  • Name at least 3 things this the Kinetic Column makes you feel and why

    • “Impressed, makes me pay attention to the amazing details, connected to history in a modern way!”

  • What can be improved about the Kinetic Column?

    • “Bent pieces aren't perfectly rolled (obviously difficult). Squeaks could be diminished (or enhanced). Some faces not as plumb/orthagonal”

If I were to give a personal assessment of my piece I think it’s a success. My most basic project needs of building a column out of acrylic and creating a turning top platform have been met. I had stretch goals of learning laser engraving and creating something to be displayed on the pedestal and I’ve met those as well. Overall the new skills I learned completing this project were acrylic welding, acrylic bending, and engraving. I’m really proud of my work!

Discussion

Building the Kinetic Column has taught me a lot of things. When I work with this neon acrylic material again I will be sure to remain patient, calm, and give myself enough time to build and install. This material is so beautiful and mesmerizing but it can be really fragile and hard to work with. In my experience, there’s a lot that can fail when designing a kinetic sculpture so it is wise to mitigate stress and panic by remaining calm when issues arise.

Since I don’t have a formal art education, another thing that I wasn’t expecting was the additive color effect of all this transparent plastic. The finished product came out more orange than I realized it would.

I also considered adding extra features. I ultimately decided against addressable LEDs because they would detract from the inherent luminescent nature of this material. The addition of the ivy leaves was also polarizing. I decided to keep them because they break up the transparent material a bit and I find them kind of ironic as something that’s inorganic posing as organic, as well as ivy vines being often associated with greek columns.

Lastly, this project is one of a few of my efforts to create open source art. I currently work at an open source technology company and am incredibly inspired by the sharing of information to recreate or expand upon projects. I think this makes the exclusive fields of creating art, designing tech, or writing code more accessible to a range of people that would not normally think to explore those realms.

Magic Mirror on the Wall

For my final project for my Creative Coding class, I wanted to flex my Processing skills and pair them with my expertise in hardware. I came up with the idea to create a magic mirror in which a scene from my computer’s web cam is reflected onto a LED matrix using Processing’s serial library.

Process

Prepare hardware

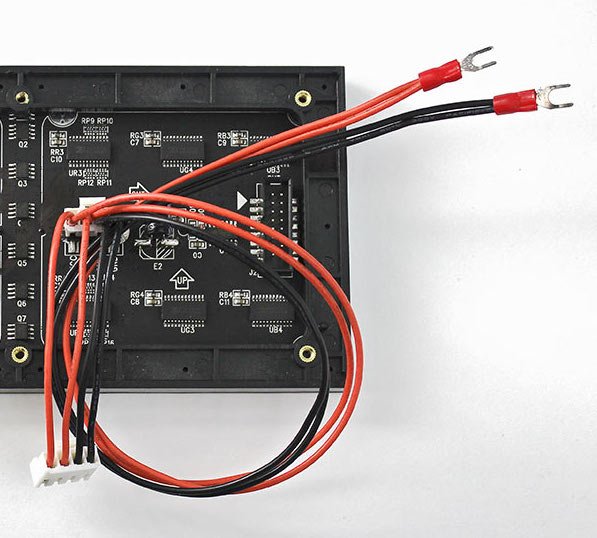
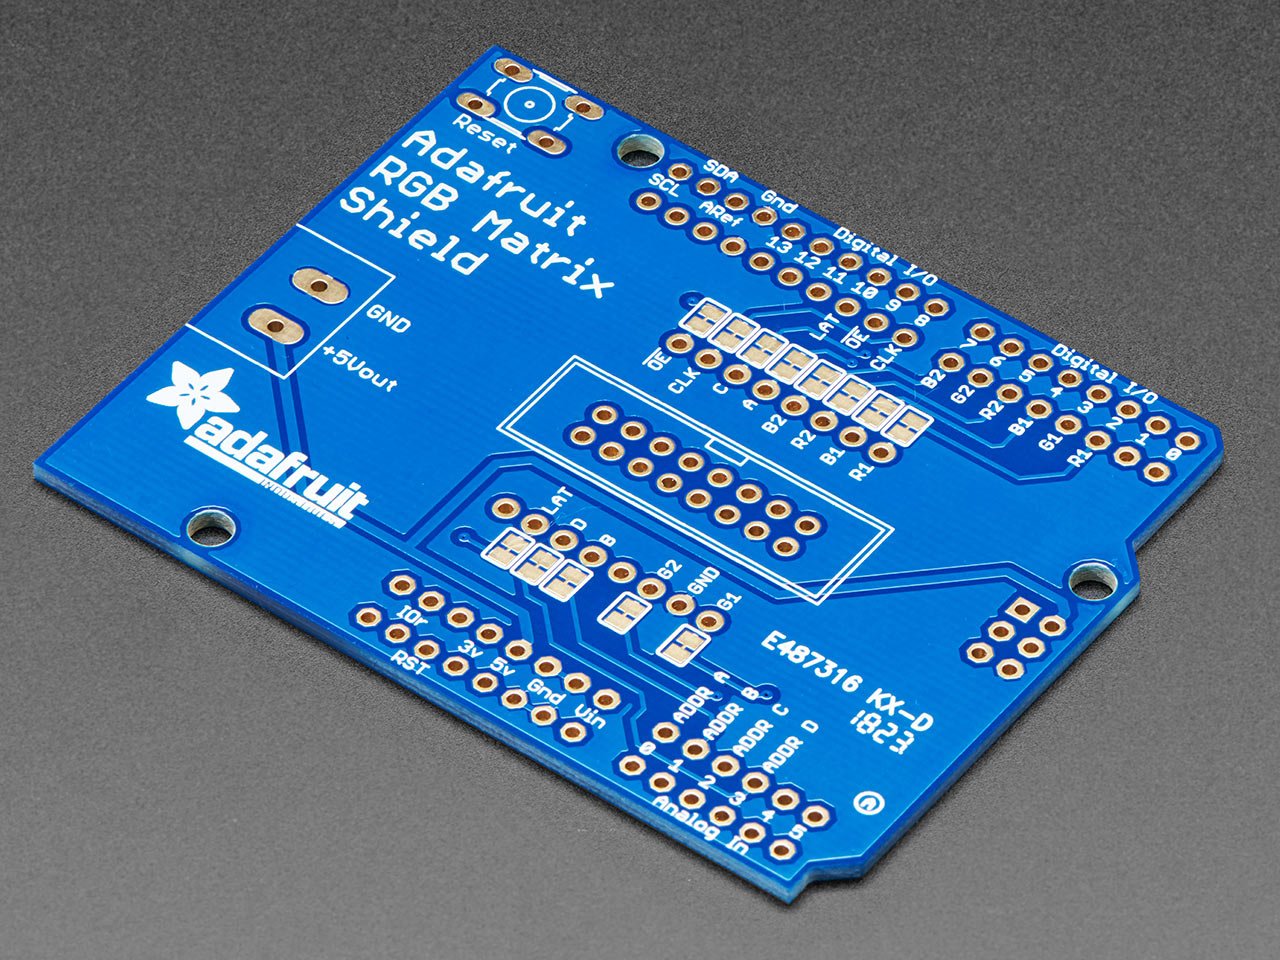
Before writing code, I needed to make sure the hardware was ready to be connected into a system. Adafruit’s RGB matrix shield comes in separate parts (ugh!) so I needed to solder on the through-hole components: headers, reset button, power terminal, and 16-pin connector which connects to the RGB matrix circuitry. I also chopped up my power supply and soldered/shrink-tubed 5V and GND to the spades terminals of the RGB matrix’s power cable.

Prepare software

After the hardware was setup, I got the Arduino IDE situated. Following the RedBoard Turbo hookup guide, I downloaded the “Arduino SAMD Boards (32-bits ARM Cortex-M0+)” and “SparkFun SAMD Boards” in the boards manager. For good measure, I restarted the IDE and I flashed the “Blink.ino” example and made sure it was working properly.

Try out LED Matrix

Adafruit also provides a handy guide for getting started with the RGB Matrix. From there I downloaded the “RGB Matrix Panel” library and “Adafruit GFX library” using the Arduino library manager. I plugged the matrix shield into my RedBoard, RedBoard into my computer, ribbon cable from matrix to shield, and matrix power cable into a power strip. At this point I was ready to test the “colorwheel_32x32” example.

Get communicating

I was lucky once again that my company had a tutorial for setting up serial communication over USB between Processing and Arduino. I followed the steps to get Arduino sending messages to Processing and vice versa.

Update LEDs using Processing

Now that hardware, software, and communication was tested, I could start updating the matrix over serial. Looking at Adafruit’s library for the matrix there are different color functions to update the LEDs: color333 for 3-bit, color444 for 4-bit, and color888 for 8-bit RGB precision. I paired this with the library’s fillScreen() function, drew some rudimentary buttons in Processing, and Arduino listened for serial messages.

Time to bring in the web cam

There are a lot of handy examples that got me started with the Processing Video Capture library. The first thing that I had to do was divide up my web cam feed into 32 by 32 pixels which represent one LED on the matrix each. I loaded the color values into an array using Processing’s loadPixels() function. Before this project, I wasn’t aware of the color datatype. I then extracted the RGB elements of each pixel and put them in a new array sequentially. This is the data I decided to send over serial to the RedBoard Turbo.

Bugs and WIP

I definitely had some hardware weirdness while trying to get this project to work. I personally rely on Arduino’s serial monitor to do a lot of my debugging, so one MAJOR drawback was not being able to use that because the serial port was busy talking to Processing. I also had issues with the SAMD21 occasionally not showing up as a COM port or not being able to upload code because the serial port was still communicating with Processing. You have to stop the Processing code!

Another road block appeared when trying to read and write the array of RGB values (ints) over serial. The video below shows the data not coming in correctly. The colors and the number of pixels illuminated are all buggy. Some internet digging recommended converting the ints to raw bytes which ended up working for me. I’ve got an example showing how to convert, send, and receive byte arrays. Massaging the baud rate on both the Arduino and Processing sides (it’s gotta match!) and how frequently I was sending data helped smooth out the RGB matrix response.

Me looking into my webcam. The matrix really abstracts the web cam image. It took me a second to realize my code was actually working!

Final Product

All the code for this project lives in this Github repo.

The code is separated by platform. The idea is to run matching named sketches in Arduino and Processing at the same time to recreate this project. I’ve numbered the examples in the order that I learned the concepts in: most basic building block to the full magic mirror.

Below are a couple of images of the RGB matrix reflecting my laptops web cam data.

Future Additions

The original idea for this project was something more dynamic and reactive, more like a mirror. So my first investigation would be into the limitations of the baud and data rates. Ideally, this would be an interactive art piece, so if a viewer can’t notice the LEDs updating they won’t know what they are looking at.

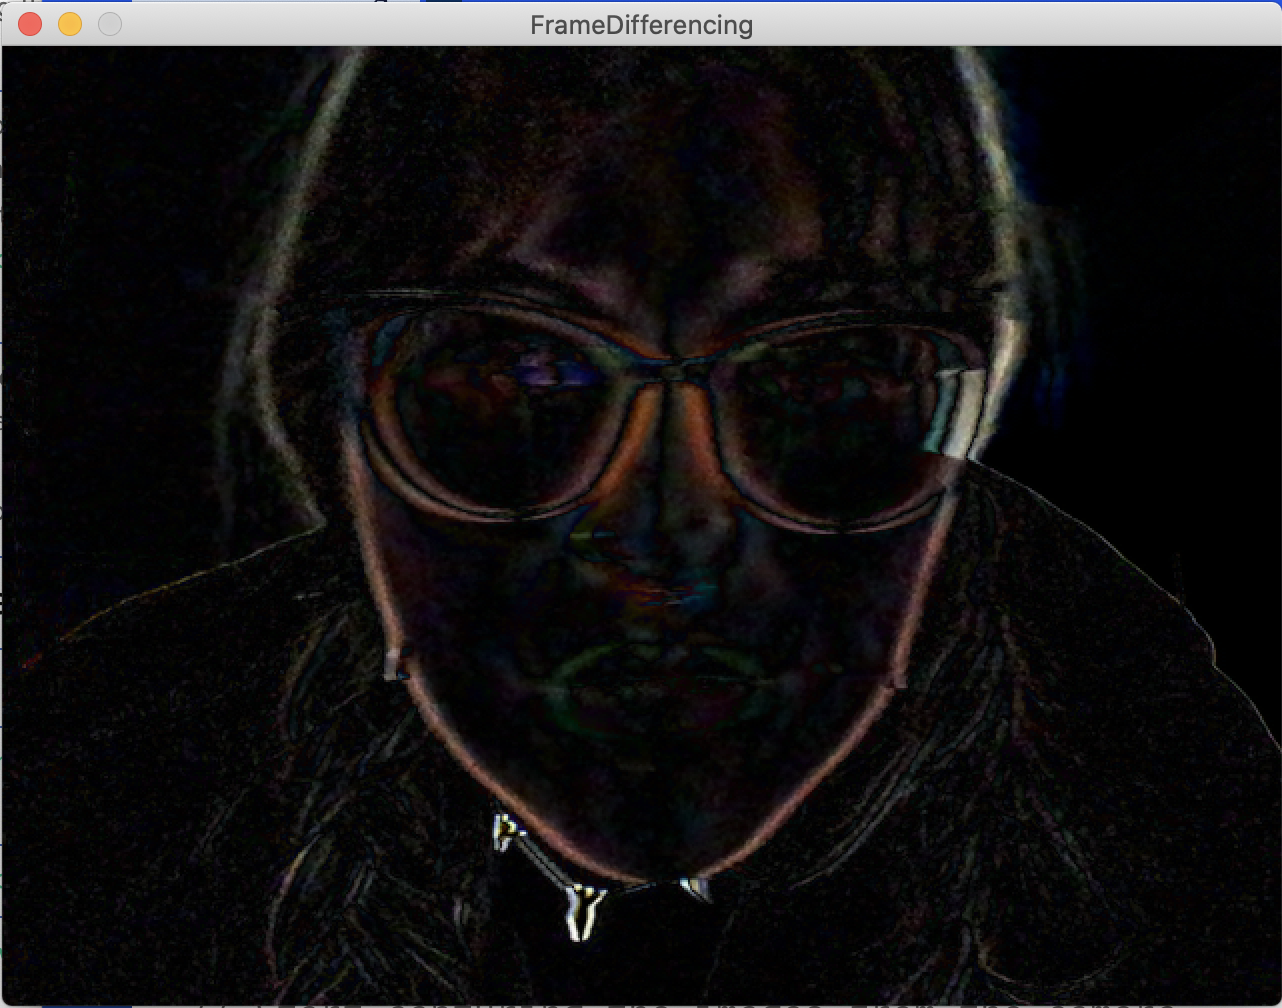
I also think it’s kind of hard to make out what exactly is represented on the matrix. Especially with all the white in the background. I think it would be interesting to abstract the image a bit more by experimenting with frame differencing or background subtraction to see if that makes for a more compelling effect.

Frame differencing

Background subtraction

Lastly, I’d want to this to be as much of a stand-alone piece as possible, something that could be installed in a gallery. I don’t know if that would mean using a kinect instead of a web cam. Also building some sort of housing for the hardware and a “frame” for my “mirror” would be the finishing touches to my art piece!

Additional Resources Used

https://processing.org/reference/

https://discourse.processing.org/t/serial-write-print-more-than-one-byte/12159/2

https://www.delftstack.com/howto/arduino/arduino-char-to-int/

https://discourse.processing.org/t/how-do-i-write-a-uint8-t-data-array-via-serial/30543/2

ATLS5430: Design Methods Portfolio

This is a collection of all the assignments and projects from my first semester Design Methods class in the Creative Technology and Design Masters program at CU Boulder. This class, taught by Joel Swanson, explored the assumptions, biases, and ideologies behind various design disciplines in order to develop a more expansive, critical, and empathetic approach to design. Here are my solutions to the weekly design challenges that delve into a certain design concept. Team members are specified in all group projects.

Final Project: Pandemic Prototype

AmbieSense

Priyanka Makin, Mark Listani, Katherine Gilchrist, Jenny Lee

An AR-therapeutic-consumer product for quarantine during a pandemic.

Challenge 9: Pandemic Design Probe

Priyanka Makin, Preetam Pothala, Shivangi Khandelwal

Assigned demographic: senior citizens

Challenge 8: Speculative Design

Priyanka Makin, Mark Lisanti, Jenny Lee

Assigned scenario: pandemic, 500+ years in the future, contopia

Challenge 7: Regenerative Design

Challenge 6: Drawing Machine

Challenge 5: Designing Error

Challenge 4: Designing Slowness

Challenge 3: Chindogu

Challenge 2: Origin Story

Challenge 1: Lab Logo

Makin Art: Nature Mobile

This blog was originally written for and published on the SparkFun Electronics site.

I recently designed and built my first kinetic sculpture Nature Mobile which I made for the "Convivial Machines" show at the Museum of Boulder. My mentor Jiffer Harriman approached me in the summer to create a piece for his upcoming show. Naturally, the first thing you’ve gotta come up with is a great idea. He told me that the show’s theme was the balance between the benefits and setbacks of technology and suggested something that was moving to be placed in the lobby windows. I had some experience with kinetic sculpture but had never conceptualized one by myself!

Coming up with an idea was the hardest part. I kept in mind the following questions: what theme did I want to explore in my piece? What are the themes and constraints of the exhibit? What inspires me? What materials did I want to work with? What skills did I want to learn when it comes to fabrication? I sat on it for close to 4 weeks and until I finally had an idea. My personal style is all about bright colors and I am constantly inspired by nature and flowers. I’m a big fan of the plexiglass sculpter Marina Fini and I wanted to use this as an opportunity to work with acrylic and learn to use the laser cutter. That’s how Nature Mobile was born.

Initial notes

Initial sketch

It’s also important to realize that the design process is fluid. More conversations with Jiffer, myself, and other artists helped me to rebase, redefine, and refine my ideas.

I was ready to order materials. I started looking for acrylic. I knew I wanted really bright, neon, and translucent plastic. I wanted the thickness to be as small as possible (¼”) to keep my mobile light. Turns out you can get anything from Amazon. As for the circuitry, I’ve built motor systems 83457938 times. You could simply power a DC motor or easily snatch one of these Big Easy Driver (BED) kits, but I ended up using a pretty beefy stepper motor. This is obviously an over engineered solution, especially for something that is spinning in one direction, constantly and needs no accuracy, but the system I used creates a good visual effect and is the engineering part of my piece. I got all my components from SparkFun:

https://www.sparkfun.com/products/12859

https://www.sparkfun.com/products/18158

https://www.sparkfun.com/products/10846

https://www.sparkfun.com/products/15664

Next I had to learn to use the laser cutter. Luckily we’ve got one at the office, and our resident expert, Joshua, showed me the ropes. It’s actually as easy as printing out a design in illustrator. Here are a couple of examples of my cuts:

Laser cutter file

Laser cutter file

Now that I had all the separate parts, I was ready to string everything together. My mentor and client Trey Duvall invited me over to his studio to practice installation. He’s got high ceilings! First, he helped me plastic weld the sun together. We did some measuring and tied the top parts to the tails. Then we put together the motor housing and practiced what it would be like attaching everything to the dry wall in the museum. Sourcing all the screws, nuts, and washers was another thing I’m not too familiar with, but Trey gave me a shopping list of what I would need.

Hanging pieces

Plastic welding

All put together

Installation rehearsal

Hardware shopping list with measurements

Installation day came and I had originally blocked out two hours to get everything hung up. I had all my parts and my install steps all written out and rehearsed. The best advice I was given was to plan out a WHOLE day for installation and to plan for the worst. For the most part, everyone was on their own when it came to installing our pieces, but Jiffer was super nice in helping me get my stuff screwed into the ceiling.

The original idea of screwing 3/8th all thread into the dry wall anchors quickly broke down because there wasn’t enough clearance above the ceiling. We weren’t really sure what was up there. We toyed with ideas of building a shelf or moving the piece somewhere else (not in front of a window) and screwing into another large piece of acrylic ($$$). Eventually, we refocused and cut out three more holes in the motor housing’s top plate and sourced shorter drywall screws and anchors.

After the housing was secure in the ceiling I could hang up my mobile, fine tune the BED to make it quieter and vibrate less, clean the acrylic of fingerprints, and tape up the extension cord. Everything came together in the end!

Nature Mobile, 2021

Nature Mobile, 2021

Nature Mobile, 2021

Nature Mobile explores the future relationship between technology, engineering, art, and nature. The organic shapes have been cut from colorful plastic using a laser cutter. Nature has a lot to teach us. Man-made designs are often inspired by nature and the materials come from the earth. Ironically, these nature-influenced processes often hurt it. The solution to our changing climate hangs in the balance of listening to nature and the future of engineering advancements.”

Makin Art: "Convivial Machines" at the Museum of Boulder

This blog was originally written for and published on the SparkFun Electronics site.

Recently, SparkFun sponsored an art exhibit at the Museum of Boulder. “Convivial Machines” is open from now until February 6. The artists are local students, scientists, engineers, and creatives that are part of the Boulder Experiments in Art and Technology (B.E.A.T.) meetup. “Convivial Machines” aims to emphasize the tension between the benefits that technology offers with its negative traits such as distraction, disruption, and environmental impact. The exhibit has a “light side” and “dark side” (literally) and has facilitated projects in which people collaborate and connect with each other, technology, and nature. It features interactive digital art, kinetic sculpture, music machines, and much more.

Fantastical Tape Loop, Cha Cha & Jiffer Harriman, 2021 - photos by Priyanka Makin

One piece in the show is a collaborative music arcade built by Sean Winters, Chase Stewart, Jiffer Harriman, Torin Hopkins, Eric Atencio, and Spencer Arrasmith. “Galaga’s Ghost” allows viewers to participate and collaborate in generating music and visuals in a vintage arcade-style format.

Galaga's Ghost, Sean Winters, Chase Stewart, Jiffer Harriman, Torin Hopkins, Eric Atencio, & Spencer Arrasmith, 2021 - photos by Priyanka Makin

“Bioluminescent Touch” by Mirela Alistar and Netta Ofer highlights living dinoflagellates. Viewers are invited to interact with the algae and see them illuminate creating a connection and intimacy between people and the microorganisms.

Here are a few more snippets from the exhibit:

Bytes of Humanity, Gail Folwell, 2021

Musical Dot Orchestra, Matt Moore, 2021

Listening Lanterns, Jiffer Harriman with special thanks to the B.E.A.T. Interactive LED Workshop participants, 2021

The B.E.A.T. meetup founded by Jiffer Harriman fosters explorations at the intersection of the arts with technology and science. The goal of the group is to share work, find collaborations in the community, and get inspired. Pre-pandemic, Jiffer hosted various open mics and technology workshops around the city, but the Zoom open mics during the pandemic kept me sane and engaged with people. This gathering of artists and technologists offers quite a bit of overlap between the CU Boulder crowd and, more specifically, people involved in the ATLAS Institute.

Interactive LED Workshop at the Museum of Boulder, 2021

Jiffer is a creative technologist, musician, and educator based in Boulder. He runs the B.E.A.T. meetup and curated the “Convivial Machines” show. He teaches and develops courses for ATLAS and creates interactive systems for music, sound, and visual arts. He does software, PCB, and embedded system design -- exactly like what we do here at SparkFun! He put a lot of work and thought into this exhibit that served as a creative opportunity and an avenue for human connection amidst a pandemic. If you’re a local, you should visit the Museum of Boulder and see this one-of-a-kind exhibit.

Makin Art: "Waiting" with Jaime Carrejo

This blog was originally written for and published on the SparkFun Electronics site.

Last winter, I spent many late nights at my friend Trey’s new studio and workshop after my workdays at SparkFun. He had pulled me onto a project to design and build some motor systems for an upcoming installation for his colleague Jaime. Jaime’s piece Waiting is currently at the MCA Denver until August 22.

Details from Trey’s home studio

Details from Trey’s home studio

Jaime Carrejo is a prominent figure in the Denver art scene. He’s a professor and chair of Fine Arts at the Rocky Mountain College of Art and Design and is an artist in residence at TANK Studios. He works with unique materials such as poured acrylic paint, vinyl and rusting oxidation paint, often layering them to create paintings, sculpture or immersive installations. His work largely explores themes such as immigration, place, identity and nationalism. He uses intricate patterns, graphic landscapes and barrier iconography to reflect on his diverse cultural heritage.

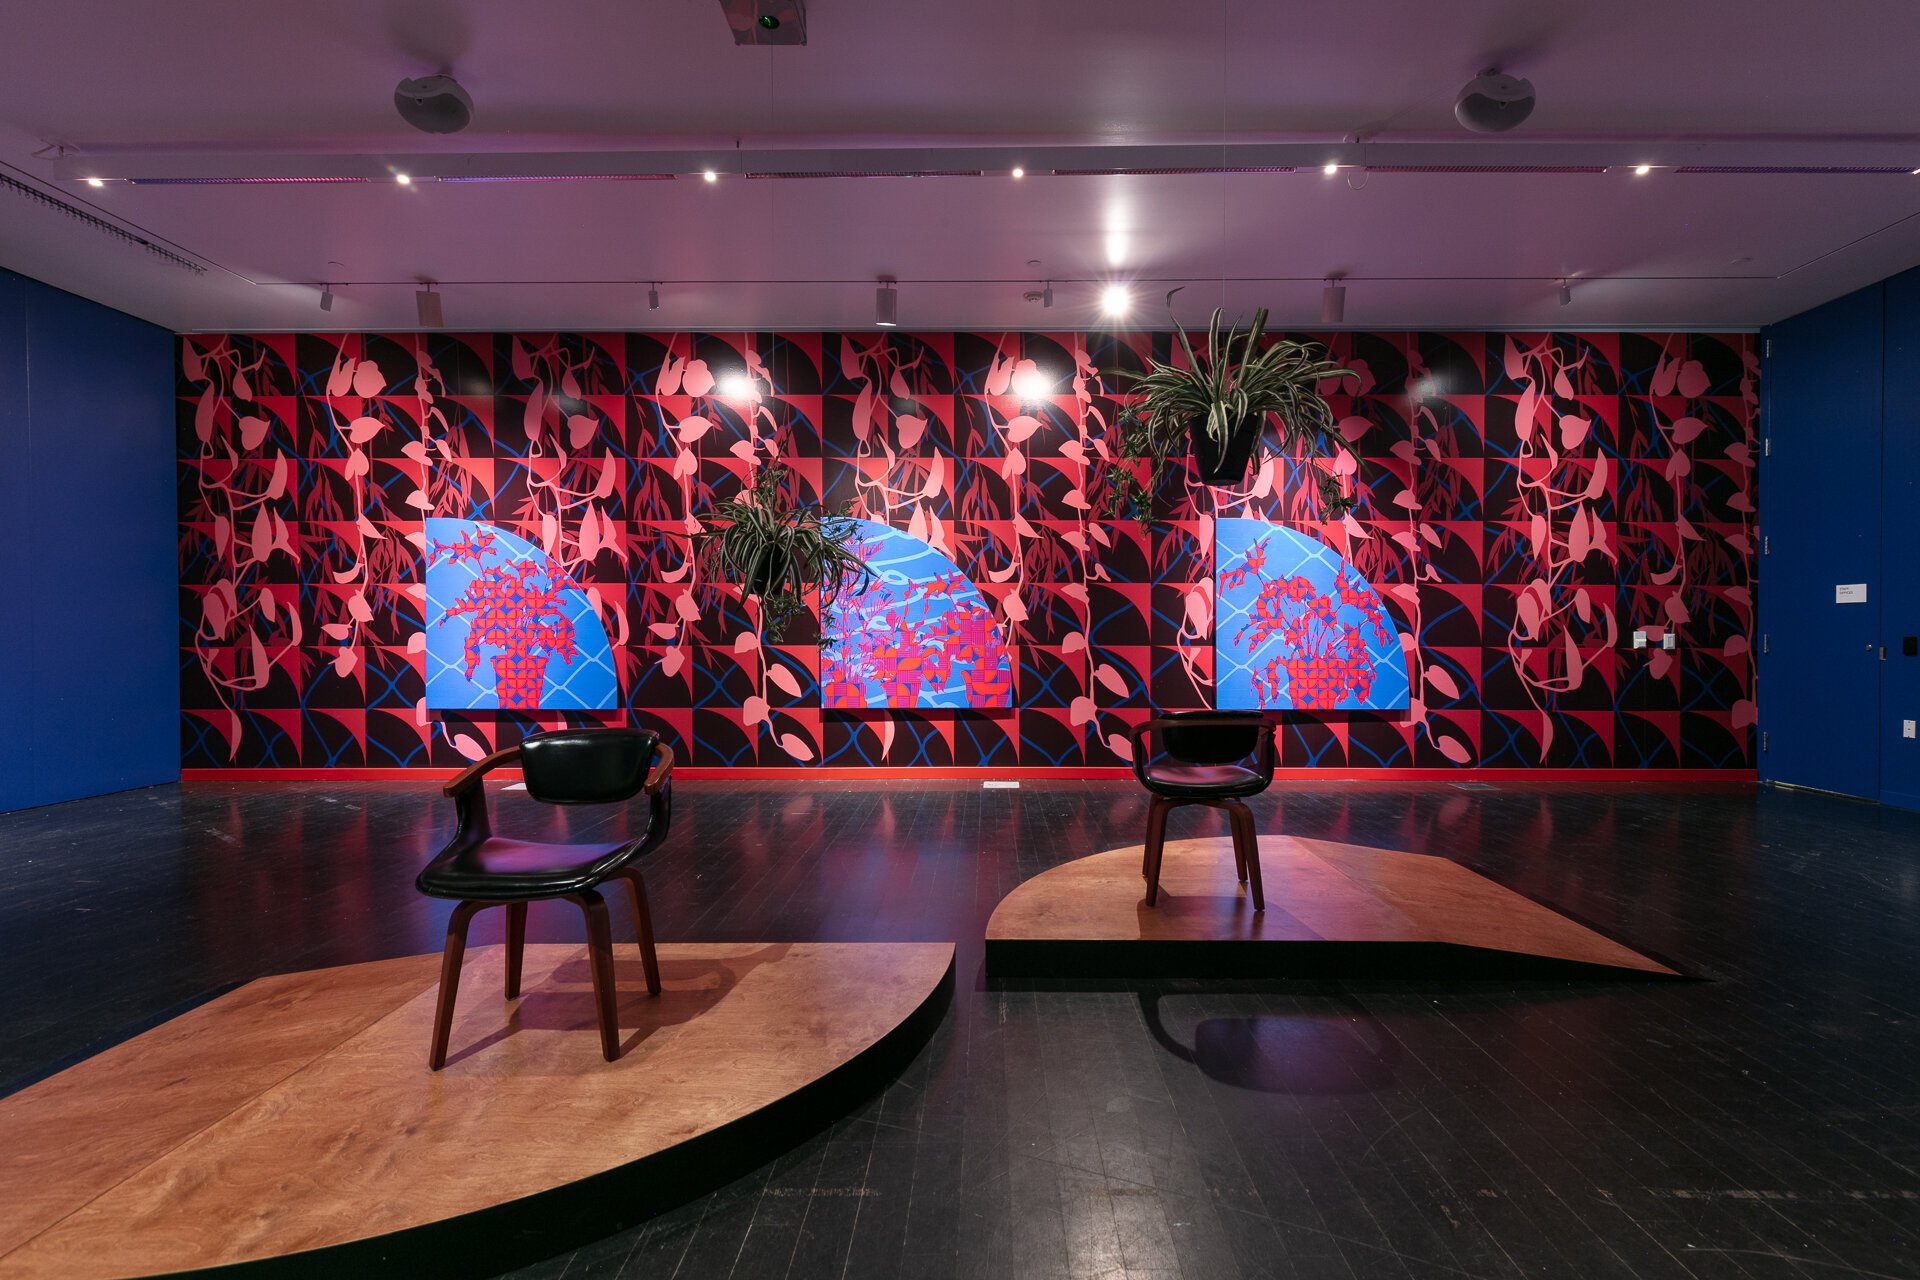
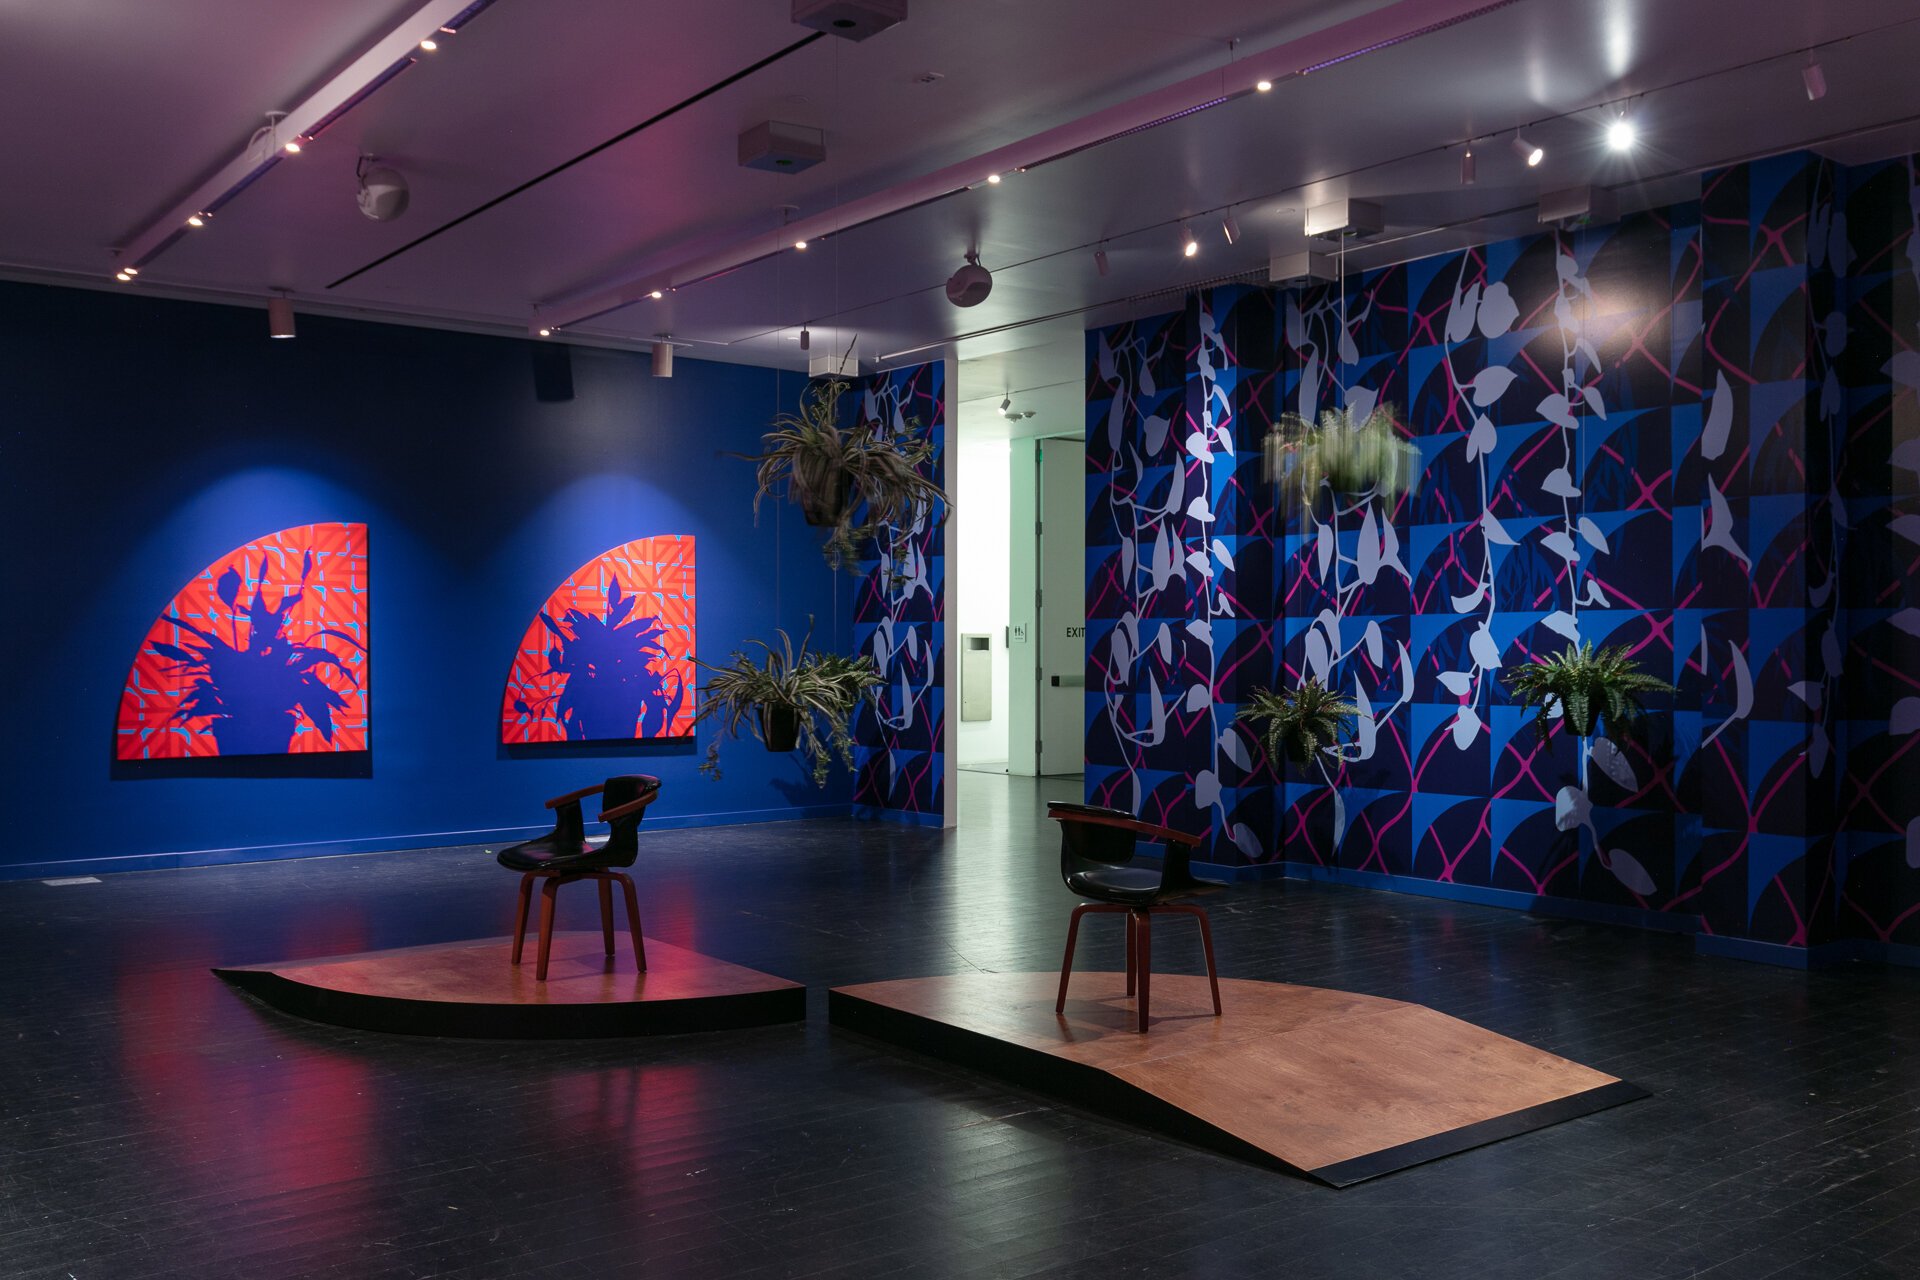
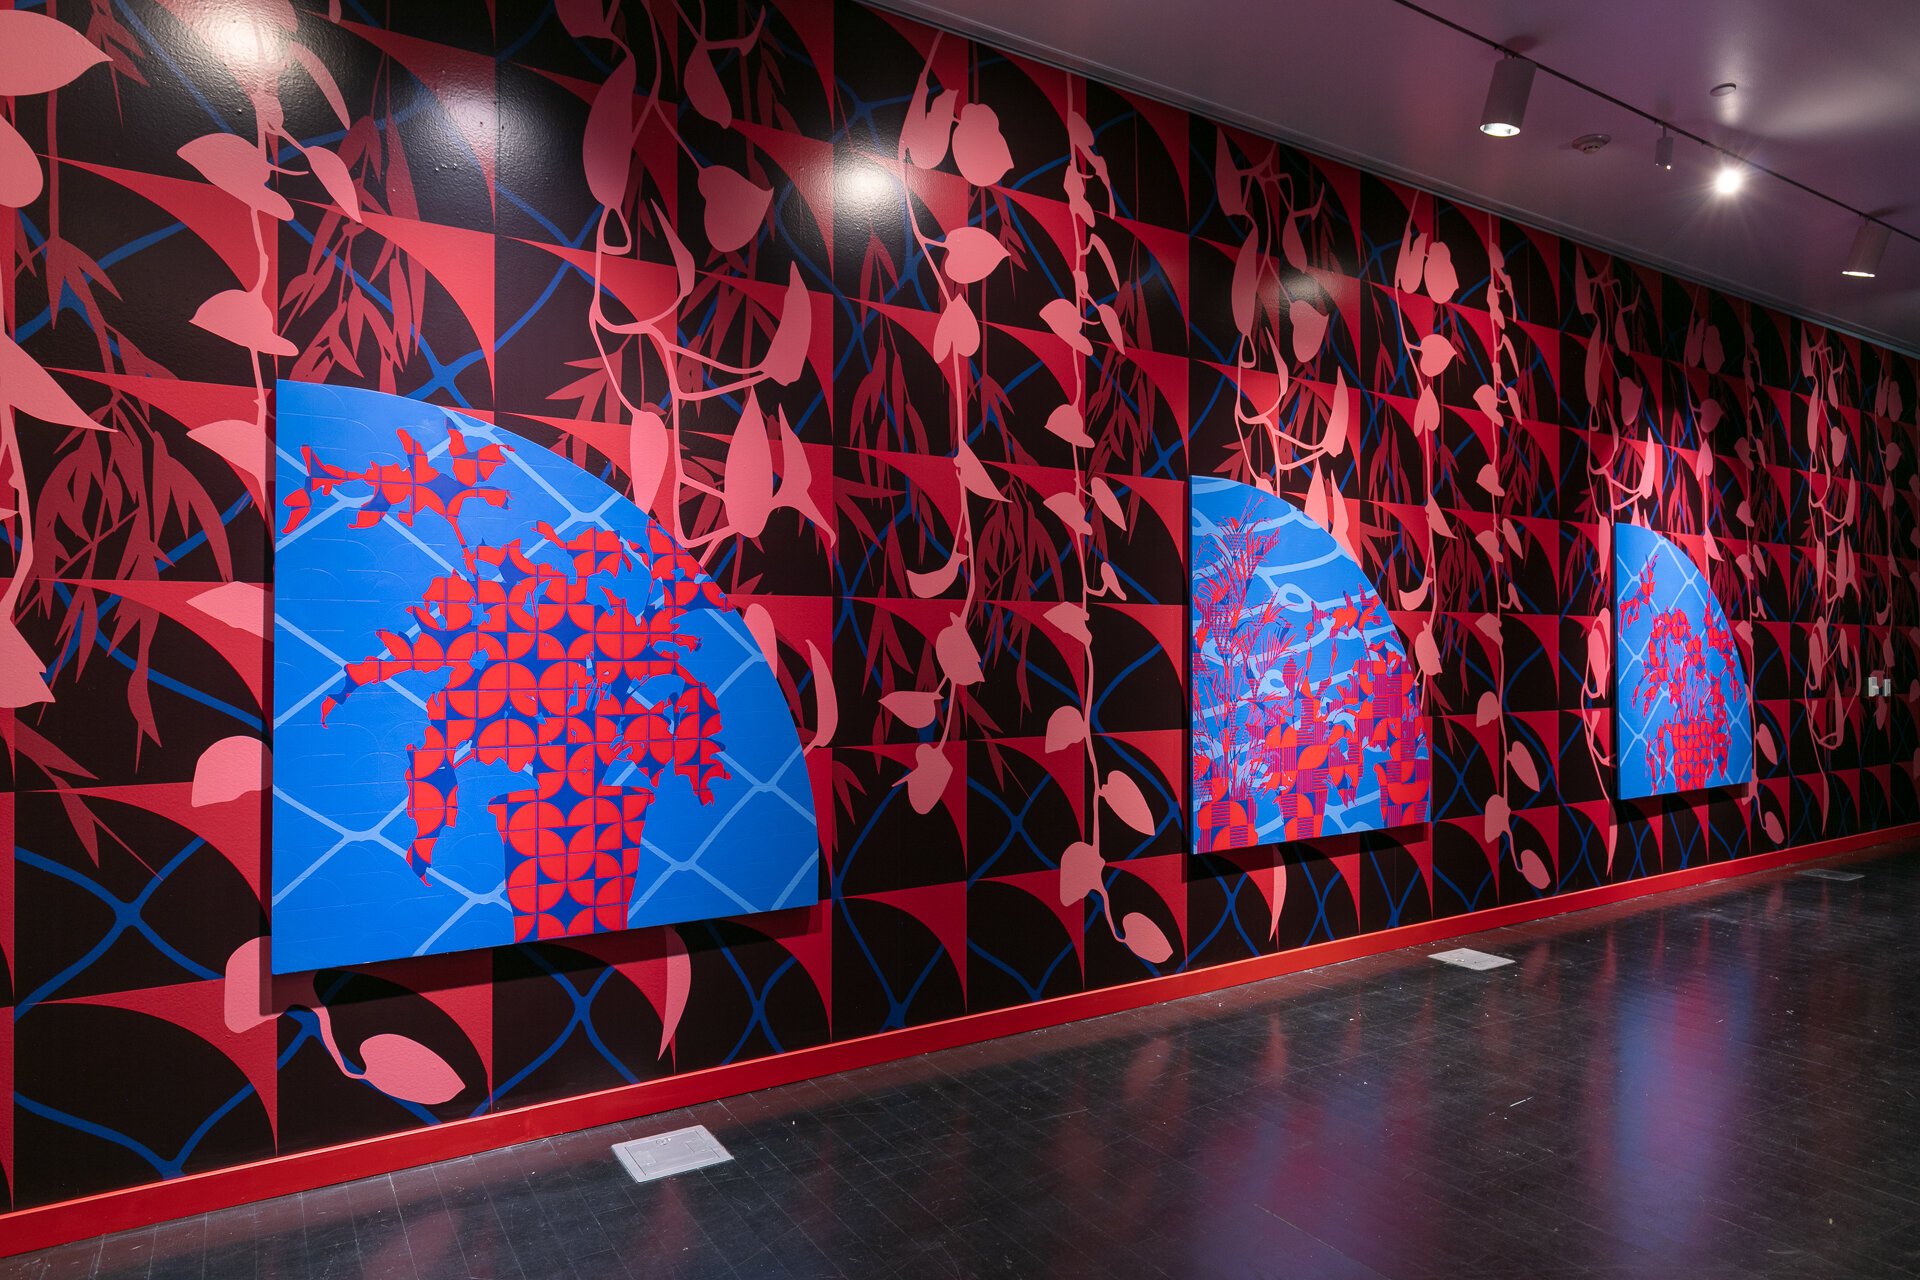
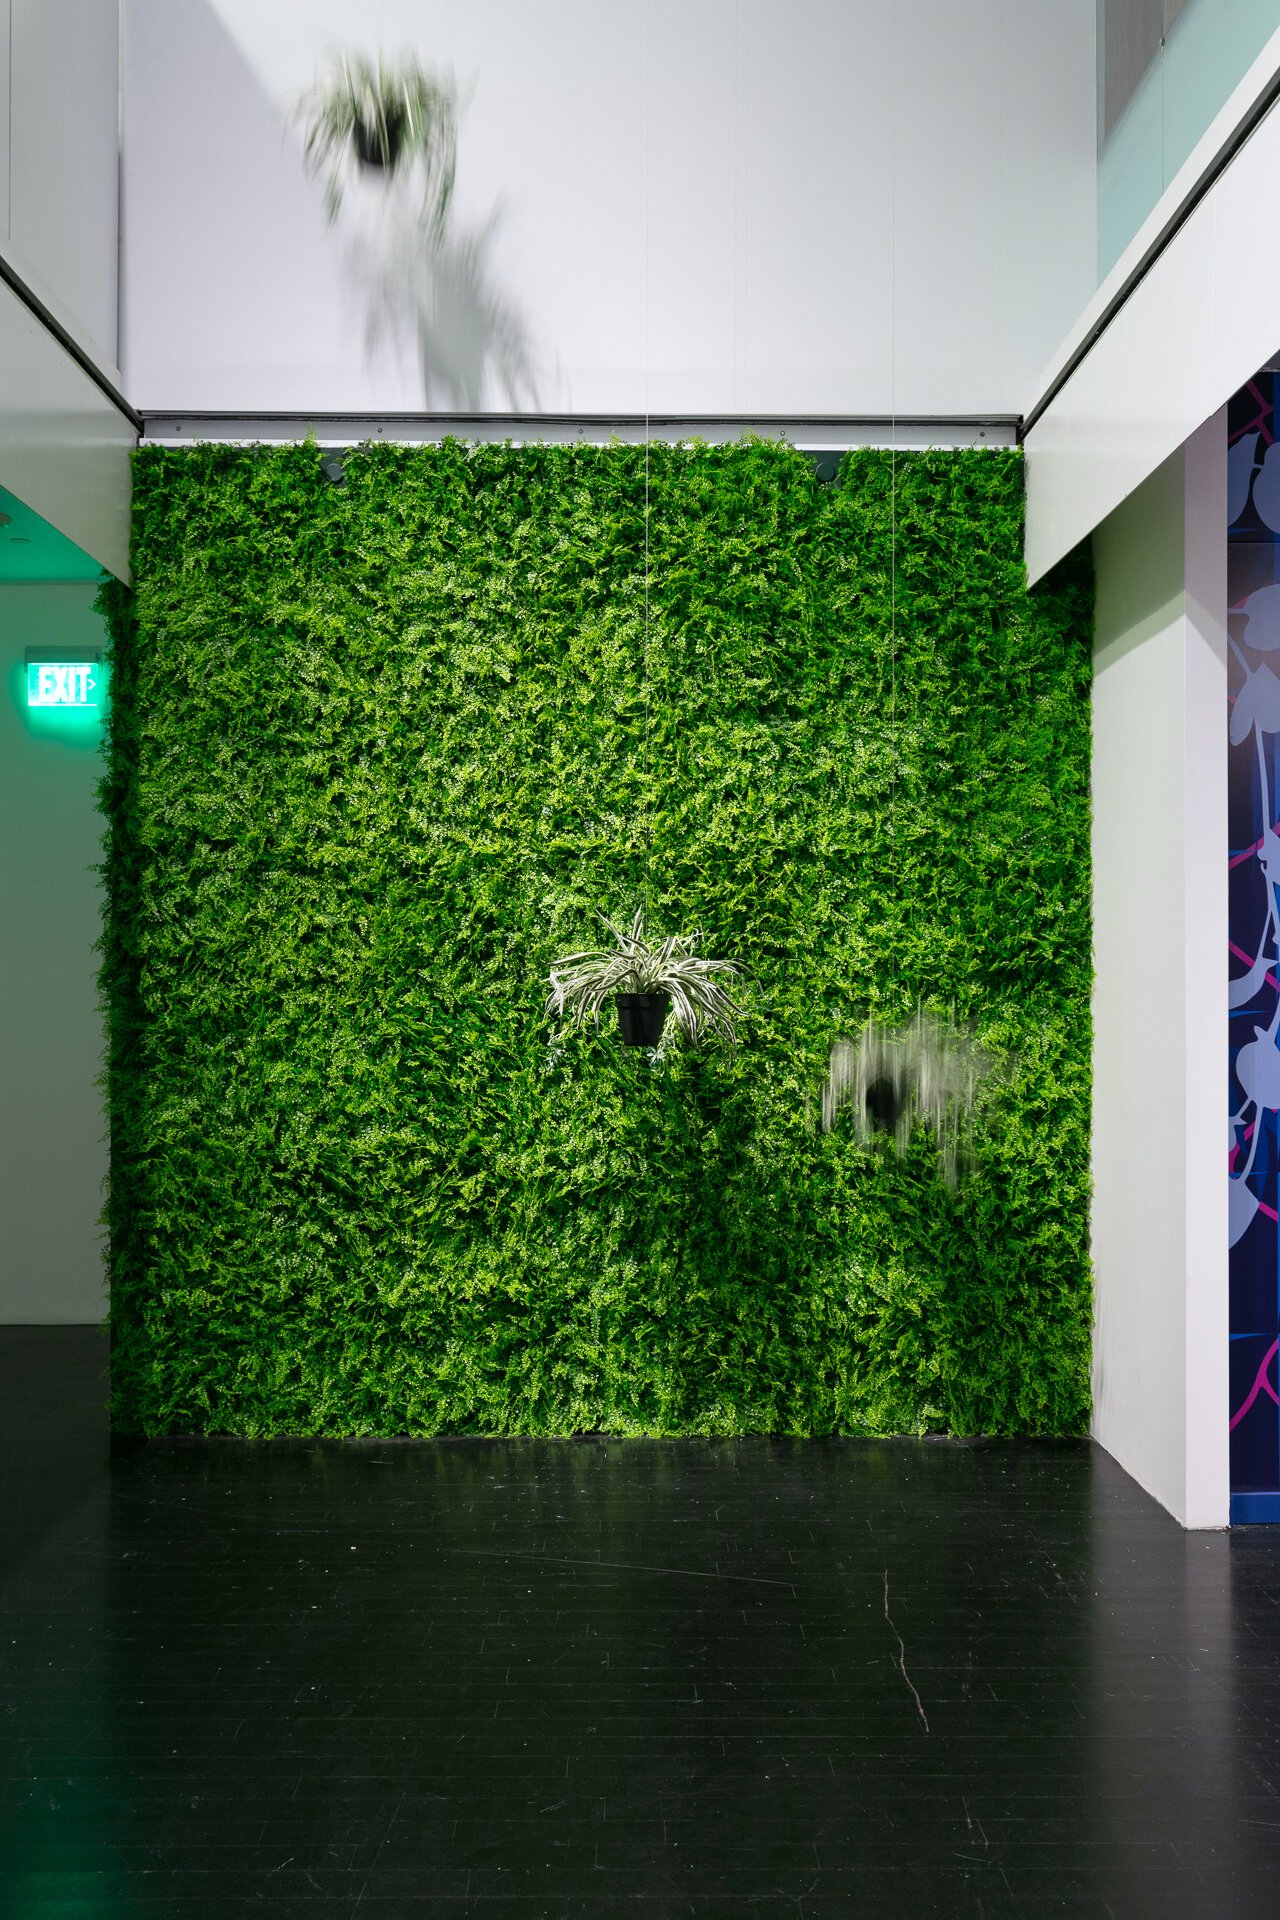
In his newest installation, Jaime explored the dimensions of waiting. This piece was born out of the waiting around and uncertainty during the lockdowns due to the Covid-19 pandemic. The installation occupies the basement of the MCA and a multi-story foyer. It consists of multiple paintings, custom wallpaper, a seating area, a curated soundtrack, and kinetic sculpture. The piece resembles an interior waiting room and exterior courtyard, spaces in which we pause for an unspecified amount of time. This multi-faceted installation explores the relationship between confinement and duration, place and identity, anxiety and hope.

Waiting, 2021 - photos by Wes Magyar

For Jaime, as for everyone I think, home became a place of protection and confinement during lockdown. He became fascinated with his houseplants, documenting their state, and observing his relationship with them. Plants are a great marker of time and he observed its passing. Time is our most valuable resource and Waiting explores what we give our time and attention to. The distorted soundtrack adds to the feeling of disorientation and uneasiness that was prevalent during this last year for many of us. Jaime also leverages the use of simultaneous contrast; striking hues of red and blue are used in his paintings and wallpaper designs, which are reminiscent of sunrise and sunset - bookends to the day, marking what we all hope will be the end of an era.

Waiting, 2021 - photos by Wes Magyar

In my opinion, the best feature of Jaime’s Waiting are the moving plants, but I’m biased of course. During the pandemic, his house plants became a barometer for level of distraction and deep care for things. He utilized the light and dark, high contrast areas of the MCA basement space to represent the emotional high and low points of the pandemic experience by having the plants travel through them as we all did. The movements were carefully choreographed and scattered so that the viewer is taken off guard by their motion. It’s mostly a period of waiting with occasional movements of hope.

Waiting, 2021 - photos by Wes Magyar

Process

So what does it take to build an installation piece like this? Well, artistic skill and creative vision is a must, but for starters, here are the SparkFun products I used to build these motor systems:

https://www.sparkfun.com/products/15123

https://www.sparkfun.com/products/12859

https://www.sparkfun.com/products/13656

https://www.sparkfun.com/products/8084

https://www.sparkfun.com/products/15664

I hear we might have a kit coming together to support a Big Easy Driver stepper motor system like this, so keep an eye out for that!

If you’ve read my last blog post, you know this isn’t my first experience with kinetic sculpture. Like before, I started with gear motors because of their high torque capability, but eventually opted for stepper motors for their increased accuracy and the hope of programming a homing sequence. After some testing, I encountered strange free fall issues I couldn’t quite pin down - maybe the step wasn’t catching? I slowed down the steps per second and honed in on a low stepper current using the trimpot of the BED. This also helped with the vibration/sound at resonant frequencies, and we were lucky that this speed worked with Jaime’s vision and intention for his piece.

An electrical system prototype

Prototype power test

After all this troubleshooting, the accuracy of the stepper motor still wasn’t good - motor step accuracy is dependent on drive current. The number of steps needed to lower the full amount was different from raising, depending on if the movement was in the same direction as gravity. We had to avoid the possibility of the plant raising all the way into the spool at all cost, so it took careful measuring and calibration to solidify the correct step sequence. We proceeded to stress test the prototype, running it for multiple days straight. I added in the programmed holds and plant choreography as Jaime defined using the handy Accelstepper library. Then Trey took over and finalized the mechanical design and alignment, 3D printed spools, and built the enclosures. We repeated the build process nine more times and just like that, we had an installation art piece! It moved reliably and as intended and could withstand the long museum hours and duration of the show.

Finished motor systems

This job was really a labor of love. Working with one of my friends and practicing my engineering skills while making art is what I enjoy most. I feel so honored to be a part of the making of Waiting -- a special and meaningful art piece that serves as a marker of a time period we’ve all lived through, and hopefully we’ve made it out to the other side. If you’re a local, make sure to check out the current exhibits at the MCA and spend some time waiting.

Waiting, 2021 - photos by Wes Magyar

Makin Art: My Adventures with Trey Duvall

This blog was originally written for and published on the SparkFun Electronics site.

For a long time I was a believer that art and engineering were two separate, basically opposite, things. Art is all feeling, weird, subjective, right brain-y. Engineering is logical, 1’s and 0’s, quantitative, left brain-y. As someone who is an engineer and artist, I always thought I existed as those two things individually. This was until I started working with Trey Duvall.

ColumnRopeColumn, 2020 - photos courtesy of the artist

Trey is an artist working in Denver. He teaches at the Rocky Mountain College of Art and Design and is the founder of SITE Gallery in Houston. His work is highly conceptual and therefore takes on many different forms from what could be considered more traditional ‘sculpture’ to large-scale installation, video, performance, and other sculptural and organizational mediums. Trey’s work focuses on relationships between agency and absurdity, permanence and failure, and the material language of functioning forms. Entropy, futility, humor, duration, stamina, and material or physical exhaustion are central underpinnings to his work.

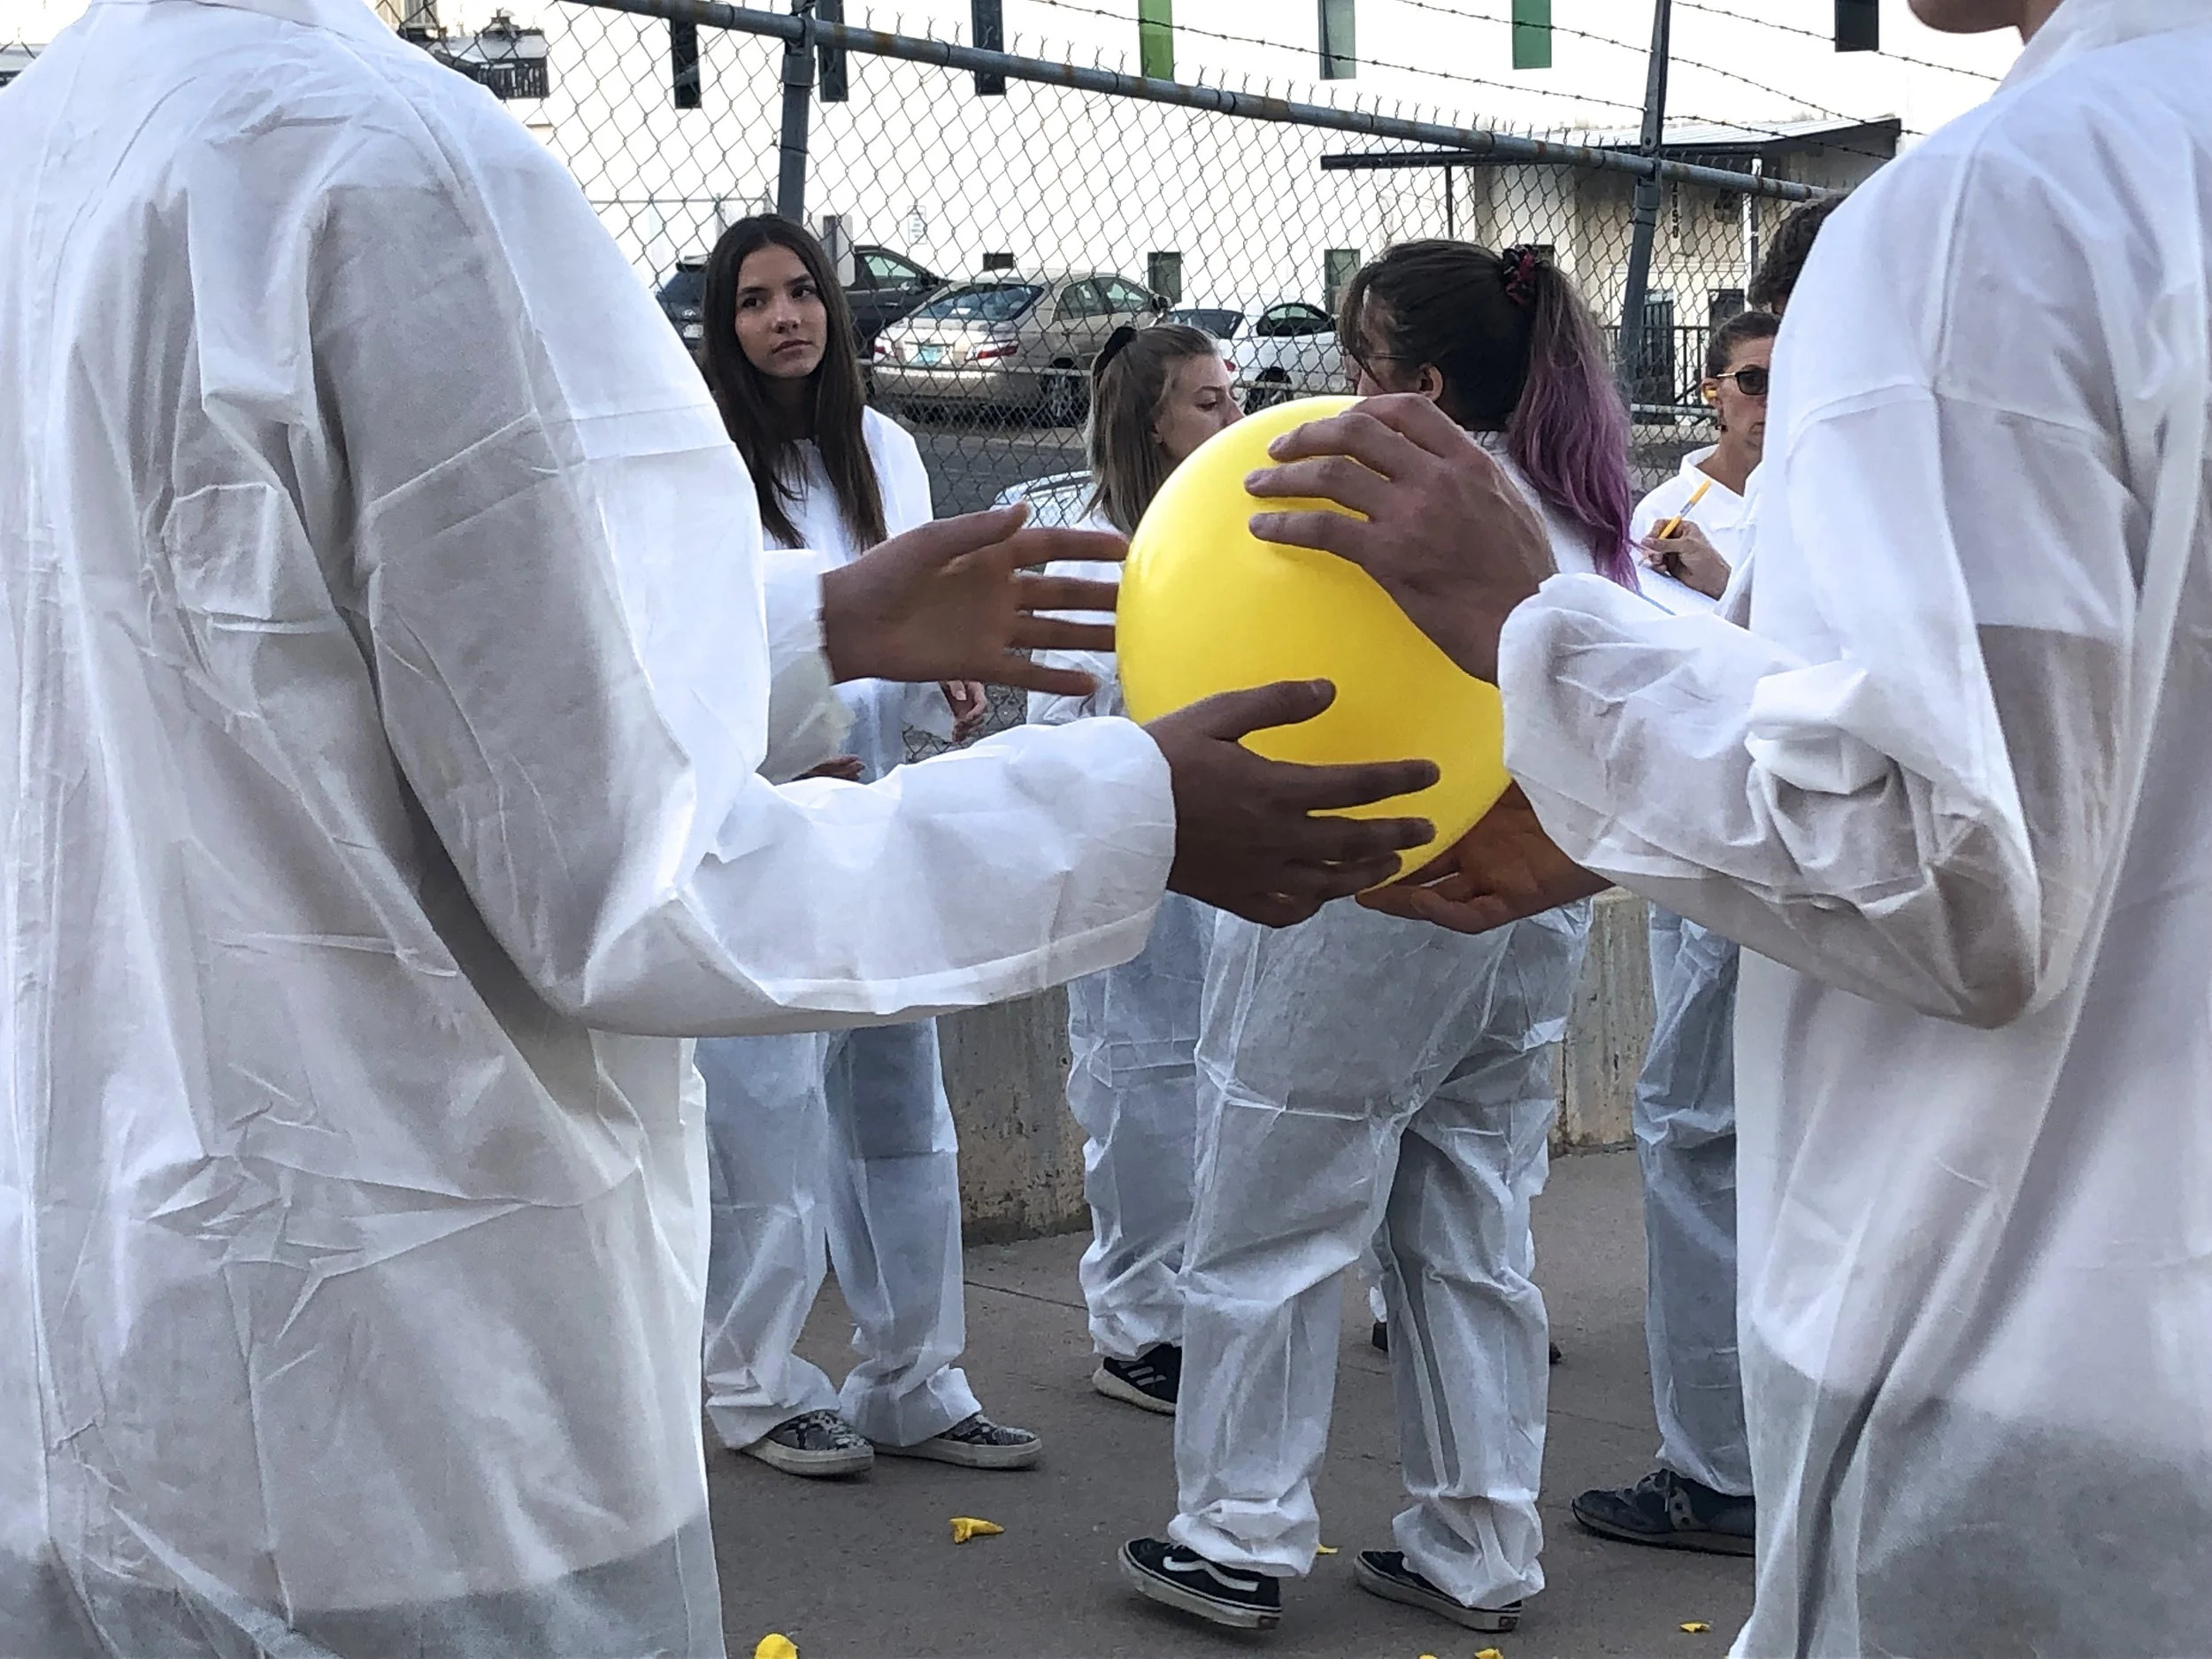
For the last two years I’ve been Trey’s intern, studio assistant, and most recently his “technical advisor,” which is a position we jokingly made up because the ambiguity of what we need to do in the studio resists any attempt at a single title. A job that started as meticulously hand-sanding acrylic and taking detailed measurements of hundreds of inflated yellow balloons has become an opportunity to flex my engineering muscles as his art moves further into kinetics and dynamic systems to create functioning examples of dysfunction and absurdity.

WorkFlow002, 2019 - That’s me with the purple ponytail!

Trey, how do you use engineering as a vehicle to convey a concept? What does the automation of movement add to your pieces?

“A lot of my work deals with repetition, doing the same task over and over until the point of exhaustion or failure. I think of the kinetic systems as performative objects, designed to demonstrate ongoing cycles or work that is seeming undoing rather than doing. The work is ongoing, you can come and go and the work is still there and running, on loop, doing the same thing, or nearly the same thing as when you left it. There is a fine line that these pieces need to walk between functionality and perceived failure, or between effort and perceived failure. Sometimes the work actually fails, systems that are designed to run until failure, and the point of failure ends up being what is shown. However, I am often looking for a system that can reliably perform while appearing to be ready to fail at any time, or perform in a way that conveys struggle or misuse, misalignment.

Designing failure, or designing unpredictability is the task that is driven by the concepts of my work. Designing motion or behavior that will predictably act in unexpected ways, or reliably operate in unexpected ways, or create unspecified results is how engineering challenges my work. The automated movement helps demonstrate the act of undoing, or create unexpected results from seemingly simple and fixed variables. When a person see these systems, or tool, some object that you expect to work a certain way, or is readily relatable or understandable, and then that thing behaves in a way that is unexpected or seemingly unintended, functions in a way it is not supposed to, the underlying fragility of of other behaviors, systems, expectancy and familiarity can also be easily questioned.”

These are the pieces I’ve seen come to life:

Spool/Unspool, 2019

Fort Lewis College, 2019 - photos by Mariah Richstone

Fort Lewis College, 2019 - photos by Mariah Richstone

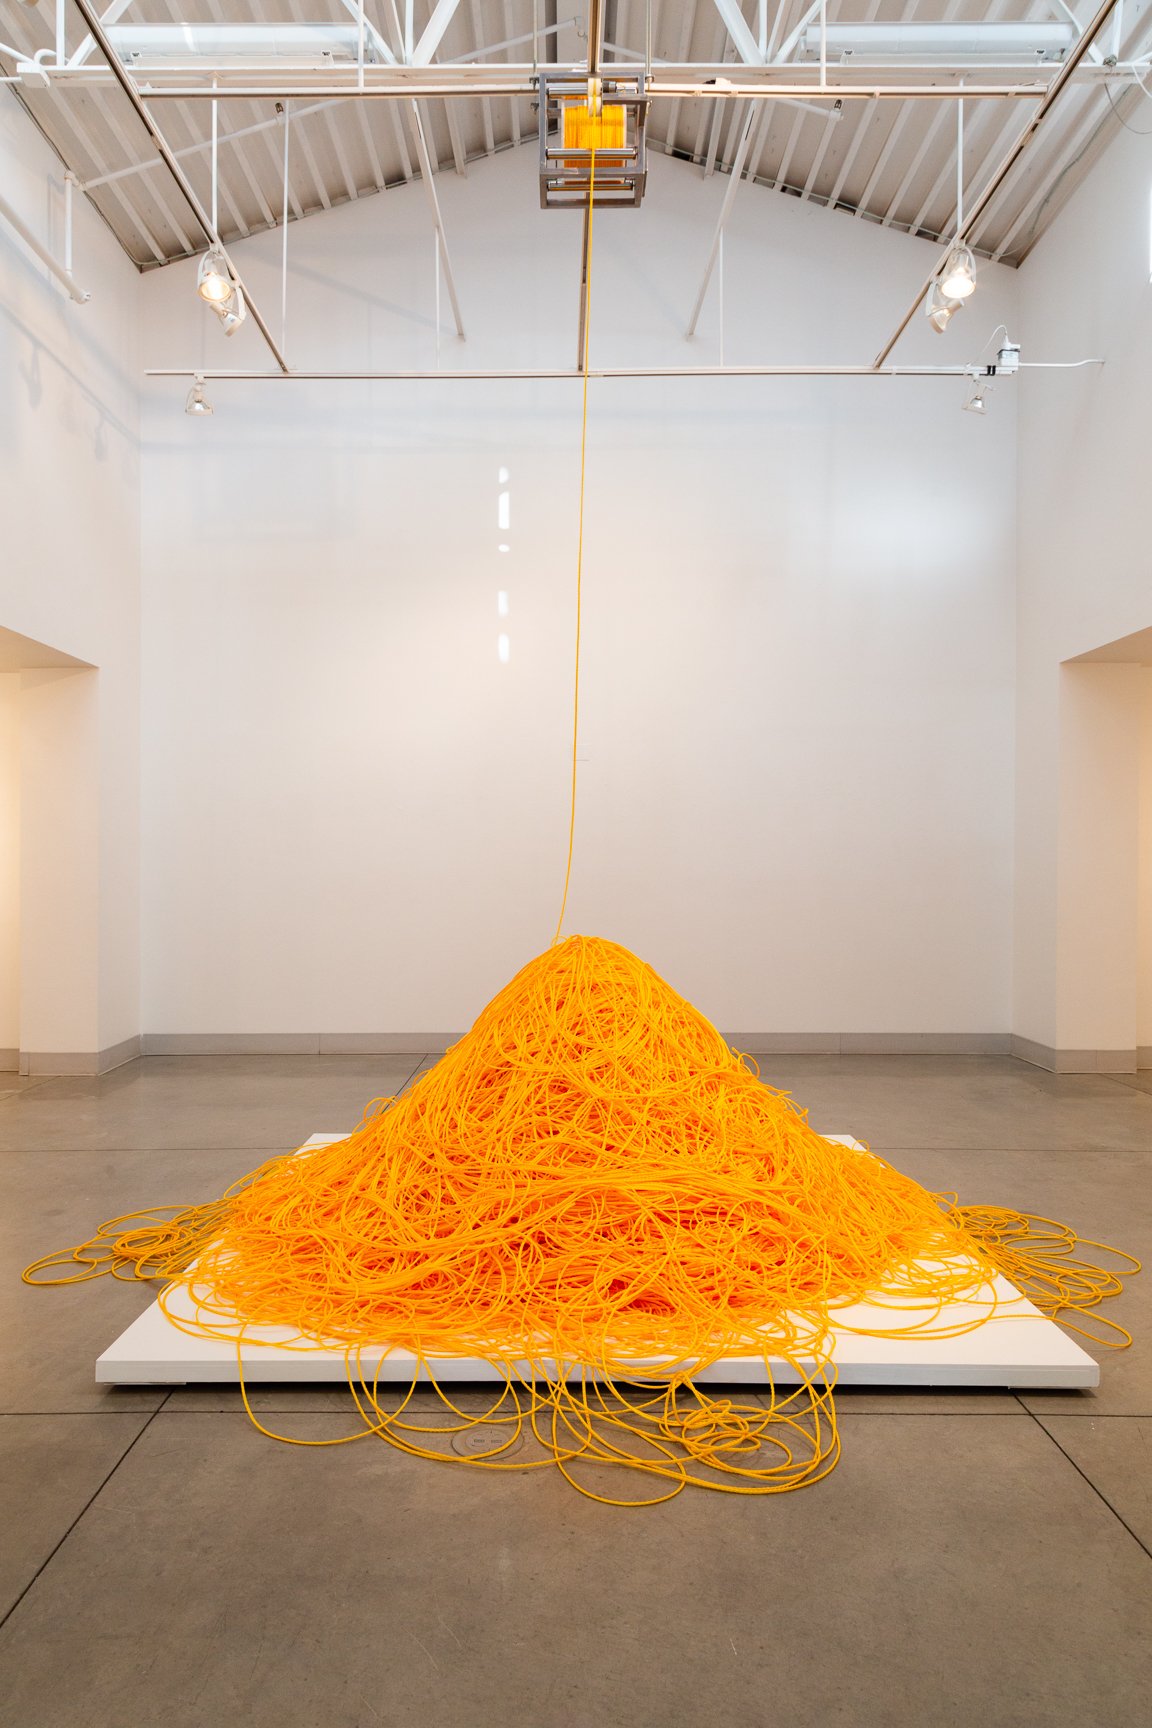
Spool/Unspool is an evolving site-specific sculpture that delivers 36 thousand feet of rope onto the gallery floor over the duration of the exhibition. Spool/Unspool runs continuously, creating a slow transfer from the organized state of the rope on spools to a circumstantial and purposeless heap.

Spool/Unspool was first shown at the University of Wyoming Art Museum as a part of Do, Do, Do, Do, Do and again at Fort Lewis College as a part of Hat On A Hat.

Latent Variability in Axiomatic Structures, 2020

This work explores the potential for chance and uncontrollability within fixed structures and set values. Unexpected compositions and behaviors exist within simple arrangements, and potential future states of change cannot be assumed or predicted. 1+1= 1,000,000. Shifting starting conditions creates the subtle potential for near limitless orientations of forms in space and compositions of sound from sequence to sequence.

Latent Variability in Axiomatic Structures was shown at RedLine Contemporary Art Center.

Lift/Fall, 2020

One By One, 2020 - photos by Wes Magyar

Part of One by One, a group exhibition at RULE Gallery's Denver location, Lift/Fall continuously raises and drops a 60’ loop of yellow polypropylene rope using a cast plastic drive wheel.

Curtain Lift/Curtain Drop, 2020

Entirely Devoid, 2020 - photos by Wes Magyar

Entirely Devoid, 2020 - photos by Wes Magyar

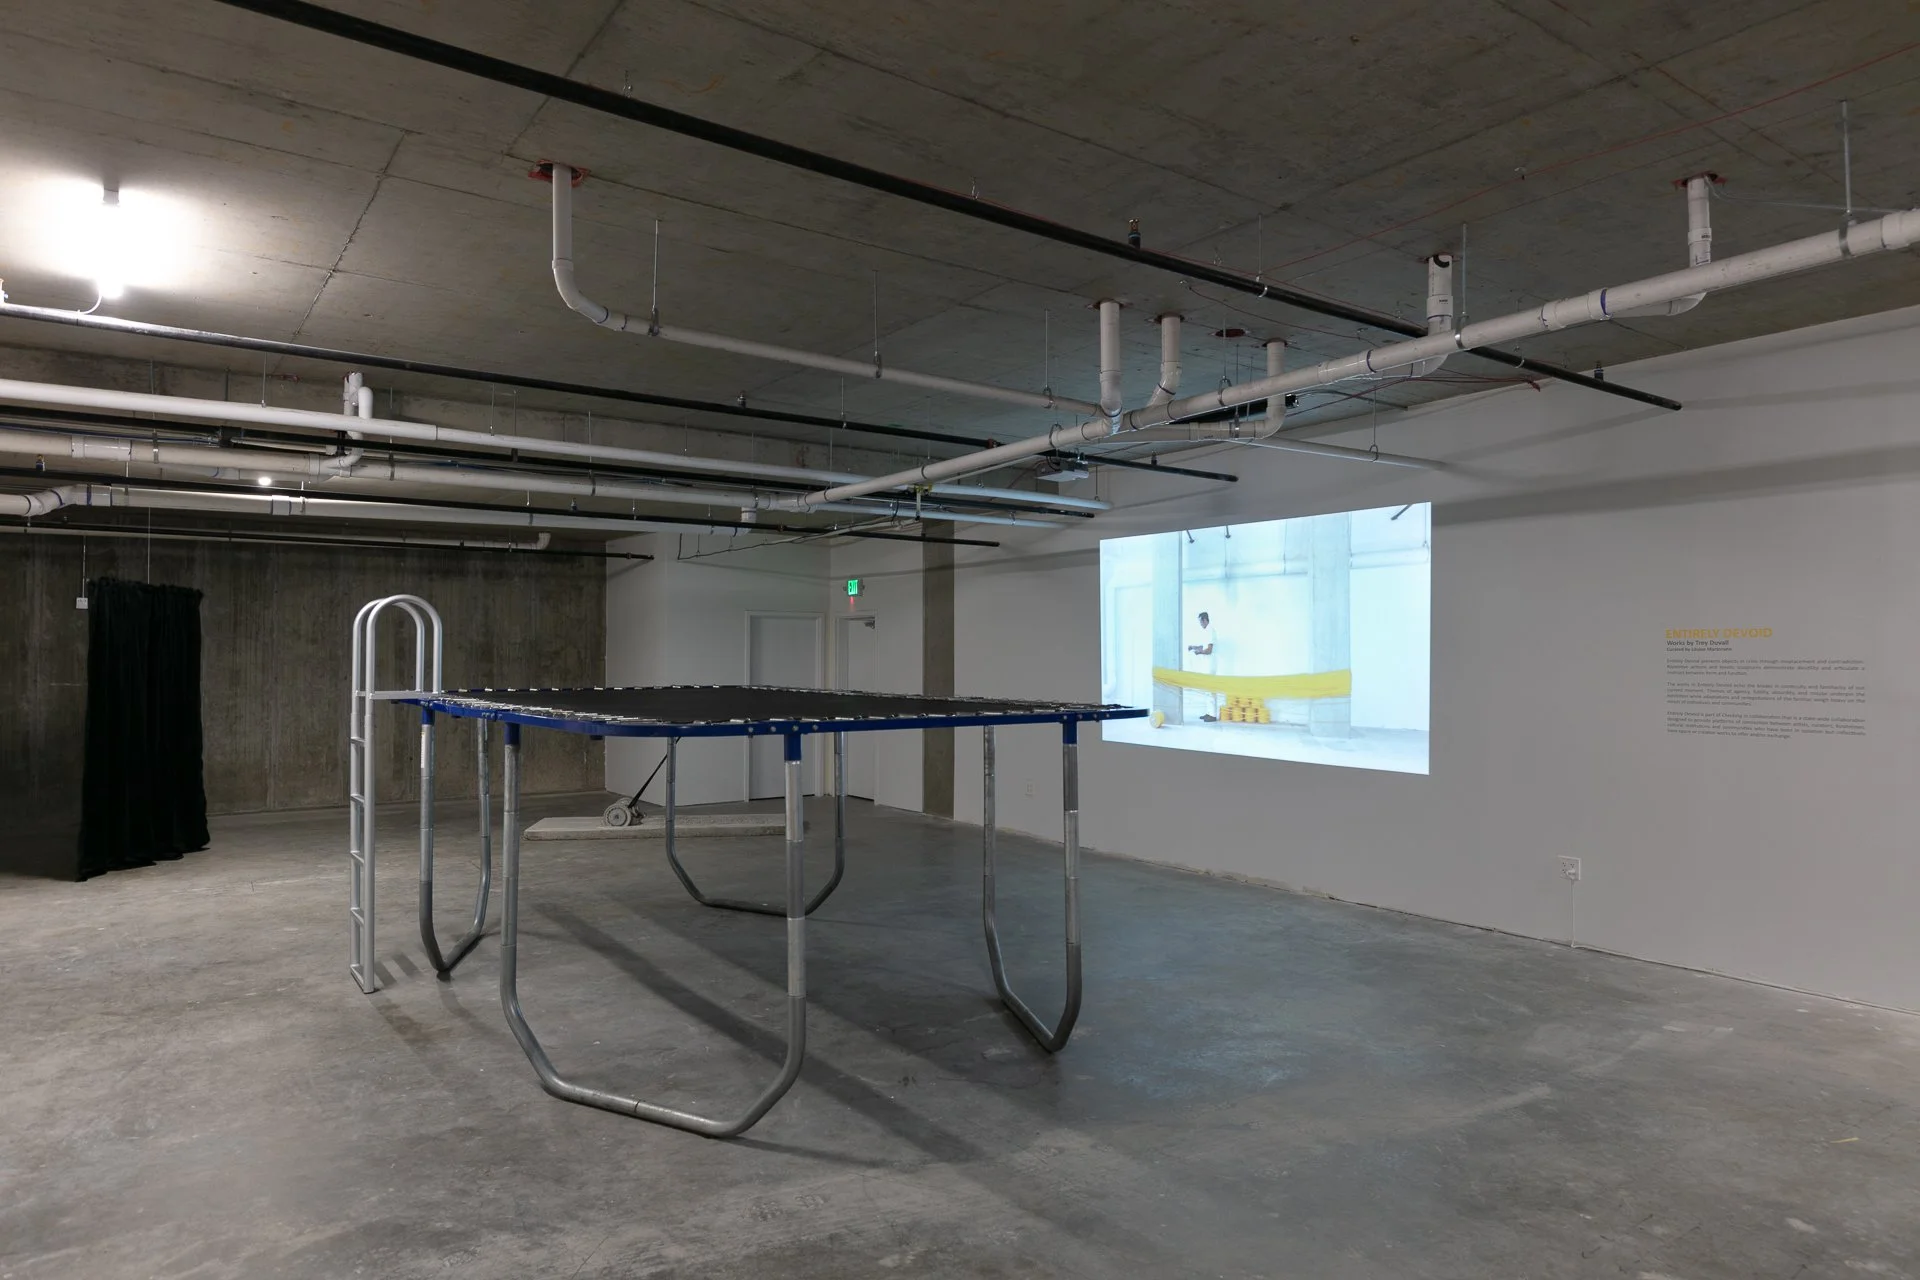
Curtain Lift/Curtain Drop, operates within a system that is contentious. As the curtain labors upward, the anticipation of reaching the top rises in the viewer, culminating in a stagnant curtain. This implied stability is ultimately withdrawn as the curtain falls and the process begins again, becoming both untenable and unsustainable.

The Denver Post reviews Trey’s show Entirely Devoid here.

Process

Once Trey comes up with an idea he works on the mechanical design and I design the circuitry and write the code. I’d be lying if I said being a SparkFun engineer didn't give me a significant advantage to designing these electrical systems. As we know, SparkFun Electronics caters to the inventor at home, so of course I’m biased to our products. Here are the products we most generally use:

https://www.sparkfun.com/products/15123

https://www.sparkfun.com/products/15451

https://www.sparkfun.com/products/retired/12262

https://www.sparkfun.com/products/15664

Though the mechanics and movement of these pieces might seem really similar, the system design is tailored to the individual piece and the concept it conveys. Our system has been evolving and improving from one piece to the next. Speed, movement, material, sound, and overall experience are intentional to Trey’s art and therefore lends itself to nuance in the design. No two art pieces are the same.

As a rookie engineer, my work with Trey has definitely put my engineering textbook knowledge into practice. I’m constantly learning new things and building up my self-confidence as an engineer and artist. Probably the most challenging part of this work has been sourcing the correct motor. DC, AC, stepper, servo, gear, brushless, brushed: there are so many types of motors! I’ve also had to dust off my physics kinematic equations to calculate torque. Turns out you need a lot more torque than you might think to lift or move things. These systems also require a lot of stress testing and need to be easy to use. They get installed in galleries where they operate during business hours (often eight hours at a time) and are handled by curators or preparators who have differing levels of comfort with the systems. What is installed in the gallery needs to be simple to operate, more or less flip on and flip off. Generally, timing is key to a Trey art piece so that takes some coding finesse. And the most recent engineering feat we conquered is the free fall (as seen on Curtain Lift/Curtain Drop), but I will keep the details of how we did that close to the chest, but believe me, it is really fancy.

Curtain Lift/Curtain Drop - here’s a little video I got when testing free fall in the studio

What’s next in the studio? Trey and I are currently working on several new pieces and we’re branching out to use stepper motors. We are also in the process of helping Jaime Carrejo with a few pieces for his upcoming show at the Museum of Contemporary art in Denver. Stay tuned!