
Drawings
From the Adafruit stepper motor datasheet
Process
1. Cardboard prototype
2. Mechanism components
3. Laser cut components
3. Sand and paint wood
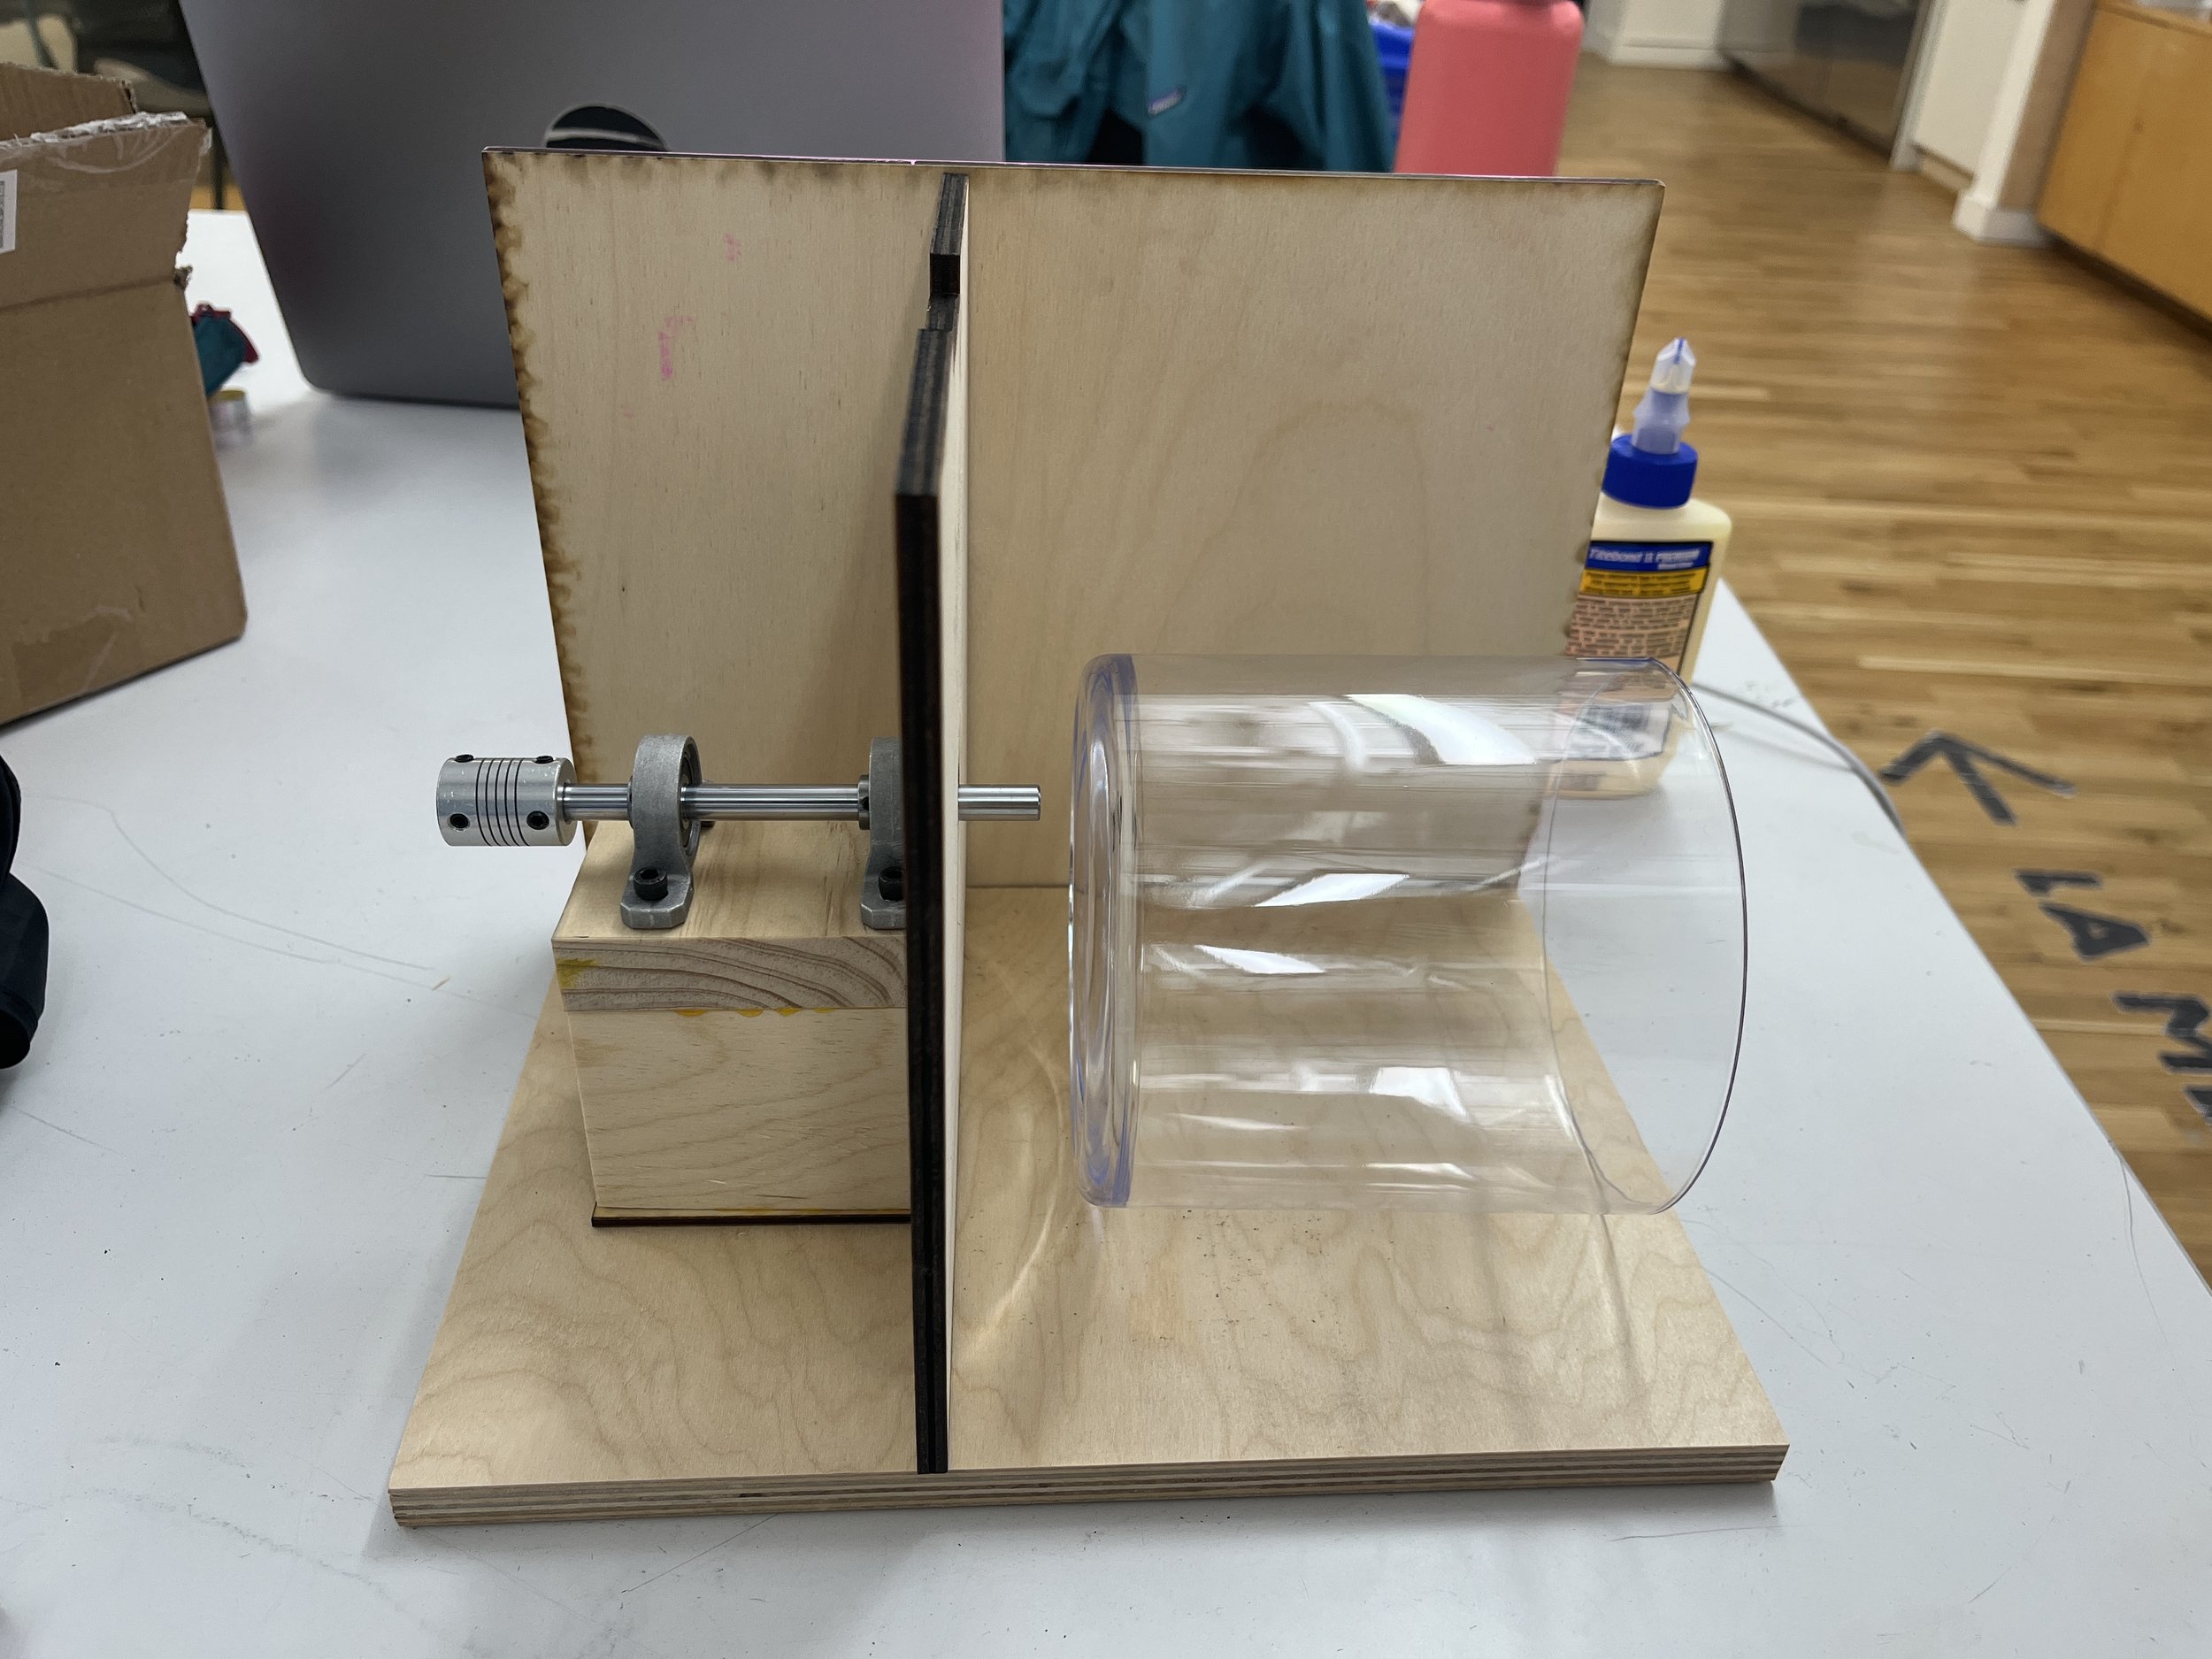
4. Construct mechanism
Mechanism top-down
5. Check that everything fits as expected
itp: accessibility

From the Adafruit stepper motor datasheet


1. Cardboard prototype

2. Mechanism components

3. Laser cut components

3. Sand and paint wood

4. Construct mechanism

Mechanism top-down
5. Check that everything fits as expected
My current apartment in BedStuy admittedly does have a washing machine. Actually it is a combined washer and dryer, which I didn’t even know existed before, so it does neither thing any good. Believe it or not, I was a laundromat girlie in a past life. I would wake up early on Sunday mornings, pack up my textbooks and a cup of tea, and pile my stinky clothes in the car and that’s kinda what I did last weekend.

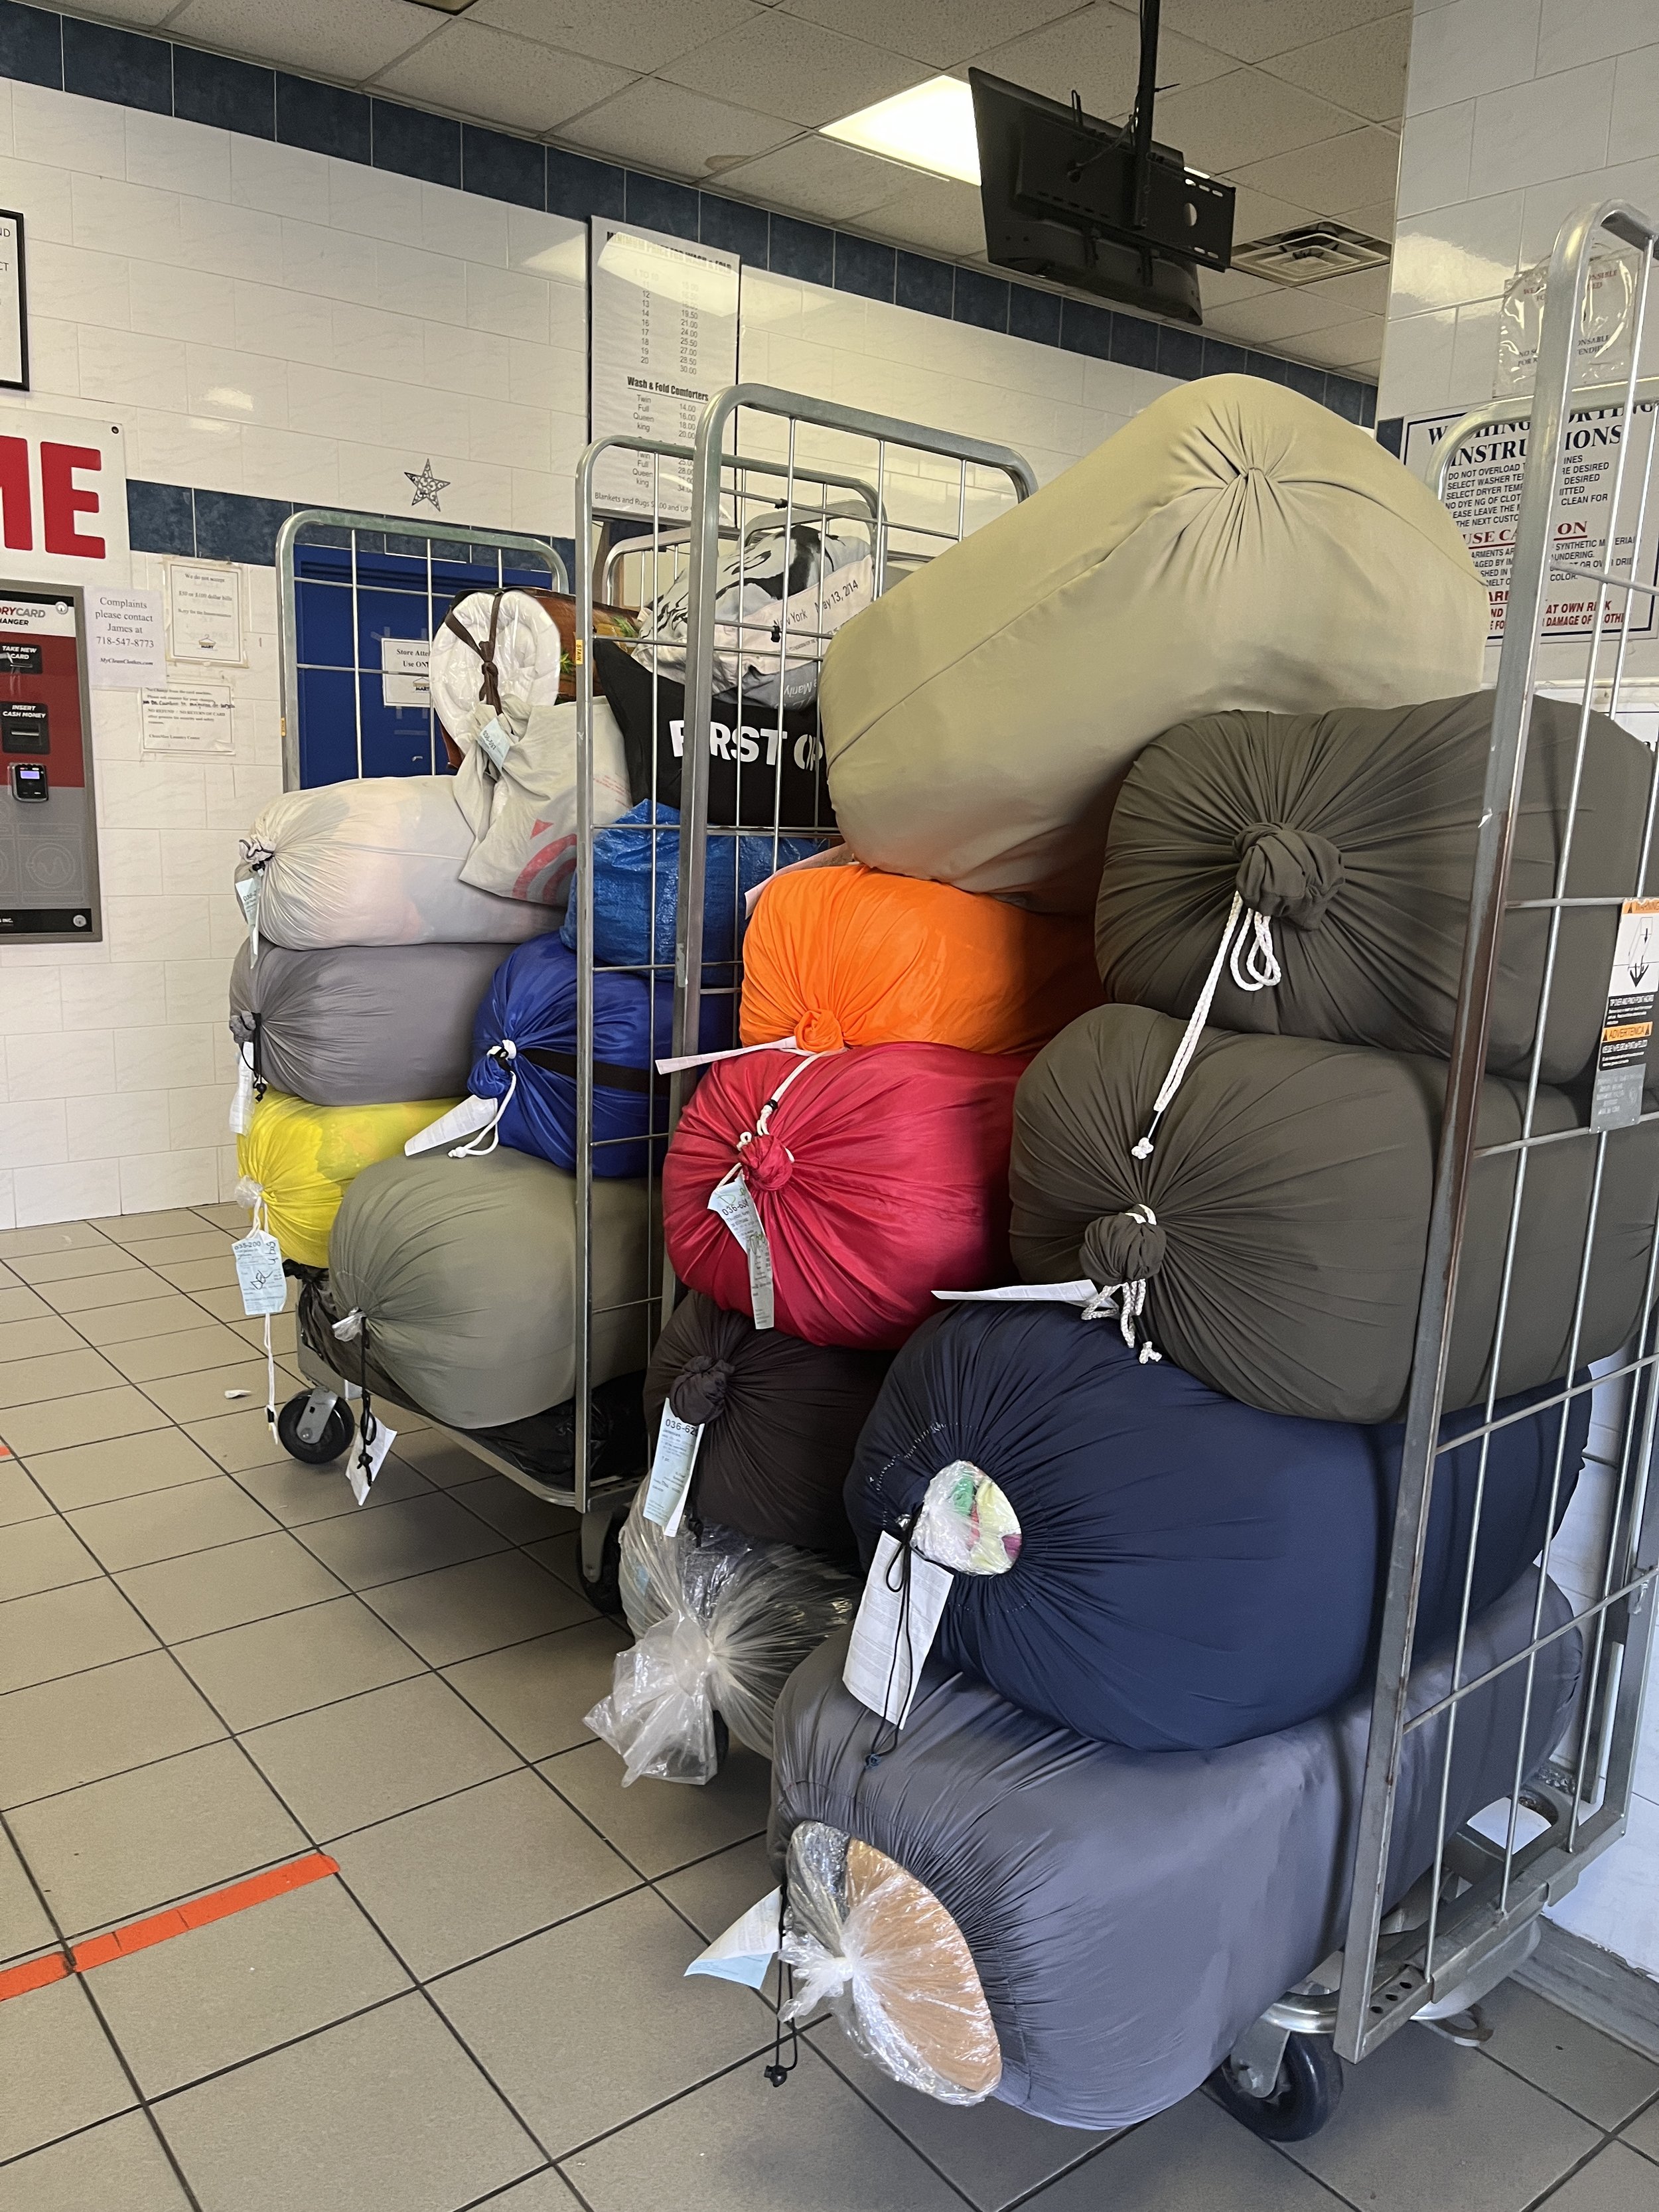
Going to the laundromat is really not that bad. It’s kind of a meditation, it even feels like you’re closed off from the outside world in your laundromat bubble. There’s a sense of collective: everyone is equal, we’re all human and need clean clothes, and all you can do is wait. I think there’s also a feeling of trust. Naturally, I couldn’t get the first washing machine I chose to work but the people working there were super helpful and got me going on another machine. People are also not going to touch your clothes because what would they want with that?!


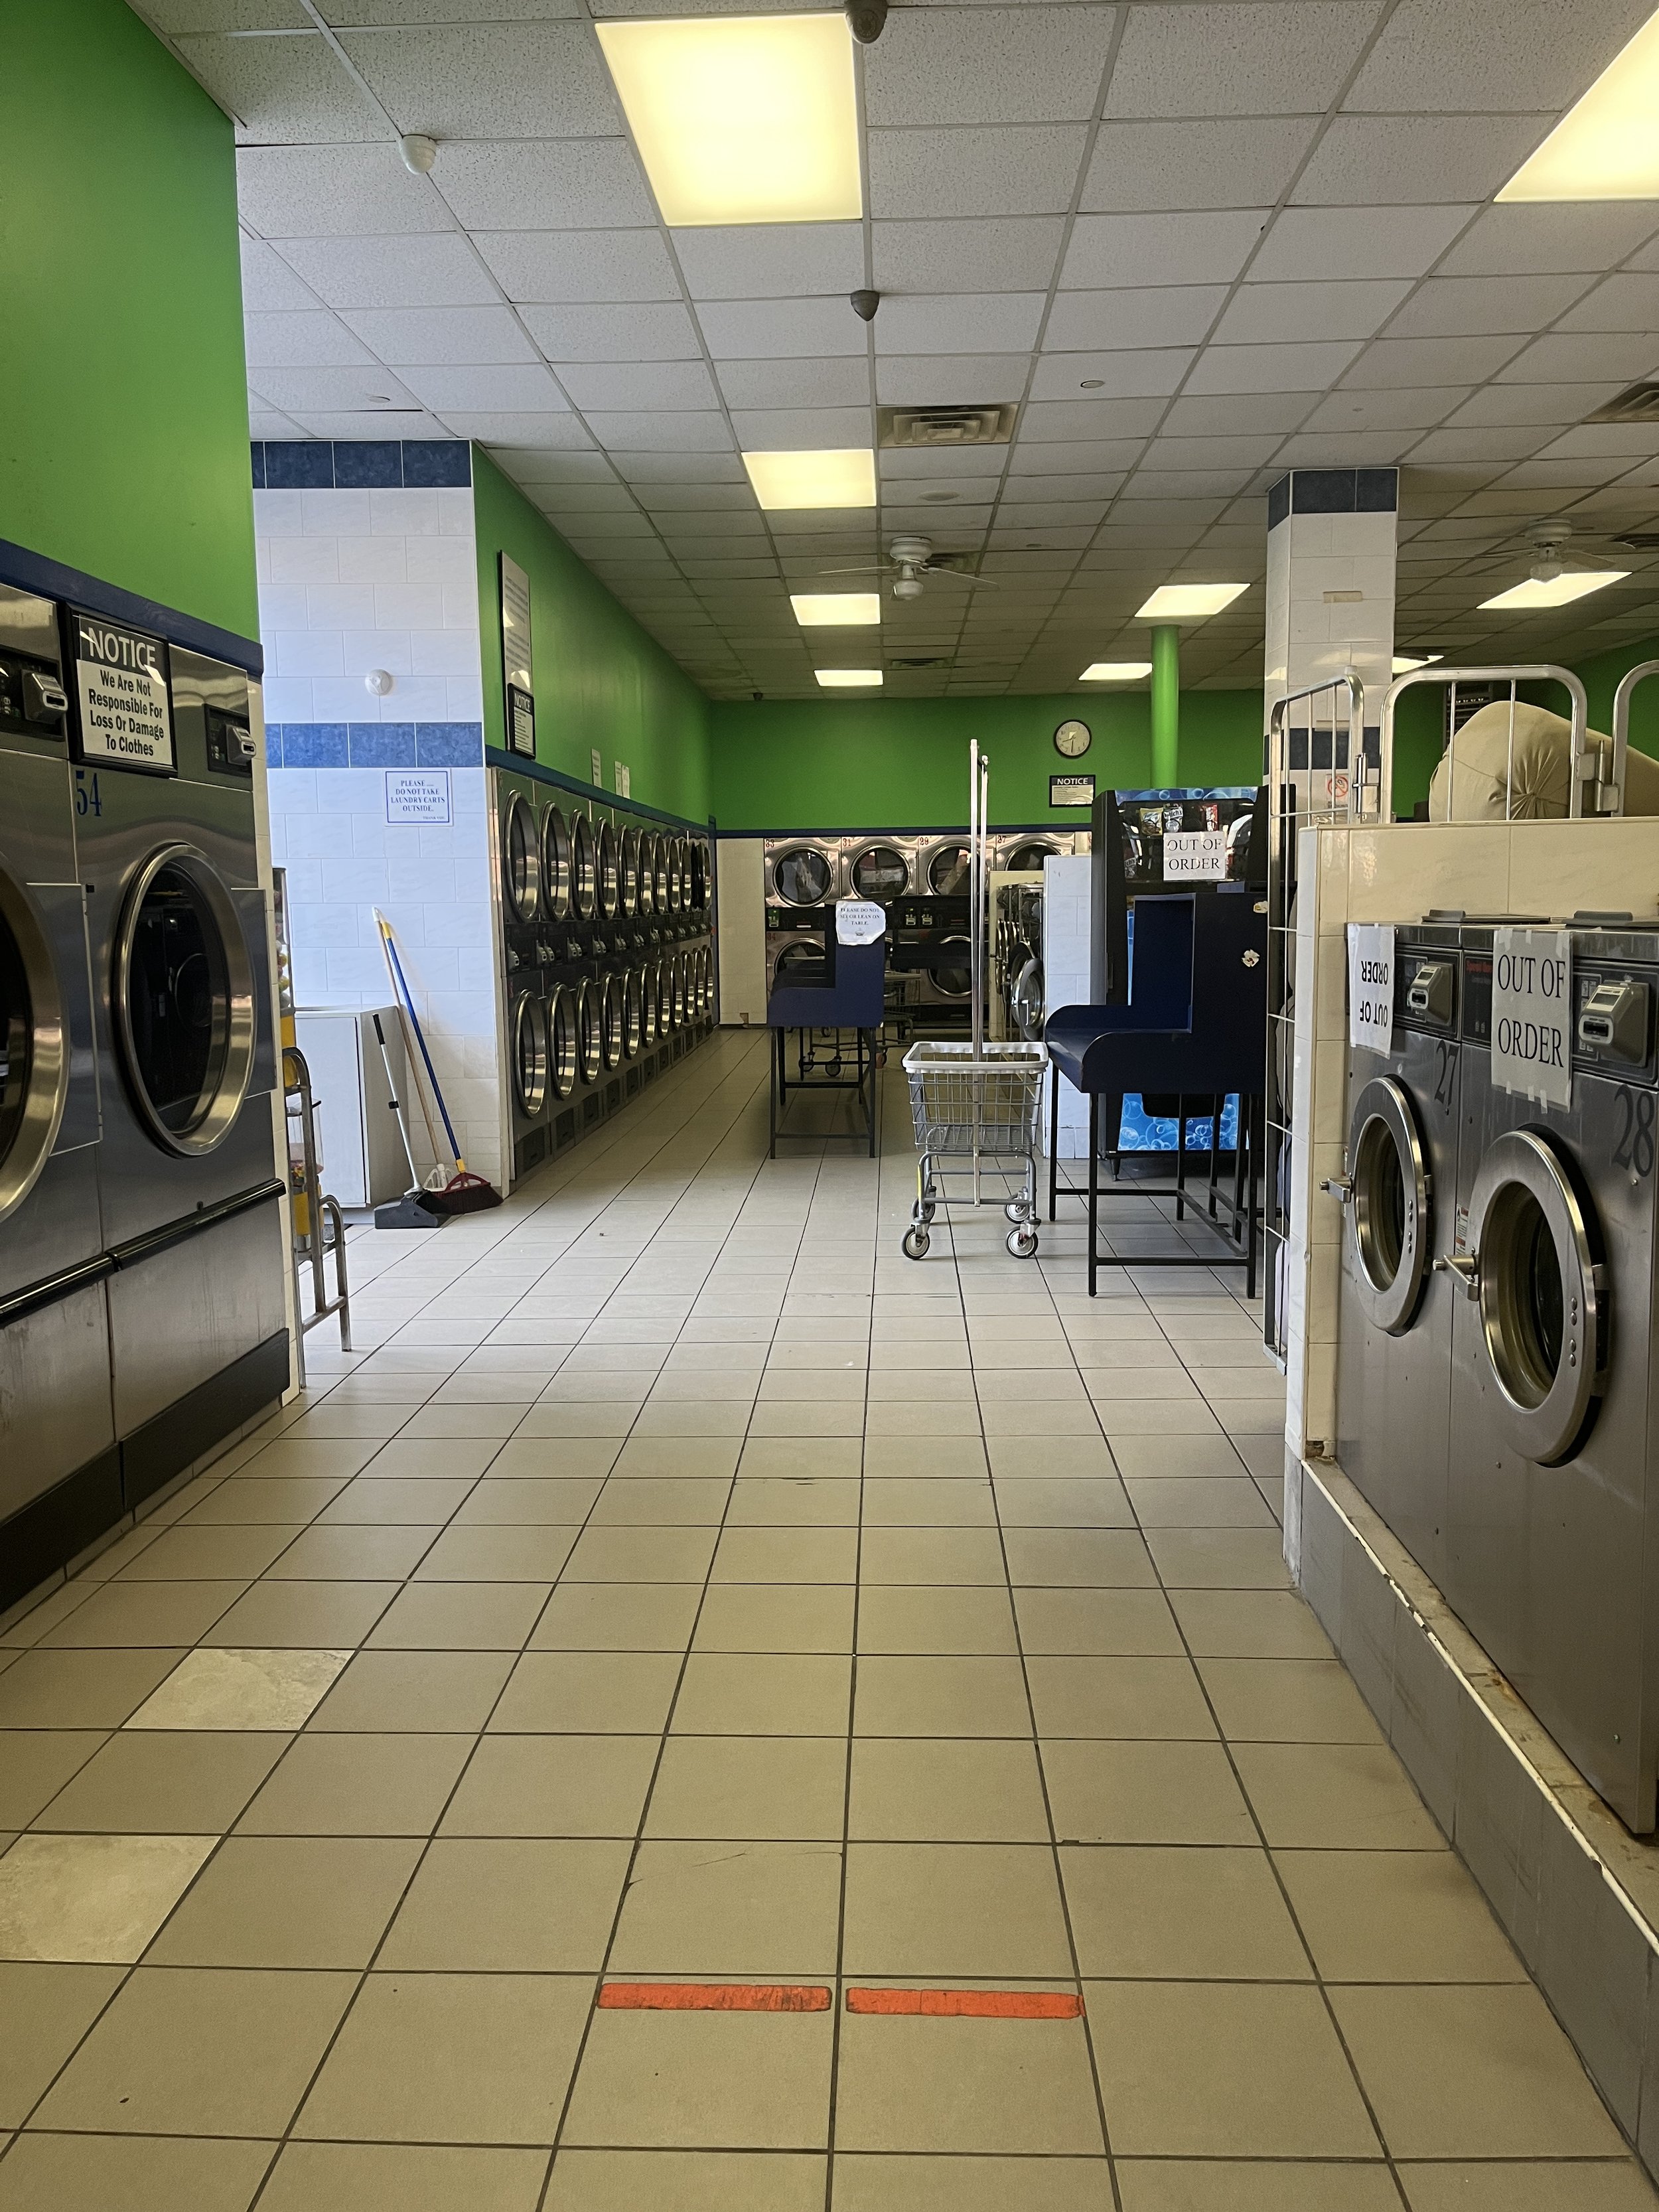
My laundromat is close to home. Close enough to walk with my basket. My laundromat is mostly women and young children on a Sunday morning. My laundromat has lime green walls. My laundromat has so many machines, many out of order from hundreds of cycles. My laundromat doesn’t have a lot of space to sit and relax. My laundromat has a really beautiful mural on the outside, a mother holding her baby.


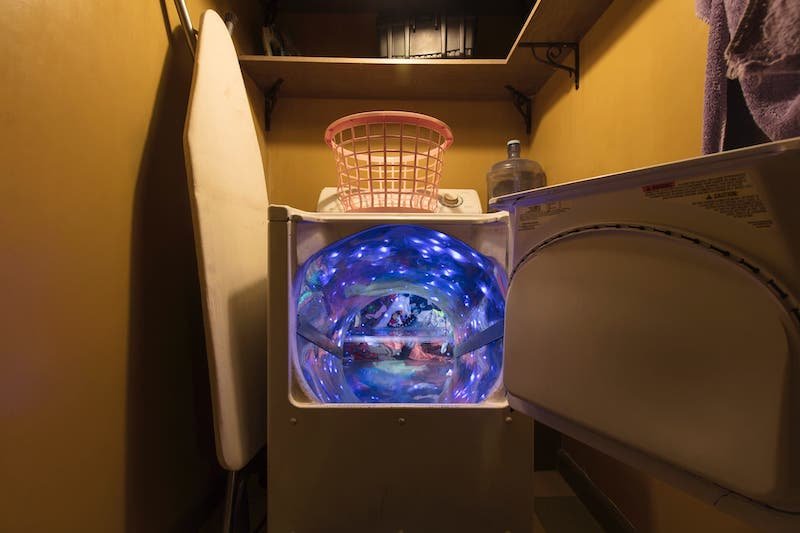
I want to create a table-top washing machine portal, think washing machine + kaleidoscope. I’m really inspired by Meow Wolf’s dryer portal and I can’t stop thinking about this reel I saw months ago. @marinaminis makes some really captivating and complex miniature scenes.
My portal may ask or answer the following questions: Where do the clothes go when we wash them? How about lost socks? How does it feel to be in the washing machine? Is it an exclusive club? Underwater(wear) dance party? Does our time go down the drain?
A literal dryer portal at Meow Wolf Santa Fe
@marinaminis on instagram

Here’s my initial sketch, no water needed. I really want to tie in some elements from my laundromat, maybe use the same colors as the mural. I’ve already met with Phil to discuss the mechanics of this project so here are some next steps:
Find the clear washing machine drum
Order the bearing and rod mechanism for turning the drum (5mm motor shaft)
Order neopixels and stepper motor driver from Adafruit
Fabricate the turning mechanism and electrical system
Find glittery stuff that will spin around in there
Build box out of plywood (acrylic window, reflective inside, hinged doors)

I am honestly really missing my old pottery studio Mudslingers in Lafayette, Colorado. I consider it a curiosity portal because once I go inside the studio it’s like the outside world disappears for me. It’s a really inviting environment, super cozy, and just oozing with inspiration and potential. The people there are all coming together to work toward similar goals. The work is independent and self-directed but there’s a strong sense of community and connection. In a pottery studio you can pretty much be certain that you’re surrounded by other creatives and even if you don’t get a chance to talk you know that there’s some common ground there.
This might be an even more intense portal for me personally because when I’m trying to make some pottery it requires HARD focus. It is something I need more practice with and does not come naturally to me yet. I think the focus is intensified by the number of steps it takes to complete a single piece of pottery and my personal need of achieving some sort of Priyanka-standard of acceptable final product haha😅. The pottery portal also spans a long period of time because it can take multiple weeks to bring one pottery piece to completion.
The mind-spirit-body connection needed to create a piece of pottery brings the portal into full effect; you need to put your full body into forming a piece. My curiosity is always piqued in trying to make sure the pot is pulled just right or in the concentration needed to trim the dried clay precisely. I also think the chance to get your hands dirty and clay in your hair gets gets you fully immersed in the portal. We’re always taught to keep things clean and I’m usually so preoccupied with staying within the lines of life but all that falls away when you’re in the pottery studio.

Baby Priyanka circa 2019

A really good movie seen at the theater — you leave not knowing what day or time it is.
Photo print dark room. I think the darkness helps with channeling focus and making it more portal-like.
Meow Wolf because … duh!
Sewn circuits - I experimented with these last semester and they really just took over my whole brain! All I wanted to do was make more cute but functional circuits
Aquarium - ethically not great but awakens my inner child and curiosity for a whole other world existing on our planet
Painting - this sometimes feels like time travel to me. Starting a new project can be really hard, but once I get into it there’s nothing else I want to do but finish the painting I’ve started!
Traveling somewhere new and/or being a tourist
Looking into people’s apartments while riding the subway
Kaleidoscope !
Partners: Eadin Wang and Vera Zhong

Initial brainstorm of many different ideas
For our STEM Accessibility midterm we were tasked with creating a STEM experience for a child in the second grade. The experiences were developed in groups and all four projects were displayed together on one display.
We have been learning a lot about teaching pedagogy and methodology. Here’s a quick overview of the concepts we’ve covered in class so far:
Monetssori = child-led activities (“work”) in classrooms with children of varying ages and teachers who encourage independence
Instructionism = teaching by instruction
Constructionism = learning by making
Socio-cultural learning = development is influenced by social interaction, language, and culture
Sensory = learning through active engagement of one’s senses
It seems pretty obvious that children (and people) learn better from experiencing and doing rather than just listening or watching, so that was our aim with this collaborative display.
I have been helping assist Jeff Feddersen’s undergraduate Energy course this semester and we’ve been building up this circuit that transforms kinetic into electrical energy. By turning the shaft of a motor it becomes a generator which outputs an oscillating signal. If we create a circuit that pipes that sinusoidal signal into a rectifier, we get a DC output we can use to power stuff, like LEDs! With some added guidance from Jeff, I was able to modify the circuit to incrementally light up an LED at a time and added a large capacitor to store the generated energy. This cool video Jeff made really illustrates the power of kinetic energy!
Now that we had identified an interesting STEM concept it was time to think of how to make it into an experience. It seemed pretty obvious that we needed to put a handle on the shaft of the motor to make it easier to turn, but how could we motivate children to WANT to turn it? An initial idea I had was attaching the handle to a gear that would also turn when a child turned the handle. Maybe there would also be other gears in different sizes that the child could install and see how the movement and speed changed with different types of gears? We ultimately decided against this idea because it seemed like too many complex concepts at once. Why were we including the gear math? What did it add to the experience and the concept we were trying to teach?
We decided to put our circuit in the context of stars. Constellations are like circuits in the way that they need to be complete loops, every star counts. With this added context, the LEDs became stars and we were hoping that the child would be motivated to try and light them all up and complete the constellation.


Initial design and schematic

Breadboard prototype
Though I had the circuit prototype working weeks in advance because of my involvement in that class, the build was rushed because our portion of the display was completed in one day. I didn’t really get as many process shots as I normally do. Mostly it was a lot of painting anyway, so not much to look at.
I think the main thing we struggled with was the physical display. The shape and size was defined and designed by our teachers. The shape was unconventional and multiple groups were sharing the same panel of wood so it took some logistics to get the display assembled. Seeing the finished display, I see the vision now! I do really like how it pops off the wall and how the different sections come together in the middle panel.
All we had really planned for was the constellation. We didn’t realize how big of a space we were given for our experience. We had to think on the fly how we were going to use the extra space and what texts/words/instructions we found necessary. I wish we had taken more time to craft the wording and design of our experience because we’ve learned that those kinds of things can be really important to learning and spending time with an object or activity.

Circuit glued to the back of the wood panel

Painted constellation with LEDs


We had 2 sessions of 3 kids total come in and tryout our display. Part of the assignment was to make a rubric and evaluate how the child interacted with our experience and understood the concepts being exhibited, but I think we were all burnt out in the end so I didn’t do this too officially.
In summary, the first session had a participant that was a bubbly and sociable girl. She had quite a bit of energy and seemed excited to get all the LEDs to light up. The second session was two siblings who were more reserved and their parents stayed and watched them. They were more hesitant to go crazy with turning the handle.
The main thought I have for how our play test went is that we designed our experience to only do one thing, there’s only one way to physically interact with it, so the children didn’t spend as much time with it as the other experiences. I’m not really sure if that’s a good or bad thing. I’m also unsure if made our teaching approach less effective. Did they even clock the change in energy? I’m not sure kids brains think like that. Also after the first session, we decided to add the muscle and lightbulb graphics to sort of illustrate the kinetic to electrical energy transformation more clearly. I’m unsure if the kids even noticed, but it was a relief to me to have the concept outlined on the display.
Overall, I’m really proud of our STEM experience and our whole class because the I think the whole exhibit looks so good and like a professional school bulletin board!
The micro:bit is a “pocket-sized computer” and educational tool. It’s comprised of many different sensors including an accelerometer, temperature sensor, light sensor, LED array, speaker, buttons, compass (magnetometer), touch sensor, sound sensor, capacitive touch button, and radio. I’ve played with one before but did not know it had so many great features. You can use the web editor MakeCode to visually write code and upload it to the micro:bit. The homework was to create three children’s toys with our micro:bit’s.
The site showcases a lot of documentation and fun examples to get you started coding. I went through quite a few like sun shine, dice, Farenheit thermometer, and reaction timer. Lily and I also tried out the radio functionality between our two micro:bit’s and we found they have a range of almost the whole ITP floor! Below is some of the code from my explorations.


The idea for this toy was to teach photosynthesis by “growing” (spinning) the flowers when the light sensor was uncovered and receiving light. The flowers should stop “growing” when the light sensor is covered. I used my multimeter to check that my logic was working but the motor wouldn’t turn when connected to a digital pin at 3.3V. The motor turned fine attached to the 3.3V pin itself. I really have no idea why this would make any sense…
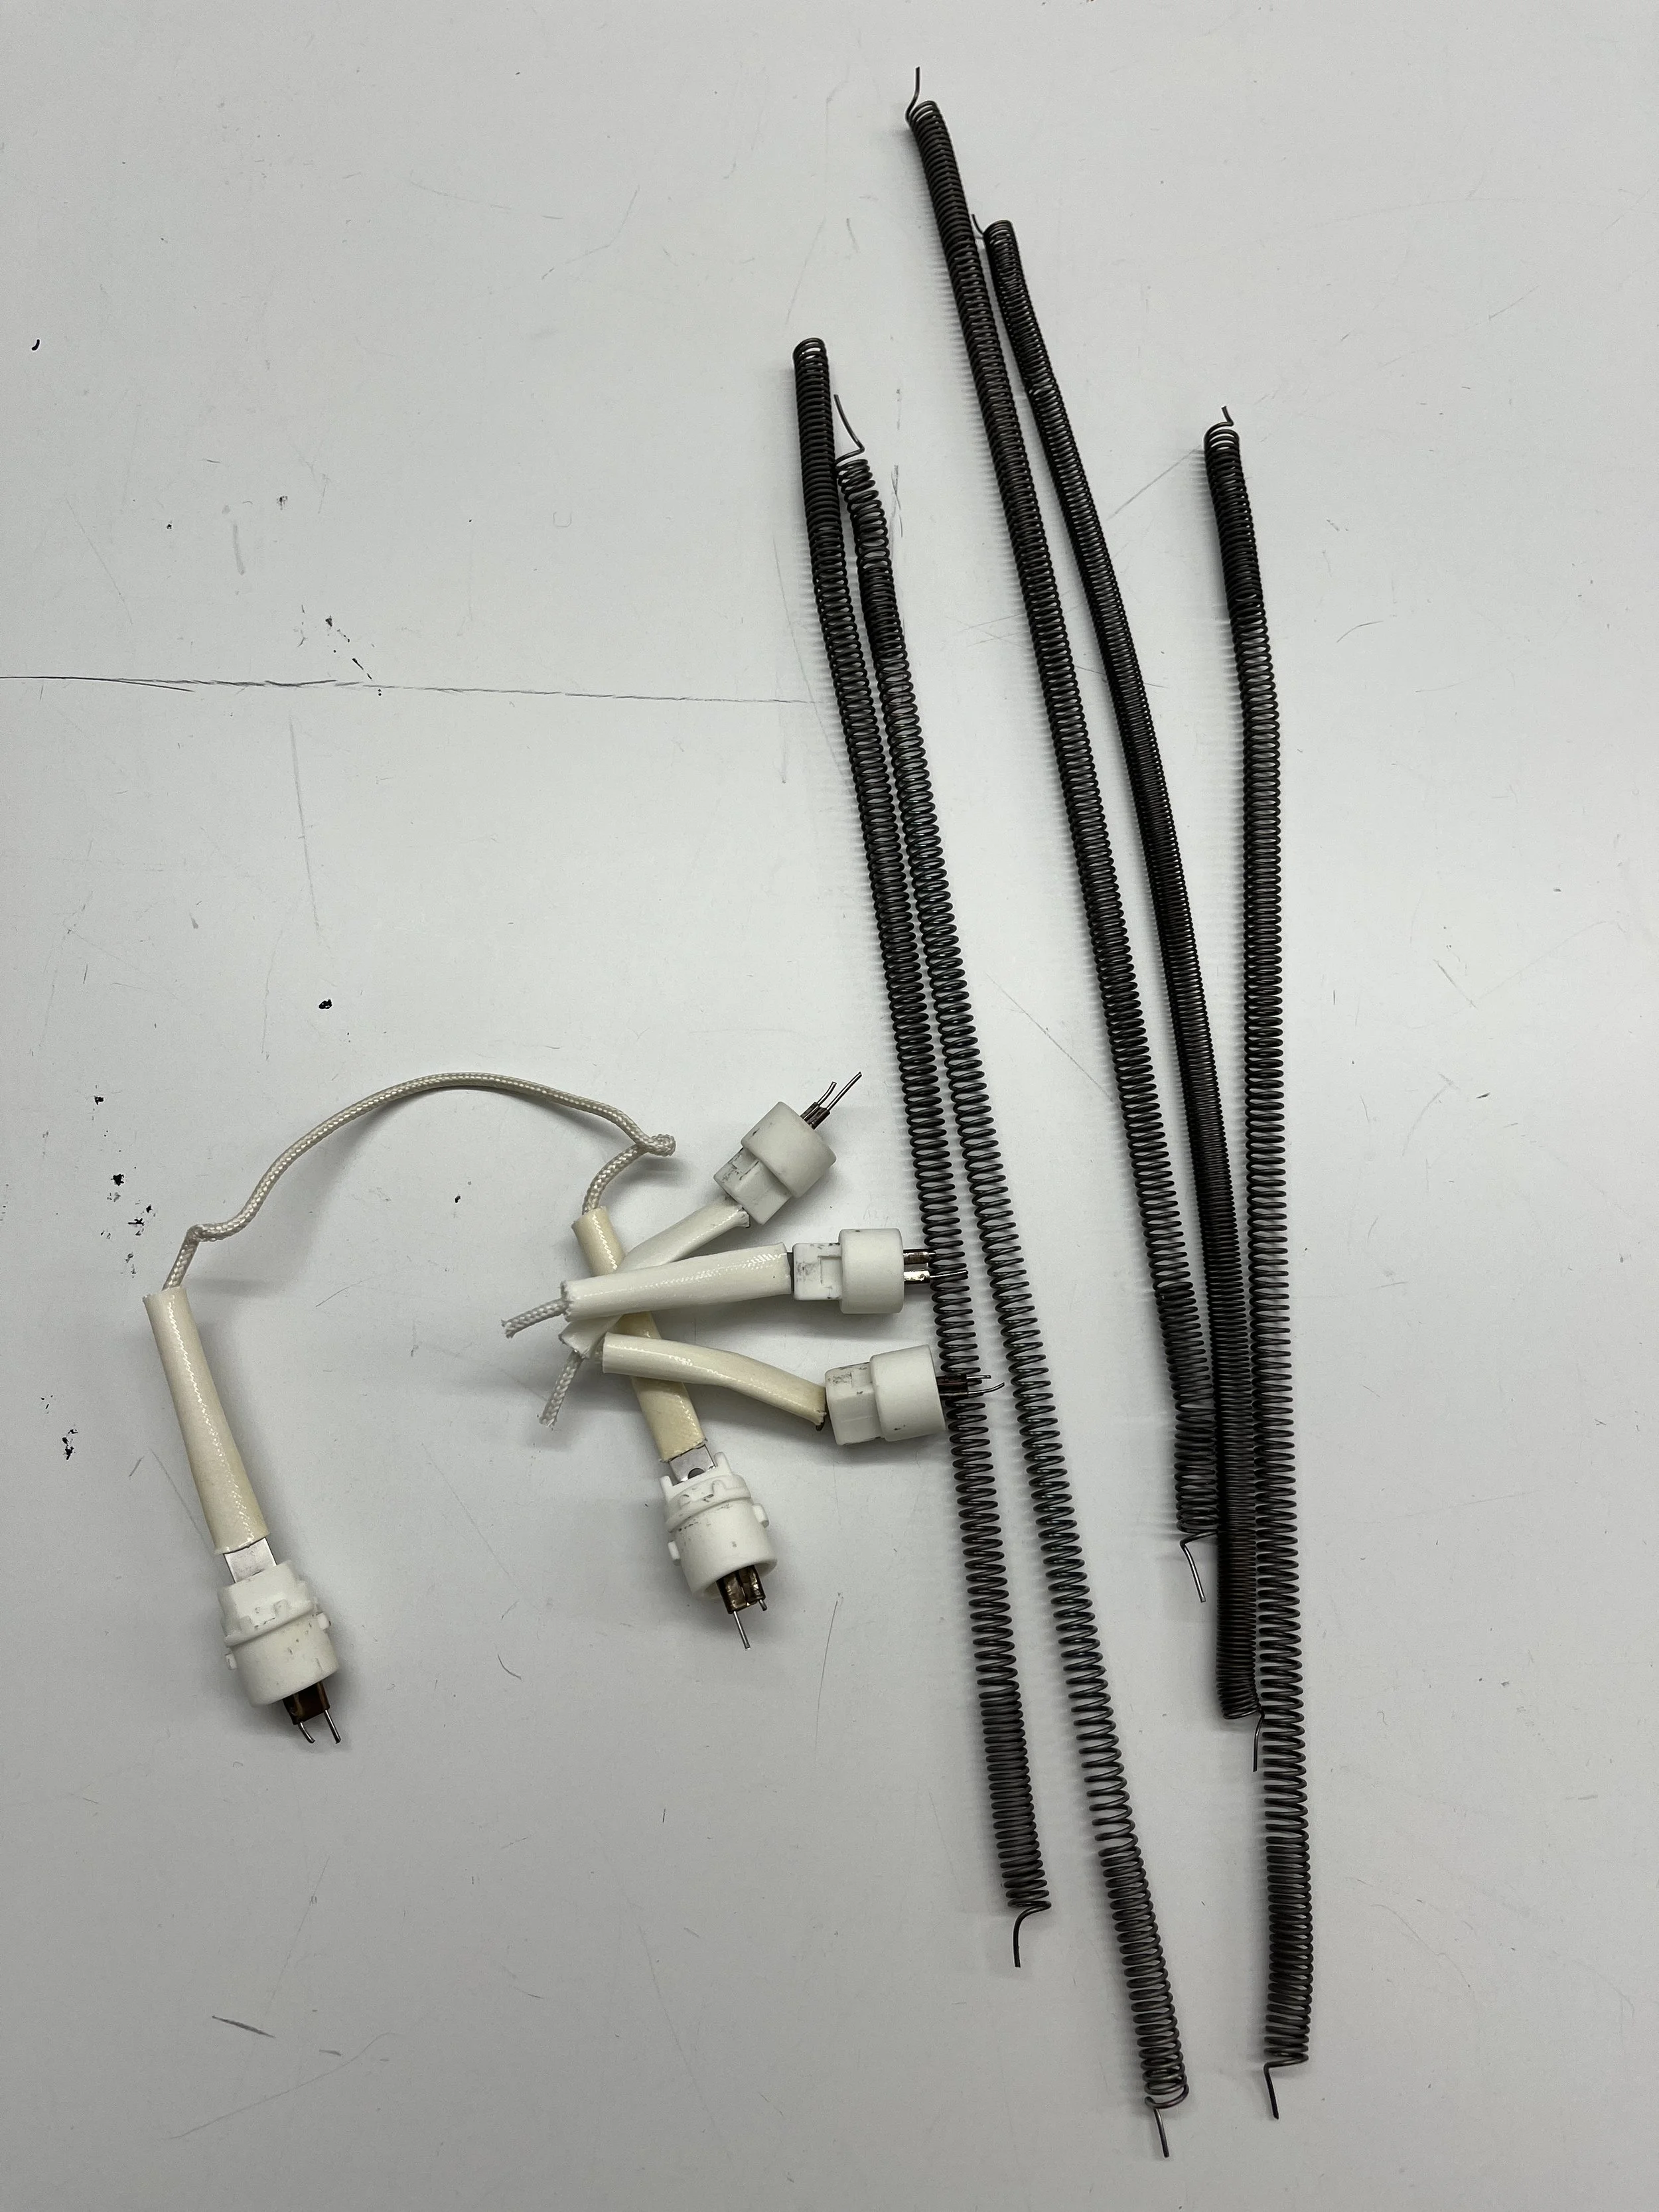
Found these springs on the junk shelf. Chop the heads off!

Lily shared her pink paper with me!

Cut into 5x5 inch squares for some origami.

Folded origami lilies in honor of Lily!

Hot glue the flowers to the springs.

Hot glue melted the plastic cup so I made this cardboard reinforcement to glue my flowers into the cup.

Ta da!
I created this really simple toy in which the frowny face turns into a smiley face when the hands are touching each other. Not sure it teaches an aspect of science tho.

In hypercinema last semester we followed a tutorial to make a “Roll a Ball” game in Unity. I decided to make a similar toy using the micro:bit’s accelerometer. As the child tilts the micro:bit the lit up LED changes positions on the screen. I referenced this code, but customized it to be more granular. This toy could teach children the concept of gravity.

I'm choosing to analyze my soldering iron which I inherited from our WFH-era while I was working at a small tech company.


The iron itself is dark blue and yellow and doesn't make any obvious attempt at gendering. Actually, something about the choice in shapes and colors makes it kind of look like a kids toy. Both the base and iron stand are labeled HAKKO. The base has a big black toggle switch for power. It also has two buttons labeled "UP" and "ENTER". These are for changing the temperature of the iron but I've never needed to change that so I don't know how those buttons work. Intuitively I would think a "DOWN" button might be necessary as well. The model number is also labeled and there is a logo stating the solder station is "ESD safe" meaning it is safe from electrostatic discharge which could break electronics. The base has also been customized with a tin of chip quik stuck to the top of it.
I would consider this a STEM object soldering is when a melted metal is used to join to other metal objects. This process is used largely in the building of circuits/circuit boards. So that falls under the technology and engineering categories of STEM.
I guess my soldering station might feel a little bit more accessible to me if I took two seconds to look up its manual. But in all seriousness, when I think about when I first started learning to solder I was really shaky and scared that I would break the circuits I was working on. Basically I was always scared of breaking things when I first started working as an engineer and that really held me back from learning and doing my work. I think STEM fields in general would feel more accessible if we were taught that it is okay to make mistakes, break things, and even fail.